This article applies to:
- Bluebeam Cloud – Web
In Bluebeam Cloud, project administrators can enable third-party integrations, which allow team members and collaborators to import drawings or attach documents from connected accounts. This article covers how to enable, sync, and leverage integrations to benefit your project workflows and stakeholders. Bluebeam Cloud currently supports the following integrations:
- Studio Projects (available by default via your Bluebeam ID)
- Microsoft SharePoint Online
- Microsoft OneDrive
- Box
- Dropbox
- Google Drive
- Egnyte
To learn more about specific integrations, visit the Bluebeam Marketplace. From there, you can contact our integrations team or partners for more information about setup and activation.
Connect integration accounts
Before you can import or attach documents from third-party integrations, you must first connect your accounts.
- After you sign in to Bluebeam Cloud, go to
 Profile > Connected Accounts.
 - Select Add Account and choose your integration.
- Sign into the account associated with your integration.
- Allow Bluebeam Cloud to access your files.
Once you connect your integration accounts to Bluebeam Cloud, they appear in ![]() Profile > Connected Accounts under Connected Accounts.
Profile > Connected Accounts under Connected Accounts.
If you need to disconnect an account, select the menu icon ![]() next to the account and select Remove.
next to the account and select Remove.
Export project data to integrations
- Open
 Projects and select the project with data ready to export.
 - From the
 Dashboard, select Settings.
 - Select Export Project Data.
- Choose To Integrations or Studio Projects and select Next.
- In the Export Project Data dialog, select the files you want to export. If you only need to update drawings in their source location, select only Drawing Data.
- Select Next.
- Select an account under Connected Accounts.
- Select Next.
- Choose a destination folder for your exported drawing.
To create a destination folder, select New Folder and enter a folder name. Then, select Create.
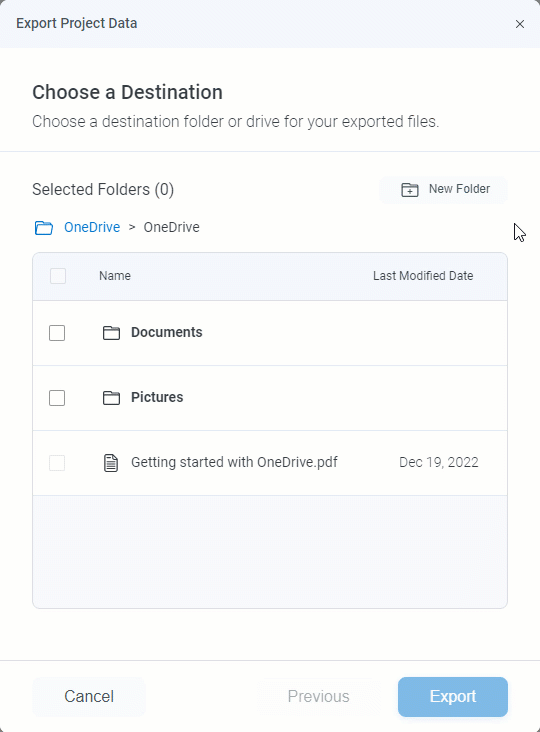
- Select Export.
You’ll receive an email confirmation when the export completes.
Import drawings from Studio and integrations
After you connect your accounts, you can import PDFs from integrations within the  Drawings tab. By default, you can import drawings from Studio Projects since your account is connected with your Bluebeam ID (BBID). Select an option below for further instructions related to importing drawings from Studio and/or integrations.
Studio Projects
If you want to learn more about preparing your drawings in Revu for Bluebeam Cloud, visit this article. To import drawings from Studio:
- From the Dashboard, go to the Drawings tab.
- Select Add Drawings.
- Select Import Drawings > From Studio.
- Select a Studio Project and choose the folder or files you want to import.
- Select Confirm Selection.
Integrations
To import drawings from integrations:
- Go to the Drawings tab.
- Select Add Drawings.
- Select Import Drawings > From Integrations.
- Select one of your connected accounts.
- Choose the folder or files you want to import.
- Select Confirm Selection.
When the drawings are uploaded and ready for review, you’ll receive on-screen and email notifications to publish them to the Project.
With connected accounts, you can also attach PDFs from integrations to an RFI. To learn more, visit How to create and track RFIs in Bluebeam Cloud.
Bluebeam Cloud
How-To