Applies to:
- Bluebeam Cloud — Web
- Bluebeam Cloud — iOS
In addition to marking up documents via app/browser in Bluebeam Cloud, you can also perform punch and punch reporting out in the field. This article covers various ways you can set up a customized punch workflow as well as built-in features that allow you to complete the entire punch process in our web/mobile solution.
Prepare for punch
Before performing punch in Bluebeam Cloud, you can prepare your drawings and custom markups in Revu to streamline the process.
Create spaces in Revu
If you designate and label areas of your drawing using ![]() Spaces in Revu, this meta data will be available when you upload the drawing to Bluebeam Cloud.
Spaces in Revu, this meta data will be available when you upload the drawing to Bluebeam Cloud.
If you have an active Core or Complete subscription plan, you can export Revit Rooms as Revu Spaces using the Bluebeam plugin in Revit.
After placing a punch in Bluebeam Cloud, the required Location field autofills as the corresponding space that was created in Revu. This helps standardize the location of punches placed by multiple collaborators, keeping the punch process organized.
To further streamline the punch process for your team, you can also add a Revu Space for general notes.
For more information, visit Preparing your drawings for Bluebeam Cloud.
Import custom punch key symbols
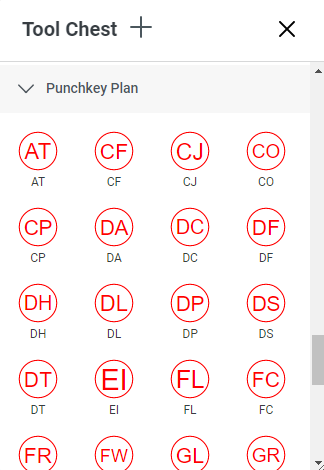
In Bluebeam Cloud, a punch appears as a red dot by default when placed on a drawing. However, you can import custom punch key symbols into your Bluebeam Cloud ![]() Tool Chest if you want to see issues or disciplines at a glance. To do this:
Tool Chest if you want to see issues or disciplines at a glance. To do this:
- Go to our Revu Custom Libraries page.
- Select Tool Sets.
- Go to the Construction tab. Here, you’ll see punch symbols for general and specialty contractors.
- Select the punch category you need. This will download a .zip folder containing the punch symbols.
Before uploading the punch symbols, unzip the containing folder by locating it in your File Explorer, right-clicking it, and selecting Extract All.
- Sign into Bluebeam Cloud.
- Select or create a project.
- Open a published PDF in
 Drawings or upload one.
 - After opening the drawing, select the
 Tool Chest.
You must have an active Bluebeam Plan (i.e., Basics, Core, or Complete) and Member/Admin permissions to access the Markup Editor in Bluebeam Cloud.
Tool Chest.
You must have an active Bluebeam Plan (i.e., Basics, Core, or Complete) and Member/Admin permissions to access the Markup Editor in Bluebeam Cloud. - Select
 to Create or Upload Tool Set.
- Select Upload and choose the punch tool set folder you previously downloaded and unzipped.
After uploading them, the custom punch keys will appear at the bottom of your Tool Chest in Bluebeam Cloud.
When you place a custom punch key on a drawing, its meaning and description appear in  Comments and Shapes upon selection.
If you already have punch keys saved as custom markups in your Revu Tool Chest, you can send your tool sets to Bluebeam Cloud. For more information, visit this article.
Create punch items in Bluebeam Cloud
Aside from available customizations, you can complete the entire punch process in Bluebeam Cloud from start to finish. Each punch item contains the following fields for communicating with project stakeholders:
- Location (required)
- Description
- Priority
- Due Date
- Assignee
You can only assign a punch item to someone who has been invited to your Bluebeam Cloud project. If applicable, you can also assign punch items to teams.
- Scope of Work
- Discipline
Additionally, you can add photos to your punch items to provide further context.
To place punch items, open a published PDF in the Drawings tab. Then, select the punch icon at the bottom of the markups toolbar.
![]()
Punch summary and reports
After completing a punch walkthrough in Bluebeam Cloud, you can view a summary of all punch items in your project. To do this:
Go to the project  Dashboard and select
  Punch in the left sidebar. Here, you can edit individual or multiple punches, filter punch items, and export punches for reports.
Edit punch items
If you need to edit a punch item, select it from the punch summary. To select multiple punch items, press Ctrl while selecting subsequent punches.

Customize punch columns
In the Punch tab, you can also edit the columns of your punch summary. To customize which columns display, select the list icon in the right sidebar.
To resize a column, highlight it and hover over the lines that appear. Click and drag the divider to adjust the width.
If needed, you can also reorder your punch columns. To move a column, select it and click and drag to the left or right.

Filter punch items
To filter your punch items by specific fields (Priority, Location, or etc.), select the funnel icon in the right sidebar.
Delete punch items
After completing a punch walkthrough, you can delete extraneous punches if needed. To delete an individual punch, select the punch item and click/tap Delete in the Item dialog. Then, confirm.
You can delete more than one punch at a time by multi-selecting punch items with Ctrl and selecting Delete in the dialog.
Punch reporting
To create a report from your punch summary, select Generate Report next to the search field. Then, choose if you’d prefer a PDF or Excel file for your punch report.
When you generate a PDF report, you’ll receive an email once it’s ready. Excel files will immediately download.
For more information about field tools available in Bluebeam Cloud, check out Get Started in Bluebeam Cloud.
Bluebeam Cloud
How-To
Getting Started