This article applies to:
- Revu 20
The Filters List
Filtering your markups in Revu is now easier than ever with the new Filters List. Create your own custom filters or toggle between a dynamic range of filters based on your document.
General Features and Navigation
- Activate the Filters List by going to the Markups List
 and then selecting
 Filter List. The Filters List appears highlighted in orange when active. You can toggle the Filters List on or off at anytime by clicking its icon.
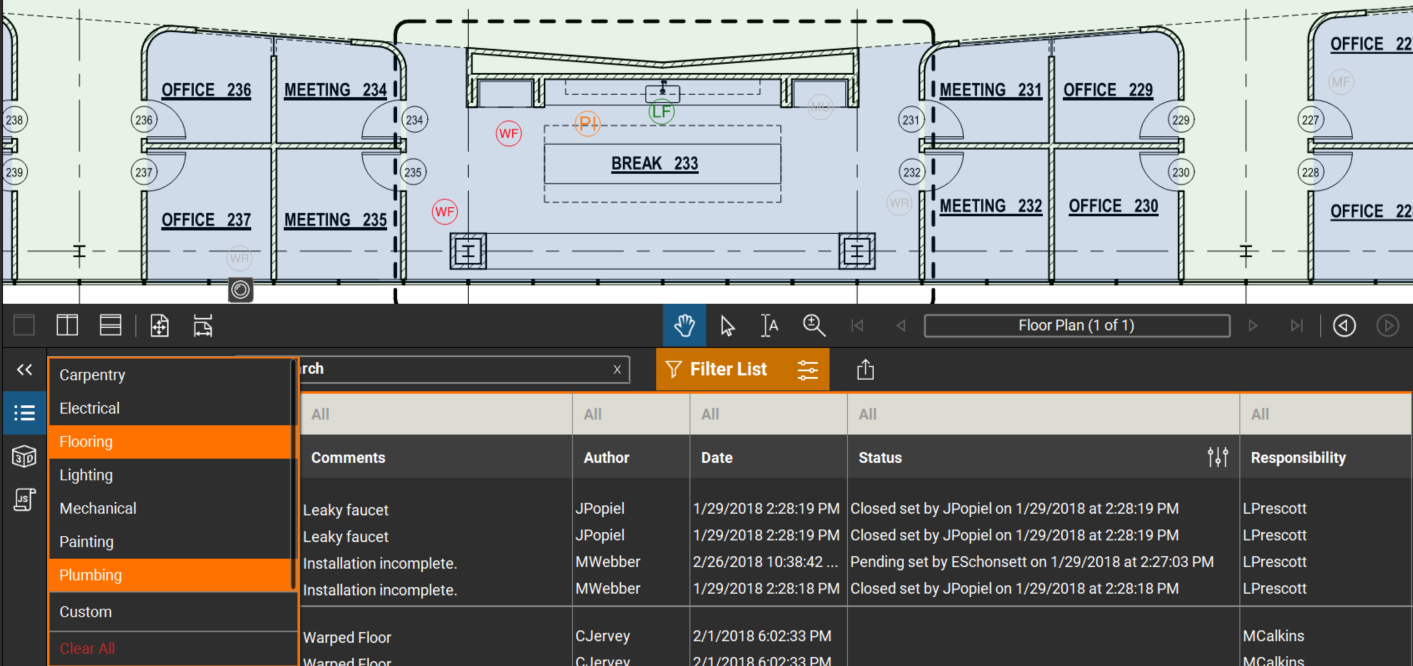
 - When the Filters List is active, you’ll see the filter row appear at the top of the Markups List. Clicking on a column header within this row reveals dynamic filters corresponding to the column name below, such as Subject or Date. Each column is set to All by default.

Figure 2. The filter row appears atop the Markups List when the Filters List is active. Select a header for more options. - Clear specific filters by clicking a column header on the filter row and selecting Clear All at the bottom of the list.
- To the right of the Filters Lists is Saved Filters
 . Here you will be able to add and select from custom filters you have made. You can also clear all active filters by selecting Clear All at the top of the dialog box.
Using the Filters List
One of the most useful properties of the Filters List is being able to quickly apply a range of filters to your document. For example, let’s say you received an updated document with several different markups on it. However, you’re only interested in the Flooring and Plumbing changes that were made within the last week.
To quickly filter for these specific markups:
- In Revu, open any document with markups present.
To better follow along with this example, download Filter_List_Example. You don’t need this file to understand the following examples, but markup filters may be different on your document.
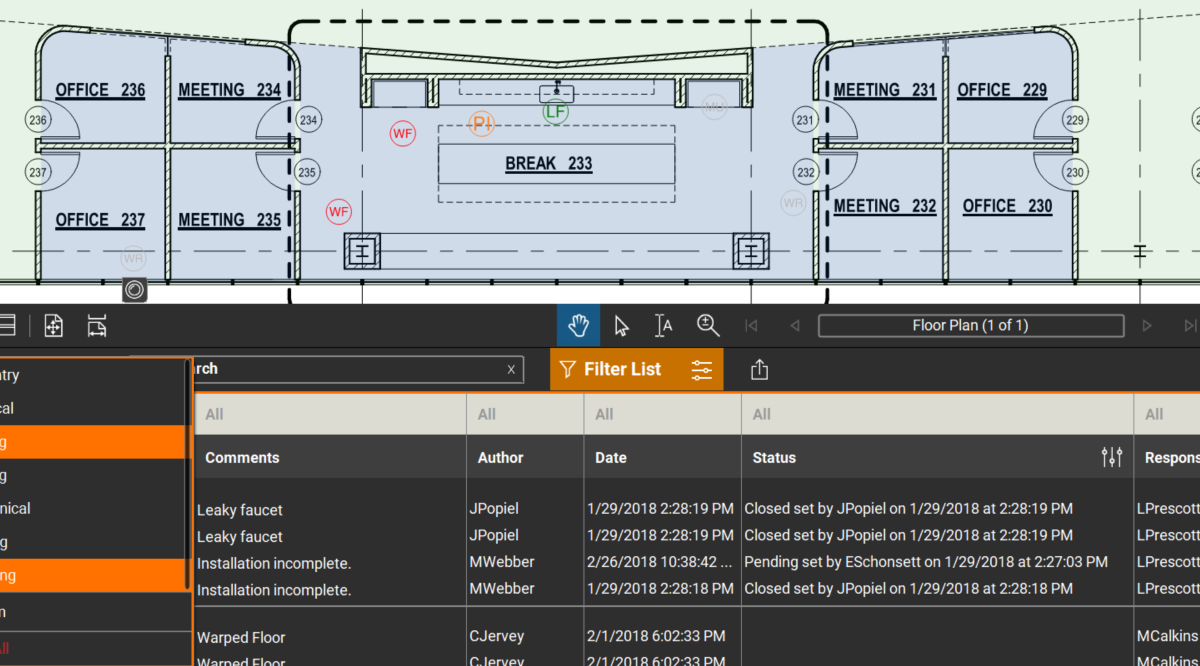
- Go to the Markups List and then select Filter List (located at the top right of the Markups List). The filter row appears.
- In the filter row, select the gray cell above the Subject column (filter will be set to All by default). A list of Subjects appears based on the markups present on your document.
- Select two markup Subjects present on your document, for example Flooring and Plumbing. After both subjects are selected, they will appear highlighted in orange. Click outside of the list (or press ESC) to close the list.
- Next, select the gray cell above the Date Column. A list of dates appears.
- Select Past 7 days and then click outside of the list (or press ESC) to close the list.
Figure 3. The Filters List lets you apply a range of filters to view specific markups. In this example, we’re filtering the list to only see Flooring and Plumbing markups made in the last 7 days.
Saving a Custom Filter
Saved Filters give you the ability to apply your custom filters to any document, at any time, without having to recreate those filters each time you need them. Continuing with the example above, let’s say you want to keep the Subject and Date filters in place but want to add another filter to show only pending items and exclude closed or completed items. After filtering for these items, we’ll be left with pending Flooring and Plumbing markups made within the last 7 days. We’ll then save this filter to keep as part of our normal workflow.
To do this:
- Repeat steps 1-6 above if you no longer have the filter in place.
- Next, select the filter row cell above the Status Column and select Custom. The Custom Filter box appears.
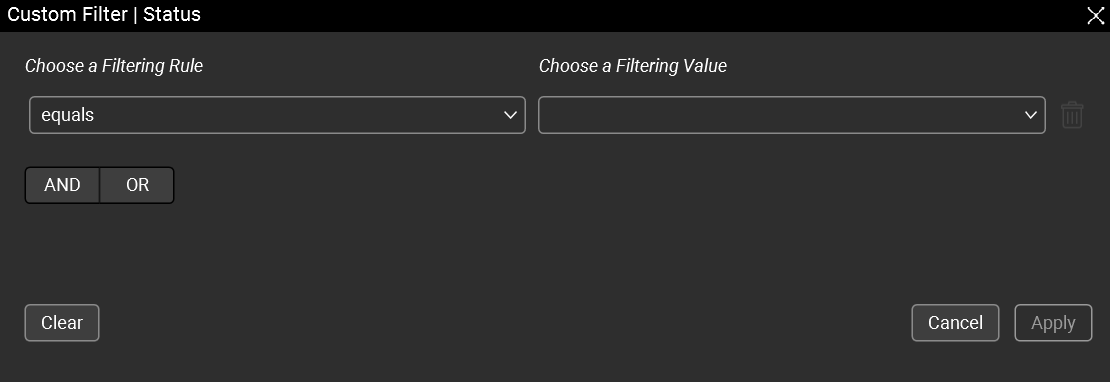
Figure 4. The Custom Filter dialog box. - Under Choose a Filtering Rule, select does not equal. Under Choose a Filtering Value, select Closed.
- Select OR to add another condition. Individual conditions can be modified or deleted without affecting the entire formula.
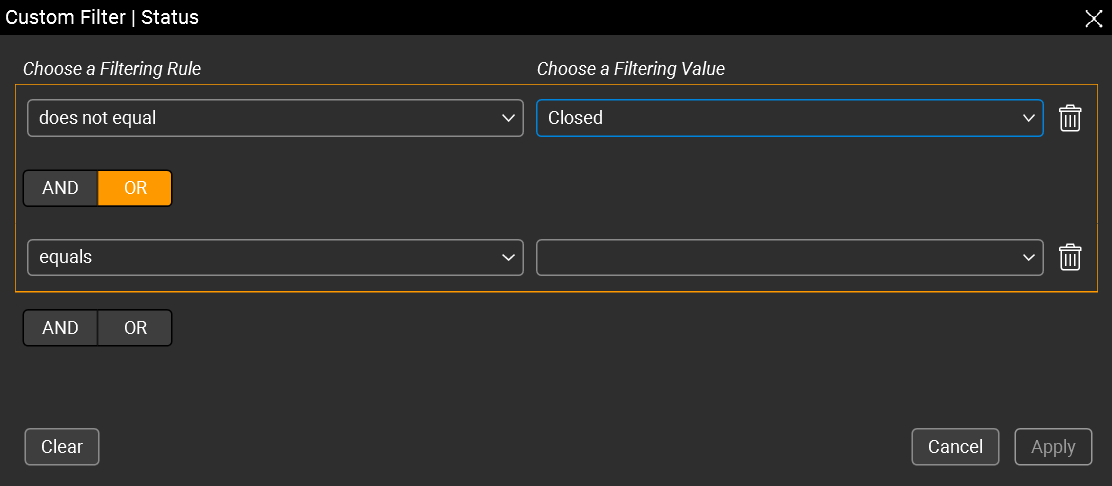
Figure 5. The Custom Filter dialog box showing individual conditions. - Under Choose a Filtering Rule, select equals. Under Choose a Filtering Value, select Pending.
- Select Apply. The filter is now active.
- To save this filter, select Saved Filters and type a name for the filter in the Saved Filter name box. Select the checkmark to add the filter to your Saved Filters.
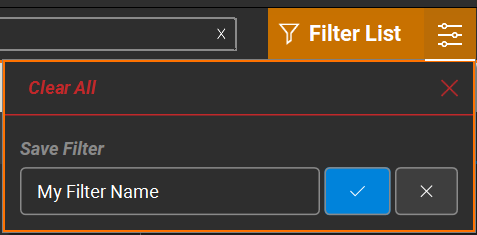
Figure 6. Enter a filter name and save it to your Filters List by selecting the checkmark.
Your filter has now been saved and can be used anytime by activating the Filters List and selecting it from Saved Filters.
Revu 20
How-To
Markup