Applies to:
- Revu 21
- Revu 20
- Revu 2019
- Revu 2018
Jump to other versions:
![]() Overlay Pages allows you to merge PDF content from two or more files into one PDF that highlights the differences between the files in different colors. This feature is useful when you want to compare original and revised drawings, or when you want to view various building plans (e.g. electrical, HVAC, plumbing, etc.) layered in one PDF.
Overlay Pages allows you to merge PDF content from two or more files into one PDF that highlights the differences between the files in different colors. This feature is useful when you want to compare original and revised drawings, or when you want to view various building plans (e.g. electrical, HVAC, plumbing, etc.) layered in one PDF.
If you’re overlaying drawings that vary in size and scale, you can align them with the Align Points option within the Overlay Pages dialog. Here’s how:
- Go to Document >
 Overlay Pages, and select the files via Windows File Explorer. Select OK.
- If the documents you’re comparing are already open, Revu will automatically list the files when the Overlay Pages dialog opens. To overlay additional files, select Add Open Files in the Overlay Pages dialog.
- To add a specific region of a drawing instead of the entire page, click Select Region in the Add Layer dialog and click and drag your mouse across the area of the drawing that you want to include in the overlay.
- Select Align Points.
To ensure that the alignment points you select overlay accurately, select View > Snap to Content.
 - Select three points in the first drawing.
- Select the same three points in the same order for each subsequent drawing. We recommend choosing alignment points from corners of the actual PDF content instead of from the borders of the entire drawing.
- Select OK.
Once you complete these steps, a new and properly aligned file named Overlay opens.
How-To
Revu 2019
Editing Documents
Other versions of this article
Revu 2017 and older
Wish you knew the best way to get your documents aligned properly when using Overlay Pages?
To help you out, we’re going to cover some concepts that will further clarify this process.
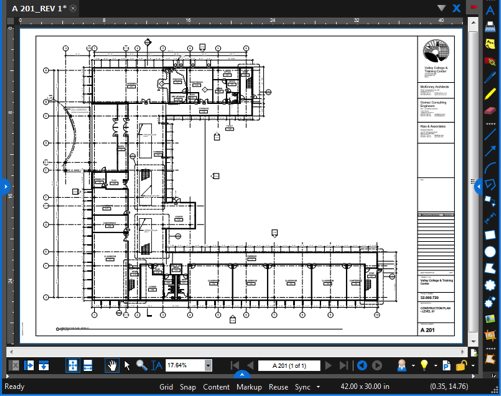
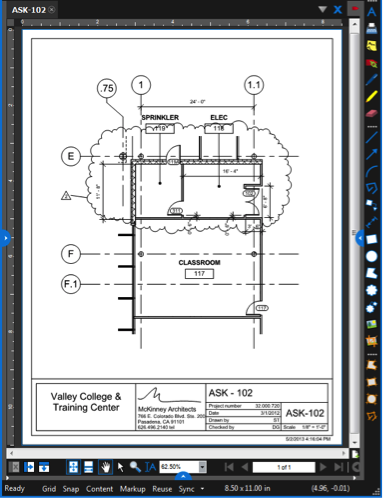
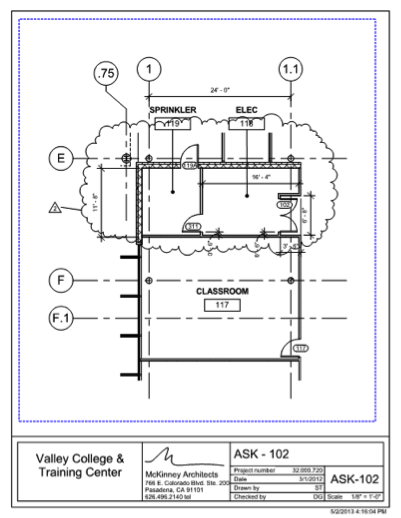
Let’s look at a scenario where you have a drawing on a 42″x30″ sheet, and you want to overlay another drawing of a small section of the building, which is on an 8.5″x11″ page.
The basic procedure for overlaying documents is to select the files you want to compare, choose three alignment points within the actual drawing content of each file, and then run Overlay Pages to create a new file that contains a separate layer for each document. But to really ensure that the alignment points you select will properly overlay those files, you should enable Snap to Content.
Let’s look at the steps for overlaying the example files shown above:
1. Add the files you’re comparing to the Overlay Pages dialog box:
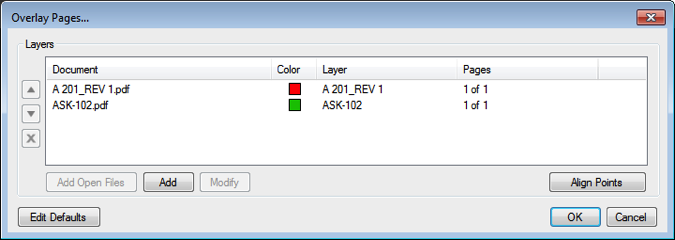
- If the documents are already open, you can go to Document > Comparison
 >Overlay
  and the Overlay Pages dialog box will automatically list the files when it opens.
If you have additional files open, you can add them by selecting Add Open Files. - If the files aren’t open, open Revu without opening the documents, and then go to Document > Comparison > Overlay to open the Overlay Pages dialog box, then select Add. This lets you locate and select the first of the files you want to compare. To add the rest of the documents, select Add again and repeat the process for each file.
But Wait…What If You Don’t Want to Include Everything?
What about the title block at the bottom of the 8.5″x11″ drawing? You probably don’t want that showing up in the final overlay file, so to exclude it:
- Select the file (in this case “ASK-102.pdf” ) in the Overlay Pages dialog box, and then select Modify.
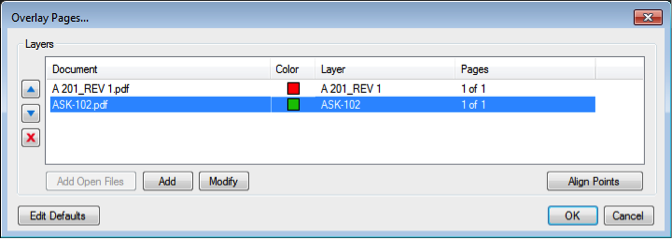
This opens an Add Layer dialog box.
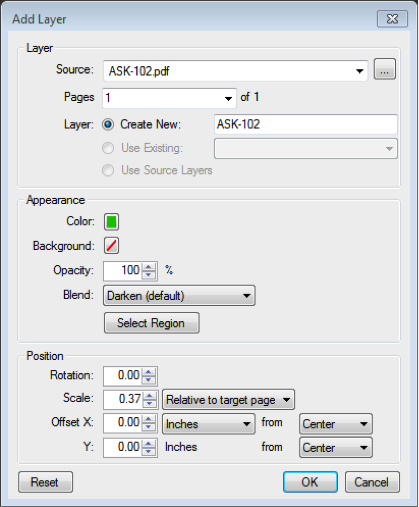
- Select Select Region, then left-select and hold while dragging your mouse diagonally across the area of the drawing that you want to include in the overlay.
- Select OK when the Add Layer dialog box reappears.
2. Picking Your Alignment Points:
When picking the alignment points, it’s important to pick the same three points in the same order on each drawing. But to improve the accuracy, you should switch on Snap to Content by selecting Content in the Status Bar or using keyboard shortcut F8.
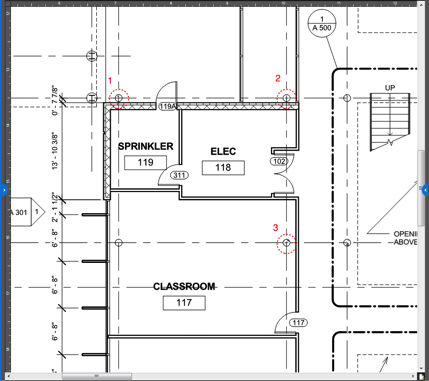

- So assuming you’ve enabled Snap to Content, select Align Points in the Overlay Pages dialog box, and select three locations in the first drawing. Once you’ve done that, the next drawing will open, allowing you to select the same three point in the same order.
Ideally, you should select the Alignment points within the actual drawing content instead of selecting three corners of the surrounding border. - Select OK in the Overlay Pages dialog box.
Once the process has completed, a new, properly aligned file called “Overlay” will open.
You can find more in-depth information about using Overlay Pages and Batch Overlay in the Bluebeam Revu Manual.
How-To
Revu 2017 & Below
PDF Management
Editing Documents
The Overlay Pages makes it easy for you to compare drawings in just a few steps.