Bluebeam® Revu 20® Administration Guide
Introduction
This guide gives IT administrators the knowledge, self-sufficiency, and freedom to manage and troubleshoot all aspects of Revu across your organization.
The included information covers topics such as Bluebeam Studio, firewall and proxy settings, using Revu with document management systems, as well as Revu settings and preferences.
Customers looking for information about installing and using Revu in a virtual environment should refer to Revu in a Citrix Environment.
Revu Licensing
Bluebeam offers three different Revu licensing options (Perpetual, Open, and Enterprise) as described below.
However, software registration and activation is usually performed as part of the Enterprise Installation process.
Perpetual Licensing
Bluebeam Perpetual Licensing registers Revu Standard, CAD and eXtreme on a per workstation basis using a serial number and product key, which is sent to our licensing server during the initial registration.
Registering Revu
Before you begin the registration process, make sure you have the correct serial number and product key for the Revu version and edition you’re deploying. This was sent from registration@bluebeamops.com. If you’re unable to find your license information, see Find your Revu product key.
Online Registration
Although registration and activation usually takes place during either an Enterprise or manual installation, you can manually register an individual Revu installation by following the steps listed below:
- Open Revu and click Revu > Register.
- When the Bluebeam Registration dialog opens, enter the serial number and product key. The product key is case sensitive and doesn’t include the letter ‘O’.
- Click Register.
- https://login.microsoftonline.com
- https://activation.bluebeam.com
Manual Registration
If you’re connected to the internet from behind a firewall, or the online registration fails:
- Open the Registration dialog as described above.
- Enter the serial number and product key, and then click Register.
- When prompted, click Get Authorization Code Manually, enter the computer name, and click Continue.
- Click the hyperlink at the top of the dialog. A web browser opens displaying the Revu Activation page.
- Review the information and click Get Authorization Code. The code appears on the next page.
- Enter the code into the Manual Authorization dialog and click Authorize.
If you’re unable to connect to the internet, follow steps 1 through 3, then go to https://activation.bluebeam.com on another machine that is able to connect and enter the Serial Number, Product Key, Security ID and Computer Name. After you’ve done this, you can go back to the original machine and enter the Authorization code. Please contact us if the registration still fails
Managing Your Perpetual Licenses
To help you keep track of your license usage, we offer a License Key Lookup page where you can generate a report of currently registered machines, and determine the number of available seats. All you have to do is enter the serial number, product key, and the email address listed on the license, then click Get Info.
If you find a machine that shouldn’t be registered, you can either unregister it via the Revu Help menu (Revu > Unregister), or uninstall the software.
Migrating a Perpetual License to a New Computer
If you need to use a Revu license on a different machine, follow the instructions in our FAQ on Transferring a Revu License to a New Computer.
You’ll need the serial number and product key listed in the license certificate, which was originally sent to you from registration@bluebeamops.com.
If you’ve lost this information, you can contact us to request a new copy of the License Certificate. When doing so, be sure to include the version number, your name, company name, email address, and the phone number where you can be reached.
You can find the serial number by clicking Revu in the top menu (Revu > About). A new dialog will open, displaying the serial number in the upper-left, below the title and version number.
Open Licensing
The Revu Open Licensing model is a cloud-based solution which lets customers using Revu eXtreme 2015.5 through Revu eXtreme 20 share a common pool of licenses across multiple users and devices. There aren’t any special hardware or resource requirements other than a standard internet connection to communicate with the Bluebeam License Hub, where their licenses are hosted and managed.
Communications between the computer and licensing server are conducted over an HTTPS connection, and include the Revu version number, serial number, product key, computer ID (the security ID), and the username.
Obtaining a License seat
Revu checks the server for an available seat on the license whenever it launches in Markup Mode or is switched to Markup Mode. If it finds one, the software will occupy the seat and function normally. When Revu is closed or switched to View Mode, the seat is released and Revu will have to obtain a seat again when it reconnects to the internet. If a seat can’t be obtained, a message will appear telling you to contact the Open License Administrator, and the software will be in View Mode.
Revu contacts the licensing server every 20 minutes to make sure the seat is still occupied. The system will release the seat after 3 failed attempts in one hour. This way, we ensure that the seat is made available to someone else. If a user obtains a seat, then fails to ping the server three times, the seat will be released. The next time this same user goes online and pings the server, a seat will be obtained even if all seats are occupied. This gives your users the opportunity to save their work. Revu will remain in Markup Mode until it’s closed or switched to View Mode manually. Seats can also be temporarily released via the Bluebeam Gateway.
Plugins will attempt to acquire a seat right before creating a PDF or starting a batch process. If a seat can’t be acquired, the user will be notified and the process will fail.
Other Bluebeam applications like the Stapler and Script Editor will attempt to acquire a seat when they launch. If a seat can’t be acquired, the user will be notified, and the application will close. The Bluebeam Administrator doesn’t require a license to run.
If Revu is already occupying a seat and a second instance of Revu, a plugin, or another application is launched, those applications will ping the license server, but won’t acquire another seat. The license server will track that multiple applications are using the same license on the same computer. The seat will be released when all applications are closed, or the internet connection is lost.
Open License Ping Policy, Server Behavior, and Seat Releasing
- Revu will ping the license server as long as there’s an active internet connection. If the connection is lost, Revu will stop pinging until it reconnects to the internet. Any disruption in the layers the connection runs through may prevent Revu from reaching the server, including:
- Putting the computer in Sleep Mode (or Hibernation)
- Shutting down the computer
- Disabling a network card, proxy, or VPN
- If Revu acquires a seat, but the computer remains running overnight with an active internet connection, Revu will continue to ping the license server. Please note that locking the screen doesn’t prevent Revu from pinging the license server.
- Revu has a View Mode and a Markup Mode. View Mode turns Revu into a PDF viewer, while Markup Mode is the fully-featured version of Revu. Seats are only occupied when Revu is Markup Mode. To release a seat, users can switch Revu to View Mode rather than close the application.
- If you’re experiencing a shortage of seats on your license, try asking your users to either close Revu or put their computers in Sleep mode overnight. This will ensure their seats are released for others to use.
- When there is an active internet connection and all applications that require a seat have been closed, the seat will be released.
Offline Mode
If a user is in Markup Mode and can’t connect to the internet, Revu will continue to operate in Markup Mode for 3 days until it’s required to obtain a seat from the server. After three days without a seat, Revu will switch to View Mode.
Beginning in Revu 20.0.20, Revu defines “offline” as a user’s Windows session entering a locked state (“locked” meaning the user is required to log back into Windows). Revu contacts the licensing server every 20 minutes to make sure the seat is still occupied; after a user locks their machine and the licensing server receives 3 failed pings, Revu will return the idle seat to your total available seats.
Managing your Open License
You can manage your licenses from the Bluebeam Gateway. Once you’ve created an account, you can perform various tasks with your licenses such as tracking, reporting, revoking, and reissuing. You can find detailed instructions for using this web portal in the Bluebeam Gateway User Guide.
License usage report and graphs in the Gateway will refresh once per hour.
Upgrading your Open License
This licensing method is compatible with all Revu eXtreme versions (2015.5. through 20), which means you can gradually upgrade your Revu installation in stages.
We understand that fully upgrading software throughout an entire organization takes time. So when you upgrade your Open License, your previous versions of Revu will remain usable and share the same pool of seats. You will also see that the new version of Revu is given a new Product Key that is tied to your original Serial Number. This means that the same Serial Number for your Open License can be used across multiple versions with each version having its own unique Product Key. This allows for ultimate flexibility when your environment requires incremental upgrades.
Enterprise Licensing
Our Enterprise Licensing solution is another cloud-based option that automatically tracks your Revu installations, allowing for more efficient management of the computers where Revu is installed.
Technical Details
Once Revu is installed and registered to an Enterprise License on a computer, that computer will use a seat until it becomes inactive. If the computer hasn’t contacted the licensing server for 15 days, the system will release the seat so it can be used by another computer. However, if the inactive computer contacts the server again, the license is restored – even if the 5% license overage has been exceeded. This is done as a courtesy so that the end-user can continue working in Revu without interruption.
You will need to purchase additional licenses if the overage has been exceeded.
A computer with an Enterprise-licensed installation will contact the licensing server one hour after a “qualifying event” has occurred and won’t do so again for at least another hour afterward.
Examples of qualifying events include:
- The BBAdminUser process launching whenever the machine starts up.
- The launch of a Bluebeam application such as Revu, the Bluebeam Stapler, or Bluebeam Administrator.
- PDF creation using the Bluebeam PDF printer, or the Bluebeam plugin within a supported third party program such as Microsoft Office or AutoCAD.
Communications between the computer and licensing server are conducted over an HTTPS connection, and include the Revu version number, serial number, product key, and computer ID (the security ID).
Managing your Enterprise License
Enterprise License management is done through the Bluebeam Gateway. Detailed instructions for using this web portal can be found in the Bluebeam Gateway User Guide, and as with an Open License, you can perform various tasks related to licenses such as tracking, reporting, revoking, and reissuing (Revu 2015.5 through 20).
Switching from a Perpetual License to Enterprise or Open Licensing
If you need to change your Revu licensing scheme from Perpetual to Enterprise or Open Licensing, you can do so by following the procedure explained in Migrating Multiple Revu Installations to a New License.
Licensing and Computer Names
There may be a time when you’ll need to rename an existing computer that Revu is already installed on.
Updating computer names
As of Revu 2019, if the application is registered, Revu will check for computer name changes on launch. If the computer name is changed, Revu will detect the change the next time the application is opened, or any of its associated plugins are initialized. Revu will then unregister the system from our license server (if connected to the internet).
At this point, Revu will enter a 15 day trial period and the following dialog will appear notifying the user that they will need to re-register Revu. 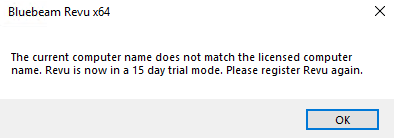
If the system is not connected to the internet or cannot connect to our license server, the computer name check will not occur until a connection can be established.
When re-registering, the Serial Number and Product Key will repopulate in the Registration window if Revu has been previously registered, allowing for quick registration.
If you are on Revu 2018 or older, you could go to the Revu menu and unregister the computer (Revu > Unregister), change its name, and re-register it. A quicker method is to change the comouter name and then use the following script:
C:\Program Files\Bluebeam Software\Bluebeam Revu\2018\Pushbutton PDF>"PbMngr5.exe" /update
You can run this on individual computers using a batch file or push it to the machines in question using deployment tools or login script. In either case the script calls up the Bluebeam Administrator Console application (PbMngr5.exe) and tells it to update the registration server with the new machine name.
Please consider the following when registering Revu installations on new or re-imaged machines:
- If your new machines are all based on a common disk image, or are part of a Virtual Desktop environment, you will need to change the machine name before trying to register Revu. If this is not done, you will be in a situation where you are trying to register Revu on multiple instances of the same computer, regardless of IP or MAC Address.
- If you are re-imaging or installing a new system drive in a computer without changing its original machine-name, our license systems will “view” it as the same computer, as if nothing had changed at all.
Virtual Environment Licensing
Please refer to Revu in a Citrix Environment for licensing information within virtual environments.
Bluebeam Studio
Bluebeam Studio™ is our cloud-based collaboration platform that helps teams and organizations manage work projects using a Windows computer, Windows tablet, or iPad.
Users can create and join Studio Sessions and Studio Projects, then upload PDFs and other file types, allowing them to collaborate with their partners in real time.
Studio Best Practices
Studio Connections
If your users are experiencing connection issues, please refer to Error: Could not connect to Bluebeam Studio.
Bluebeam Studio Portal
To help users manage various aspects of their Bluebeam Studio presence, we have created the Bluebeam Studio Portal. After they’ve logged in with their Studio account credentials, they will be able to perform the following tasks:
- Manage their Studio Profile
- Email address changes
- View a list of Sessions they have created
- Reassign ownership of their Sessions
- View a list documents in their Sessions
- View lists of attendees for their Sessions
Additional Resources
If you or your users have further questions about using Bluebeam Studio, please refer to Bluebeam.com, as well as the Bluebeam Support site where you can find information about various aspects of the technology including:
- An overview of Bluebeam Studio
- Best Practices for Bluebeam Studio, which highlights “Practical Considerations for Large Project Collaboration.”
- Creating a Studio account using Revu
- File upload or download failures
- Studio allowlist – Control Server Access
- Inability to receive Studio related emails
- Configuring Studio Notifications and Alerts in Revu
- Setting Studio Project folder permissions in Revu
- Our free Studio training videos
- The Revu 20 Help Guide
The Bluebeam Administrator
The Bluebeam Administrator lets you configure and control Revu using the functions and features on the various Tabs as described in the following sections. These settings can be pushed out to your end-user machines as a means of standardizing your post-deployment customizations.
Further information can be found in the Bluebeam Administrator Help Guide.
Plugins Tab
This displays a list of installed applications that are supported by our PDF plugin which are detected by the “Bluebeam Admin User.exe” that launches when the client machine starts up.
All Revu editions will list the plugins for Microsoft Office (Word, Excel, Power Point, and Outlook), but the plugins for AutoCAD, Revit, SolidWorks, Navisworks, and SketchUp Pro only appear on machines running Revu CAD or eXtreme.
The eXtreme edition is the default trial edition. If a Revu Standard serial number is used to register the software after the trial expires, the eXtreme edition plugins will no longer work.
Revu 20 Side-By-Side Installation
Revu 20 can be installed and ran side-by-side with Revu 2018 and above, which lets your end-users run Revu 20 as a fully-functional 30-day trial. This allows users to evaluate Revu 20 while your organization decides whether or not it’s time to upgrade.
Enabling a Plugin
You can find more information about troubleshooting plugin issues on this page, but if a plugin is missing within a supported application, you can enable it by following these steps:
- Close the application
- Go to Start > All Programs > Bluebeam Software > Bluebeam Administrator.
- In Windows 10 and 8.1, click or press Start and type Bluebeam Administrator.
-Or-
- Go to Help > Administrator in Revu.
- Click the Plugins tab.
- Click the check box next to the name of the program.
- Click OK.
- Reopen the application.
Net Configurations Tab (Net Config)
This is where you can set the location of various Revu settings and assets. They can remain in the default local folders listed in the Unmanaged section, or they can be accessed from a centralized server location which you can set in the Managed Net Configuration section. However, you can also configure Revu to use a combination of local and network locations based on folder paths you define in the Unmanaged section.
Unmanaged Net Configurations
In a typical Revu installation, the Unmanaged option is enabled by default. In this instance, the assets and settings are in various locations within the user’s Windows profile under C:\ProgramData as shown in the screenshot.
Managed Net Configuration
To configure your Revu installations to access all settings and assets from a centralized server location:
Select a computer to use as a “staging” machine and copy any custom settings or assets into their corresponding default locations that listed when the Unmanaged option is enabled. Refer to the screenshot of the Unmanaged settings above.
You can easily open the default folder locations by double-clicking on their corresponding folder paths.
- When you have finished copying the items, enable the Managed Net Configuration option. A dialog will open, where you can either browse to an existing network folder you want to use as the centralized location or create a new network folder.
- In either case, select the folder and click the Select Folder button.
- When the Copy All Files dialog opens click one of the following three choices:
- Copy All, which creates folders for the asset type or setting in the server location, and copies everything to the correct location.
- Merge, which takes all locally defined settings and resources and merges them with any existing items in the shared location.
- No Copy, which points to the network folder, but does not copy or integrate anything into the folder. Once the operation has completed, the Net Config tab will display the locations of all assets and settings.
Affected Registry Keys
The following seven registry keys are altered whenever you make changes in the Net Config tab:
[HKEY_CURRENT_USER\Software\Bluebeam Software\20\Plugins]"ManageNetConfig"="1""ManageNetConfigPath"="U:\\netconfig\\"
[HKEY_CURRENT_USER\Software\Bluebeam Software\20\Brewery\V45]"PageSizeConfigFile"="U:\\netconfig\\PtrPageSizes\\"
[HKEY_CURRENT_USER\Software\Bluebeam Software\20\Plugins\AutoCAD]"PC3Path"="U:\\netconfig\\PC3"
[HKEY_CURRENT_USER\Software\Bluebeam Software\20\Plugins\Email]"TemplateFolder"="U:\\netconfig\\E-mail\\"
[HKEY_CURRENT_USER\Software\Bluebeam Software\20\Plugins\PageSetup]"ConfigFolder"="U:\\netconfig\\Page Setup\\"
Deploying a Managed Configuration
The Bluebeam Administrator creates a registry file named Netcfg.reg containing all affected registry keys. This file is located in the root of the managed folder (U:\netconfig in the preceding example), and it can be distributed as part of an MSI deployment as described in the Revu Deployment Guide.
You can deploy this registry file to individual workstations to quickly apply the managed configuration.
When changing the pathing within Managed Net Configuration or within Revu Preferences Net Configuration, Revu needs to be closed and re-opened in order for changes to take effect.
Printer Tab
This tab is divided into four sections (Printer Options, Printer, Port Monitor, and Image Resolutions) which offer features and functions for controlling and reinstalling the Bluebeam PDF printer.
Printer Options
These options determine what happens during and after a PDF is created using the PDF Printer or the Stapler.
Prompt for File Name
When this option is enabled, a Save As dialog will appear, prompting the user to enter a file name, and if needed, choose a destination for the new PDF.
Delete Source PS File
This is disabled by default, but when enabled, the PostScript file a PDF is based on will be deleted once the document has been produced.
Open in Viewer
This setting determines whether or not the new PDF will be open in the default PDF application on the user’s machine.
Stapler Context Menu
When this is enabled, the Combine Files in Revu and Convert Files in Revu options will be available in the pop-up menu when the user right-clicks on an applicable file on their desktop or in Windows Explorer.
Folder Options
Clicking this button opens the Folder Options dialog which lets you select the default location where new PDF documents produced using the Bluebeam Stapler will be saved. The available options are:
- Source Folder – This is the location of the original source file.
- Last Saved Folder – This is the last folder that a new PDF was saved to.
- Custom Projects Folder – This option lets you specify a default location of your own.
Image Resolutions
The Resolutions list shows the image resolutions that will appear in the Save As window for the Bluebeam PDF printer, Stapler, and Bluebeam Plug-ins.
Printer
In addition to displaying the printer name, driver, and printer port, the printer section is where you can select the default page size from the available list of pages sizes. You can also edit the page size list via the Manage Pages button as described below.
In addition, you can uninstall and reinstall the Bluebeam PDF printer using the Reinstall Printer button when troubleshooting performance issues.
Manage Pages
Clicking the Manage Pages button opens the Page Sizes dialog, where you can add, delete, or edit page sizes used by Revu, the PDF printer, Stapler, and plugins.
Reinstall Printer
If a user runs into an issue with either the Bluebeam PDF printer or Stapler, such as the Save As dialog not appearing when creating a PDF, one of the things you’ll need to do is use the Reinstall Printer button to reinstall the PDF Printer.
If this doesn’t work, you can also right-click the Reinstall Printer button and select Install Printer.
Once the Bluebeam PDF printer has been installed, it’s a good idea to go into the Devices and Printers section of the Windows Control panel to make sure it’s been installed there.
Port Monitor
The Port Monitor is based on the BBPrint.exe process which runs on a per-user basis, and watches the user’s printer folder (C:\ProgramData\Bluebeam Software\Print Jobs\) for files to process.
Restarting the Port Monitor
If the Port Monitor Status shows as <n/a> or the Save As dialog is not being displayed while creating PDF, you will need to restart the Port Monitor. Once it’s running again, the Status should display as Responding, and BBPrint.exe should be listed as a running process in the Windows Task Manager.
Troubleshooting the Bluebeam PDF Printer in a Citrix Environment
If you’re experiencing issues with the Bluebeam PDF printer while running Revu in a Citrix environment, please refer to Revu in a Citrix Environment for troubleshooting information.
AutoCAD Page Sizes Tab
This tab is available for Revu CAD and eXtreme editions on machines that also have a compatible AutoCAD product installed on them.
You can use the checkboxes to select the page sizes (ANSI, ARCH, or ISO) that you want to make available on the Page Setup tab of the AutoCAD plugin.
ANSI, ARCH, and ISO Checkboxes
As an alternative to clicking the individual checkboxes, you can use the ANSI, ARCH, and ISO checkbox to select or deselect whole groups of size types.
PDF Type
The PDF Type dropdown lets you decide which printer driver will be used when creating PDFs from AutoCAD.
Your choices are either the default PDF driver or the Heidi (AutoCAD HDI) driver, which are explained below:
Printer
This option uses the Bluebeam PDF printer, which supports TrueType fonts for creating PDFs from AutoCAD with searchable text. In addition to offering better image quality, this driver also lets you add more Page Sizes and synchronize them across your network for use by all of your Revu CAD or eXtreme users.
Heidi
The Heidi option uses the AutoCAD HDI driver which doesn’t support TrueType fonts and “draws” non-searchable text as Vector data. However, you can create custom Page Sizes and synchronize them across your network for use by all of your Revu CAD or eXtreme users.
Synchronizing Page Sizes Across Your Network
If you’d like to centralize your custom page sizes for all of your Revu CAD or eXtreme users, you can do so by following the steps listed below based on whether or not your organization used the Bluebeam PDF printer or the AutoCAD Heidi driver:
- Synchronizing Page Sizes for the Bluebeam PDF Printer
- Select a computer to use as a staging machine, and create your custom Page Sizes on it.
- Once you’ve finished setting your custom Page Sizes, go to the Net Config tab.
- Click the located to the right of the default folder path for the Printer Driver.
- A dialog will open where you can either browse to an existing network folder you want to use as the centralized location, or create a new network folder.
- Select the folder and click Select Folder.
- When the Copy all Printer Page Size Files dialog opens, click Copy All.
- This copies the prtPages.xml file from the default location on the local drive to the network location, and the new folder path for the Printer Driver will be listed on the Net Config tab.
- Click Apply and OK.
Configuring Other Machines to Use the Centralized Page Sizes for the PDF Printer
This setting can be distributed to your other Revu CAD and eXtreme clients as part of an MSI deployment, or you can manually configure individual machines by following the steps listed below:
Note: Centralized PC3 files cannot be used when the PDF Type is set to Printer. They can only be used when the Heidi driver is selected.
If this is distributed as part of an MSI deployment, the changes will not take effect until the client machine is restarted. A restart isn’t required when manually configuring an individual machine.
- Open Bluebeam Administrator and go to the Net Config tab.
- Click the ellipse located to the right of default folder path for the Printer Driver.
- When the Windows Explorer dialog opens, locate and click on the network folder which contains the prtPages.xml, and then click Select Folder.
- When the Copy all Printer Page Size Files dialog opens, click No Copy.
- Click Apply and OK.
Synchronizing Page Sizes for the Heidi Driver
- Select a computer to use as a staging machine, and create your custom Page Sizes on it.
- Click the Net Config tab, then double-click the folder path for the Heidi Driver.
A dialog will open where you can either browse to an existing network folder you want to use as the centralized location, or create a new network folder.
- Select the folder and click Select Folder.
- When the Copy all Bluebeam PC3 Files dialog opens, click Copy All.
- This copies the PC3 files from the default location on the local drive to the network location, and the new folder path for the Heidi Driver will be listed on the Net Config tab.
- Click Apply and OK.
Configuring Other Machines to Use the Centralized PC3 Files
This setting can be distributed to your other Revu CAD and eXtreme clients as part of an MSI deployment as described in the Revu Enterprise Deployment Guide, or you can manually configure individual machines by following the steps listed below:
If this is distributed as part of an MSI deployment, the client machine must be restarted before it can be used.
- Open Bluebeam Administrator and go to the Net Config tab.
- Click the ellipse located to the right of default folder path for the Heidi Driver.
- When the Windows Explorer dialog opens, locate and select the network folder which contains the PC3 files, and then click Select Folder.
- When the Copy all Bluebeam PC3 Files dialog opens, click No Copy.
- Click Apply and OK.
Affected Registry Keys
The following two registry keys are altered when the PDF Printer pages sizes and PC3 files are centralized:
[HKEY_CURRENT_USER\Software\Bluebeam Software\20\Brewery\V45]"PageSizeConfigFile"="U:\\netconfig\\PtrPageSizes\\"
[HKEY_CURRENT_USER\Software\Bluebeam Software\20\Plugins\AutoCAD]"PC3Path"="U:\\netconfig\\PC3"
Support Logs
If you’re experiencing issues with Revu or its plugins, there are multiple ways to access the relevant logs, and if needed, email them to our Technical Support group.
View log files
- Bluebeam Administrator – Help > Explore Log Folder
- Revu – Revu > Preferences > Admin > Options > Explore Log Folder
Email logs to Bluebeam Technical Support
- Bluebeam Administrator – Help > Email Logs to Support
- Revu – Help > Report an Issue > Yes
Application Logs
These log files record the activities of the various Revu application components. You can open each log file by clicking its corresponding hyperlink.
Plugin Logs
This group of log files record the activities of any enabled plugins for supported applications. Each enabled plugin will have a corresponding hyperlink which you can click to open the log file.
Explore
This button opens the folder within the current Windows user profile where all the log files are stored.
Email Logs to Support
This button is used for submitting your log files to our Technical Support group.
This creates new log entries that are specific to the issue. Clicking it creates a zip file (logs.zip) containing the complete set of log files for all Revu components and plugins. This is attached to a new email, addressed to support@bluebeam.com.
If the email doesn’t open, or you’re using a webmail account, you can follow the directions to View log files above and manually attach the logs.zip file to an email addressed to support@bluebeam.com.
In either case, please include as much information as possible about the problem you’re experiencing.
Reset Settings
Running this option resets the software to the default state based the settings found in C:\Program Files\Common Files\Bluebeam Software\Bluebeam Revu\{Revu-version-number}\Revu.
C:\Program Files\Bluebeam Software\Bluebeam Revu\20\Revu\"PbMngr5.exe" /reset - Resets Revu settings
When running a reset of the Revu settings, the Backup.zip file is created in %Appdata%\Roaming\Bluebeam Software\Revu\20\
This applies to resets initiated in the following ways:
- Revu > Preferences > Admin > Reset
- Bluebeam Administrator Console > Help > Reset Settings
- The Command Line.
Administrator Console Application
The console application allows administrators to perform the following administrative functions via command line using the PbMngr5.exe.
Administrative Functions
The PbMngr5.exe executable allows Administrators to preform the following Administrative functions via the command line:
- Install Plugins
- Set Revu as the Default Application
- Reinstall/Uninstall our Bluebeam PDF Printer
- Set default DPI for the Bluebeam PDF Printer
- Setup Net Config
- Register License
- Update License Server with new computer name
- Expire Trial
- Reset/Restore/and Backup user’s settings
Examples of these commands are below:
Backup Settings
This option backs up your current Revu settings to a .zip file, and saves them to a location of your choice, which is useful when migrating them to another machine.
Backup
Creates a zipped file named Backup in root of C:\ :
C:\Program Files\Bluebeam Software\Bluebeam Revu\20\Revu\"PbMngr5.exe" /backup "C:\backup.zip"
Reset Settings
Running the option below resets the software to the default state based on the settings found in C:\Program Files\Common Files\Bluebeam Software\Bluebeam Revu\{Revu-version-number}\Revu:
C:\Program Files\Bluebeam Software\Bluebeam Revu\20\Revu\"PbMngr5.exe" /reset
Restore Settings
Running this option lets you restore select Revu settings, which is an integral part of migrating Revu settings from one machine to another:
C:\Program Files\Bluebeam Software\Bluebeam Revu\20\Revu\”PbMngr5.exe” /restore “C:\backup.zip” – Restores Revu settings from zipped file named backup.zip in root of C:\
Printer Reinstall
Running this command will reinstall the Bluebeam PDF Printer.
C:\Program Files\Bluebeam Software\Bluebeam Revu\20\Revu\"PbMngr5.exe" /reinstallptr
Register License
Running this command to register with parameters will attempt to register between Bluebeam products.
C:\Program Files\Bluebeam Software\Bluebeam Revu\20\Revu>"PbMngr5.exe" /register 20 1234567 ABCDE-FGHIJKL
Running this command to register with parameters will attempt to register Revu.
C:\Program Files\Bluebeam Software\Bluebeam Revu\20\Revu>"PbMngr5.exe" /register 20 1234567 ABCDE-FGHIJKL [NoAuth]
Administrator Console Features
To see more details about the available features within the Administrator Console, follow these steps:
- Click on Start and type in CMD
- Open the Command Prompt
- In the command prompt type in cd “C:\Program Files\Bluebeam Software\Bluebeam Revu\20\Revu”
- Type-in: PbMngr5.exe /help
- Press Enter
This will bring up the latest Help file for the application. The available options are as follows:
| /help or /? | Shows command line help for PbMngr5.exe. |
| /printername | Displays the printer name used by Bluebeam Revu |
| /printerdpi <number> | Sets the default DPI of the Bluebeam PDF printer |
| /reinstallptr | Reinstalls the Bluebeam Printer. |
| /uninstallptr | Uninstalls the Bluebeam Printer. |
| /update | Updates Bluebeam authorization server with current version and machine name. |
| /register [<version> <serial number> <product key> [NoAuth]] | Register with no parameters will attempt to register a delayed authorization. Register with parameters will cross register between Bluebeam products. |
| /expire | Expires trial, forces Revu into View Mode. |
| /reset |
Resets Revu settings. Make sure to back up settings before. Ex: C:\Program Files\Bluebeam Software\Bluebeam Revu\20\Revu\”PbMngr5.exe” /reset |
| /backup <zipfile> |
Backs up Revu settings. Ex: C:\Program Files\Bluebeam Software\Bluebeam Revu\20\Revu\”PbMngr5.exe” /backup “C:\backup.zip” – Creates zipped file named Backup in root of C:\ |
| /restore <zipfile> | Restores Revu settings. |
| /setup [parameters] | Setup is used to initialize Bluebeam Revu. |
| /DVON |
Microsoft changed how default applications are selected in Windows 8 and later, which means these command options for making Revu the default PDF editor or resetting the default PDF editor do not work with the Administrator Console Application. Your users will have to follow the steps in Changing the Default PDF Viewer to change the default PDF viewer. Further information can be found on the Microsoft website.
|
| /DVON32 | |
| /DVOFF | |
| /IF: |
Bitwise flags to install plugins in: Office(1), AutoCAD(2), AutoCAD Lt(4), SolidWorks(8), Revit(16), IE(32), ProjectWise(64), Outlook(128), Sketchup(256) |
| /DPS:[A4 or Letter] | Default page size to use with Bluebeam PDF printer |
| /NCPATH:<path> | Netconfig path. |
| /JOPATH:<path> | Job options path. |
| /PREFSPATH:<path> | Path to a Bluebeam Revu preferences setup file. |
| /ANALYTICS | Enables data concerning the usage of Revu to be captured and automatically sent to Bluebeam servers. No user data is captured or transmitted. |
| /QLINKON | Enables the Quantity Link plugin for Excel. |
| /QLINKOFF | Enables the Quantity Link plugin for Excel. |
| /latest | Use the latest installed version of Bluebeam Administrator to execute the commandline. |
Revu Preferences – Admin
Some features that were previously found in the Bluebeam Administrator have been moved to the Revu Preferences under the Admin section, including Reset Settings, Backup Setting, Logging, and client-specific Net Config settings.
Options Tab
The Options Tab contains the following features:
- Default PDF Viewer
- Explore Log Folder
- Extended Debugging
- Settings
- Reset
- Backup
- Restore
- Default PDF Viewer
- Opens the Default Apps window.
Default PDF Viewer
Opens the Default Apps window. To make Revu the default PDF viewer:
- Click on Choose default apps by file type
- Click .pdf
- Select Bluebeam Revu.
Explore Log Folder
Opens the pathing to the Revu log files. The log files can be found here: C:\Users\\AppData\Local\Bluebeam\Revu\20\Logs
Extended Debugging
Selecting this option turn on verbose logging in the application.
Settings – Reset
When you click on this option, you will be prompted to close Revu. After selecting OK in the dialog window:
- Revu will automatically close.
- The user settings will be Reset.
- Once the process is completed, Revu will automatically restart.
- You can click on Cancel to stop the process
When running a Reset of the Revu Settings, the Backup.zip file is created in %Appdata%\Roaming\Bluebeam Software\Revu\20\
This applies to running a Reset from within Revu > Preferences > Admin > Reset, Bluebeam Administrator Console > Help > Reset Settings, and via the Command Line.
Settings – Backup
After selecting this option, you will be prompted with a Save As Dialog.
If you select a directory and then click Save, a .zip file containing a backup of Revu settings will be saved to the selected location..
Settings – Restore
This option will restore settings from a backup .zip file.
- After clicking on Settings — Restore, you will be prompted to close Revu.
- Select OK.
- Click on the backup .zip file.
- Click Open
Once the Restore is complete, Revu will automatically restart.
Net Config Tab
The Net Config tab contains the following options:
- Stamps pathing
- Email Templates pathing
The default path for Stamp files is ProgramData\Bluebeam Software\Bluebeam Revu\20\Stamps. You can choose a different Stamp folder by clicking Browse and selecting the desired folder.
The default path for Email Templates is C:\Users\\Documents\Bluebeam\E-mail. You can choose a different Email Templates folder by clicking Browse and selecting the desired folder.
Revu Preferences and Settings
The Preferences dialog is used for customizing Revu settings for a single workstation, or for an organization.
For example, you might go to Interface > File Access to configure a connection to Microsoft SharePoint or Bentley ProjectWise, which you will then deploy to your user population.
Or, if your organization uses Studio U.K. to host Sessions and Projects, you can set up this connection from the Studio section.
Exporting Revu Preferences
If you would like to use a set of Revu Preferences across all or part of your organization, you can click Export in the lower left of the Preferences dialog and save them to a network share. The RevuPrefences.xml can be distributed by following the process outlined in the Revu Deployment Guide.
Revu Profiles
Profiles contain information about the overall layout of the Revu interface, such as toolbar positions, Tool Chest contents, and panel configurations.
Best Practice: If you’ve created your company Profiles in older version of Revu, and have not updated them in several years, it would be a good idea to recreate those in the latest version of Revu. Otherwise, your may have compatibility issues.
Exporting Profiles
Complete instructions for managing, exporting, and importing Revu Profiles can be found in the Revu Manual, but once a Profile is created, configured, and saved, it can be exported to a central location by clicking Export in the Manage Profiles dialog. After this, it can be deployed by following the process in the Revu Deployment Guide.
You can also import a profile into a Revu installation by navigating to its location and double-clicking the .bpx file. Alternatively, you can also import it by clicking Import in the Manage Profiles dialog, selecting the file, and clicking Open.
Include Dependencies
Filling this checkbox before clicking Export embeds the following items into the Profile:
- Tool Sets
- Custom Columns
- Custom Statuses
- Bookmark Structures™ (Revu eXtreme only)
Using Shared Profiles on a Network Location
If you do not want to import a profile into Revu, you can link to its location on a centralized network location accessible to all users. To do this:
- Open the Manage Profiles dialog and click the Browse button located to the right of the folder path displayed in the Location box.
- Navigate to the folder, click it, and then click Select Folder.
Read-Only Profiles
By default, Revu remembers the last known state or layout of the user interface when the application is closed. Changes — such as enabling a tool bar or hiding the Properties tab — are saved to the active Profile. If your organization uses shared Profiles as described above, you will want to prevent this because it overwrites the shared Profile, which can adversely affect other people who are using it. To do this:
- Navigate to the network location of the Profile.
- Right-click on it and select Properties in the pop-up menu.
- Click the Read Only checkbox, and then click Apply and OK.
The Tool Chest
Essentially, the Tool Chest is a convenient location where users can save and organize markups into Tool Sets. More in-depth information about the Tool Chest can also be found in the Revu Manual.
Managing Tool Sets
All tool sets are saved as .btx files that can be copied to a network drive or sent directly to users. As with Profiles, tools sets can be imported directly into Revu by double-clicking on a .btx file, or from the Manage Tool Sets dialog.
Best Practice: If you’ve created your company Profiles in older version of Revu, and have not updated them in several years, it would be a good idea to recreate those in the latest version of Revu. Otherwise, your may have compatibility issues.
To export a Tool Set, open the Manage Tool Sets dialog, select the Tool Set, and click Export. When the Save As dialog opens, select the destination folder you want to export it to, and click Save. If your users will be sharing this Tool Set, you will need to save it to a network location they can access.
You can also distribute Tool Sets using a command line script, as described in the Revu Deployment Guide.
Using Shared Tool Sets on a Network Location
If you do not want to import a profile into Revu, you can “link” to its location on a centralized network location accessible to all users. To do this you’ll need to follow the steps listed in the Revu Manual.
Locked Tool Sets
A locked Tool Set appears in the Tool Chest with a blue padlock  located to the right of its name. As the Administrator, you can grant any user write permissions to the file and set others to read only. A user with write permissions to the Tool Set will be able to check the file out and add changes. Any changes made to a Tool Set will affect all users sharing that Tool Set.
If a user is designated as read-only, that user won’t be able to make any changes to the Tool Set or unlock it for changes. Users marked as read-only will need to contact the Admin and request permission to check out the Tool Set.
Specific user permissions can be modified on a Tool Set by following the steps below:
1. Go to the network location of the Tool Set.
2. Right-click on the Tool Set (.btx) and select Properties. The properties dialog box appears.
3. Go to Security and select Edit under Group or user names.
4. Modify existing users/groups or add new users/groups. Once satisfied with your changes, press Apply and then OK.
Read-Only Tool Sets
If you want to prevent changes to a shared tool set, you can set its properties to read-only by doing the following:
- Navigate to the network location of the Tool Set.
- Right-click on it and select Properties in the pop-up menu.
- Fill the Read Only checkbox, and then click Apply and OK.
Hatch Patterns
Revu includes several standard Hatch Patterns used for filling in markups, which can be exported, imported, or added in the same manner as Tool Sets. Along with this, these Hatch Pattern (.bhx) files can also be exported to a centralized network location from where they can be deployed to your Revu installation.
You can find details about deploying Hatch Patterns within your organization in the Revu Deployment Guide. Information about managing exporting, importing, adding, or otherwise working with your hatch patterns can be found in the Revu Manual.
SharePoint and ProjectWise Integration
Revu has direct integration with Microsoft SharePoint and Bentley ProjectWise document management systems (DMS). You can check-in, check-out, and view files from either a ProjectWise DataSource or SharePoint Document Library from the Revu interface.
Logging In
By default, whenever you log into a SharePoint site, the first log in attempt will use your Windows account credentials. If the attempt fails, you will be prompted to enter credentials. To ensure a smooth authentication, Revu can store the correct credentials for you within the Revu File Access Preferences. However, these credentials will not be included in the RevuPreferences.xml export file.
The Revu Manual includes more in-depth information about setting up SharePoint or ProjectWise integration, but the basic steps are:
- Go to Revu > Preferences (Ctrl+K)
- In the Preferences dialog, go to Interface > File Access.
- Click the + symbol in the File Access dialog. This opens the Add Document Management Systems dialog.
- Select the type of DMS you’re to configuring, and then enter the login credential and any other required information.
- Click Ok to close the dialog windows.
Bluebeam, Revu, and Bluebeam Studio are trademarks or registered trademarks of Bluebeam, Inc. Microsoft, SharePoint, and Windows are either registered trademarks or trademarks of Microsoft Corporation in the United States and/or other countries.
AutoCAD is a registered trademark of Autodesk in the United States and/or other countries.
© 2019 Bluebeam, Inc. All Rights Reserved.
All other trademarks or registered trademarks are the property of their respective owners.
How-To
Revu 20
Deployment