Creating a 3D PDF
3D PDF files can be created within Revu using Universal 3D (U3D) and Industry Foundation Classes (IFC text) files. Other 3D files from supported CAD applications (Revit, Navisworks, and SketchUp Pro) can be converted to PDF from within their applications using the Bluebeam plugins found there.
A new 3D model window can be created on an existing PDF by using the 3D Editor.
Note: Creating from SketchUp Pro files requires access to SketchUp Pro and either Revu CAD or Revu eXtreme.
Universal 3D (*.u3d) or Industry Foundation Classes (*.ifc) files can be drag-and-dropped directly into Revu to create 3D PDFs. They can also be opened from within Revu to create 3D PDFs, as described below:
- Go to File >
 Open or press CTRL+O. The Open dialog box appears.
 -
From the file type list to the right of the File Name field, select 3D Files.

-
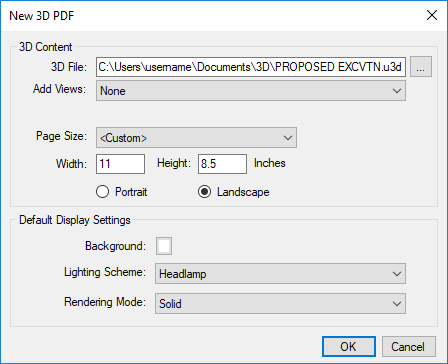
Navigate to the desired file and select it, then click Open. The New 3D PDF dialog box appears.

- Select the desired 3D Content settings and Default Display Settings in the New 3D PDF dialog box and click OK. The PDF will be created and opened automatically.
See Interacting with 3D PDFs for information about displaying 3D PDFs.
3D file can be added to an existing PDF. This allows 3D and traditional text or graphic content to exist on the same page.
- Go to Edit > PDF Content > Add & Edit 3D Content or press CTRL+ALT+3.
- Click and drag a rectangle to define the area of the 3D model. The Open dialog box appears.
-
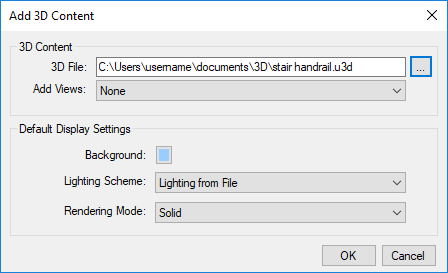
Navigate to and select the desired 3D content. Content should be in a Universal 3D (.u3d) or Industry Foundation Classes (.ifc) file. Click Open. The Add 3D Content dialog box appears.

- To add views from the 3D file, select Views from file from the Add Views list. There are also a number of standard views available in this list that can be used instead.
- Set the desired Default Display Settings.
- Click OK.