Creating and Editing the 3D Model Window
In Revu, 3D content always exists in a 3D Model Window. It is possible to resize and move that window with the 3D Editor.
 Creating a New 3D Model Window
- Go to Edit >
 3D Editor.
- Click and drag a rectangle to define the area of the 3D model. The Open dialog box appears.
-
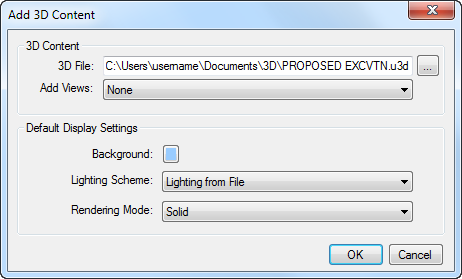
Navigate to and select the desired 3D content. Content should be in a Universal 3D (.u3d) or Industry Foundation Classes (.ifc) file. Click Open. The Add 3D Content dialog box appears.

- To add views to the 3D content, select the desired option from the Add Views dropdown list.
- Select the desired Default Display Settings. These settings can be manipulated later, if necessary.
- Click OK.
 Moving, Resizing, and Deleting a 3D Model Window
- Go to Edit >
 3D Editor. The 3D Model Window will highlight in blue.
- To move a 3D Model Window, click and drag it to the desired location.
- To resize a 3D Model Window, click it, then click and drag any of the yellow control points.
- To delete a 3D Model Window, right-click it and select
 Delete.
- When finished, press ESC or change to another tool.
Related topics
Interacting with 3D PDFs
3D Model Tree Tab
Working with 3D Views
Marking Up 3D PDFs
Selecting 3D Parts
Revu 2017 & Below
Help Guide
Editing Documents
3D PDFs
 3D Editor.