
The Bluebeam Administrator allows you to install, uninstall and manage the Bluebeam plug-ins. This tool can be used to perform such functions as:
To run the program, from the Start menu, click All Programs, Bluebeam Software, and then Bluebeam Administrator.
______________________________________________________________
Clear the check box corresponding to the version of AutoCAD in which you do not want Bluebeam to appear. In the below example, we will remove Bluebeam from AutoCAD 2010. Uncheck the button next to this version of AutoCAD as shown in the picture below:
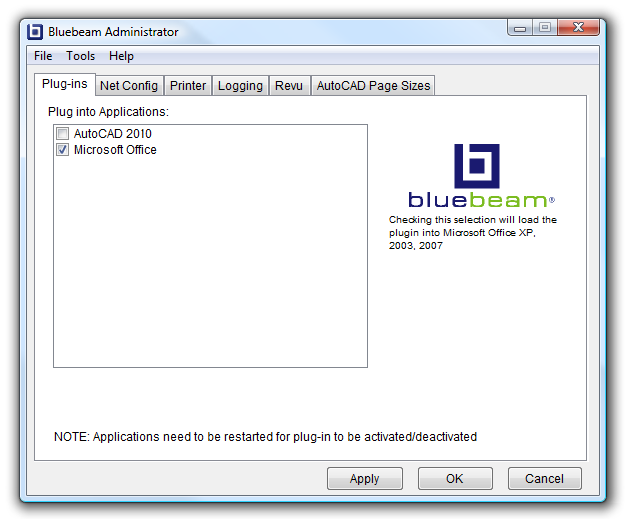
Click Apply and the plugin will not load into AutoCAD.
____________________________________________
Select the check box corresponding to the version of AutoCAD in which you want to Bluebeam to appear.

Click Apply to re-activate the plugin in the particular version of AutoCAD.
________________________________________________________________
Page sizes, text stamps and other configurations can now be centrally located on a shared network drive. Changes made in this one central location will be immediately available to all user's workstations which point to the indicated shared folder.
The Net Config tab setting controls where the location is of centrally located files. At install time the Unmanaged configuration is defaulted on a user's workstation. All customizations are stored locally on a user's workstation. To centrally locate the configuration files in a shared network area, select the Managed Net configuration button. Further information related to the managed Network configuration can be found here. Bluebeam does provides a mechanism for defaulting to a managed network location as an install parameter. Refer to the Bluebeam support website for further information on network deployment options for Bluebeam PDF Revu.
________________________________________________________
The third tab in the Administrator controls settings related to the Bluebeam Printer. Clicking the Printer tab will display this dialog:
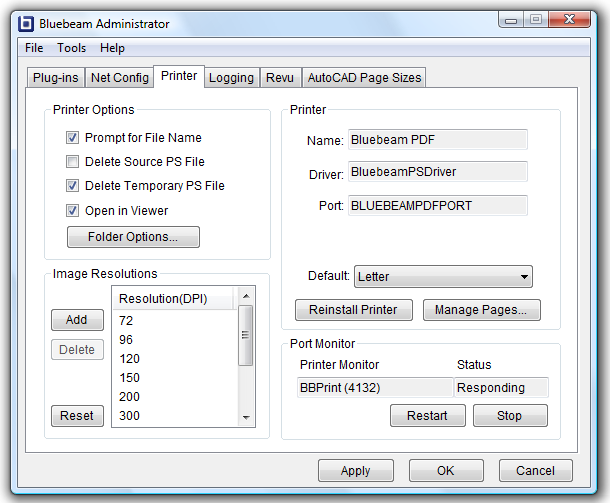
There are several options related to the use of the Bluebeam Printer which you can control from this window. The settings will be applied whenever you print to the Bluebeam printer, which was added as a Windows system printer as part of the Bluebeam installation.
Prompt for filename - Will display a settings window when printing to the Bluebeam printer. Checking this option will trigger the Bluebeam Save-As dialog to appear when creating files. In the Save-As dialog you can name the file and select the file type as well as control various parameters for the creation of the file. Using the settings box, you can choose from application presets based on the software application from which you are printing.
Delete source PS file - Remove the temporary source postscript file that is generated. This option should be checked unless the file needs to be kept for troubleshooting purposes.
Delete temporary PS file - Remove the temporary postscript file that is generated. This option should be checked unless the file needs to be kept for troubleshooting purposes.
Open in viewer - If this option is selected, each time a file is created using the Bluebeam printer, the file will be displayed using the workstation's default viewer (if one is available) for the particular file type that is created.
Folder Options - Opens the Folder Options dialog, which allows you to configure default output folder selection.
Reinstall Printer - Pressing this button will remove and reinstall the Bluebeam Printer. You can choose the default paper size to be set at Letter/A4 by choosing the papersize from the Default dropdown.
Manage Pages - Pressing this button displays the following window:
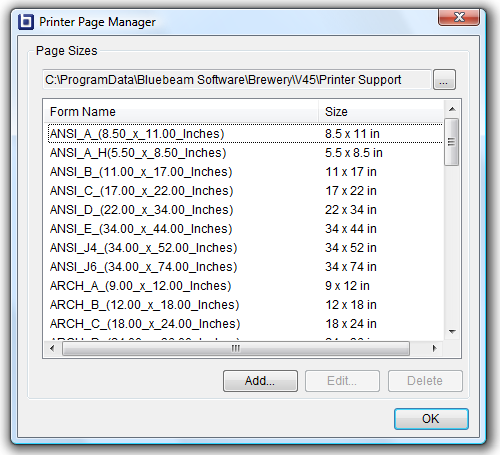
The path displays the location the pages the Bluebeam printer will use for printing. If this directory is writable by the logged-in user, page sizes can be added and modified from this screen. To add a new custom page, press the Add button which will display the following window:

Define the name of the page in the Form Name field, specify English or Metric units, and add the Width and Height dimensions in the appropriate fields. Press OK when complete. If the pages are stored on a network shared location, once a page has been added, all users pointing to the shared directory will have access to the newly defined page. This provides a powerful mechanism for adding specific page sizes that your company uses and storing them in one location. Any new page sizes that are stored in the central location will be immediately available to all users pointing to this location.
PDF Port Monitor
You can Restart the printer port monitor service by clicking the Restart button. Try this if you attempt to create a file using the Bluebeam printer and no file appears.
__________________________________________________________________
The logging tab lists hyperlinks to the various logs created during normal operation of the Bluebeam product.
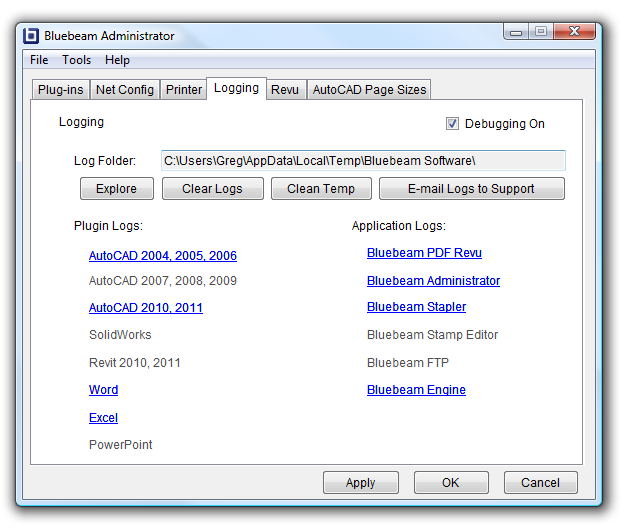
If problems occur during the operation of Bluebeam, check the Debugging On checkbox to record more detailed information, as this information will be requested should you need to contact Bluebeam technical support.
Click the Clear All button to reset all the log files, which will essentially erase the files. Click the Explore button to open an Explorer window to the folder where all of the files are stored. The Clean Temp button will erase files other than logs from the Bluebeam Temp folder, such as temporary postscript files. The E-mail Logs to Support button will create a .zip archive of all the log files to facilitate attaching logs to a support email.
______________________________________________________________
The last tab controls which of the Bluebeam defined page sizes are loaded.You can selectively check and uncheck page sizes that your company uses:
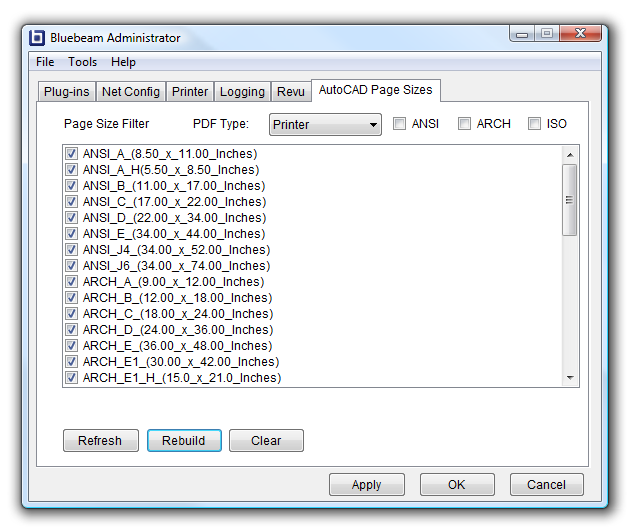
There are two paths for creating a PDF from AutoCAD. With release version 3 of Bluebeam, the default option selected is Printer. Previous to version 3, only the Heidi driver path was available. The Printer option provides much more flexibility and control for the creation of PDF files and this should be used. If you require support for text wipeouts it is suggested that you use the Heidi driver.Once selected, restart AutoCAD for the changes to take effect.