Text Stamp
The Text Stamp tab is used for selecting and placing text stamps that have been created using the Bluebeam Stamp Editor.
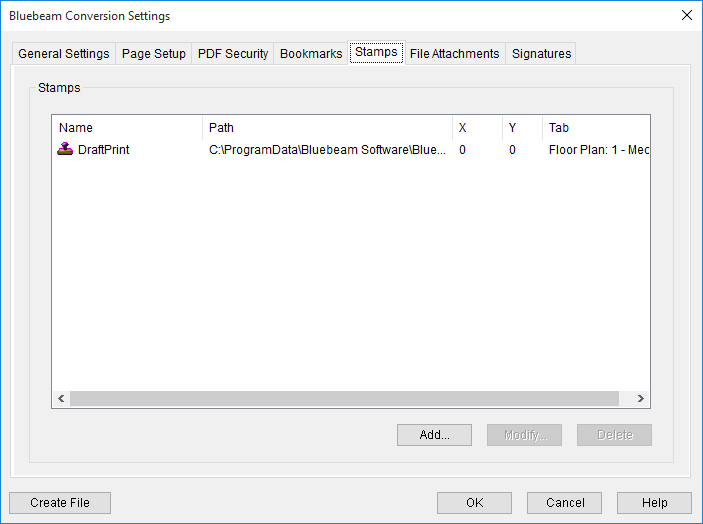
Any text stamp here will be visible on the file when it is created. The screen used to add a text stamp is depicted below:

You can Delete by highlighting a text stamp in the Text Stamp List and pressing the Delete button.
Stamps that have already been added can be edited at any time. Select the stamp, then click Modify to change any of the settings in the Text Stamp dialog box.
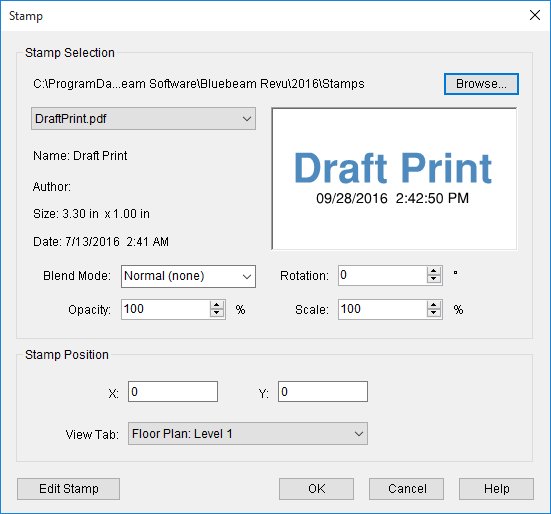
To add a stamp, click Add. The Text Stamp dialog box will appear.
 Adding Text Stamps

- Before selecting a stamp, click Browse to search for the folder location containing the necessary text stamps. Bluebeam Text Stamps have a .brx file extension. By default, Bluebeam uses a folder containing a selection of pre-made sample text stamps. You can change the default location to a centralized network storage server containing all of your company's text stamps.
- Once you have selected a folder, select a text stamp from the drop down list. A preview of the stamp will be displayed in the window to the right of the list.
- There are four options for controlling the appearance of the stamp on the drawing:
- The Blend Mode acts as a filter for determining which pixels to display. The Line Merge topic explains the Blend Mode options in greater detail.
- You can set the text stamp Rotation by either entering the specific value or pressing the up and down arrows in the Rotation box. The value is specified in degrees.
- Set the Opacity of the stamp by changing the value in the Opacity box. A value of 100% defines the text stamp as being opaque while setting it to 0% makes it completely transparent.
- Scale will re-size the text stamp on the face of the drawing by the specified percentage.
- Position the text stamp on the drawing by using one of the following methods:
- Stamp Position - X, Y: Type the X and Y coordinates (referenced from the bottom left corner of the page) in the corresponding text box. Alternatively, you may click Get Point. This will display the CAD session. Click the location on the layout where you want the text stamp to appear, and the coordinates will be entered in the X and Y text boxes.
- Stamp Position - View Tab: Select the layout sheets on which you want to display the text stamp. Selecting All Views will display the stamp on each page that is printed.


