Profiles provide an easy way to store your favorite toolbars, menus and other display settings so that the tools you find most useful are readily available each time you open Revu. Read on to learn how to choose a preloaded Profile or create your own.
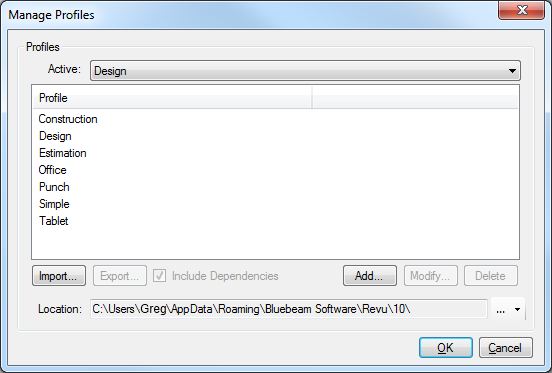
Revu comes preloaded with several Profiles that are geared toward specific jobs and functions, including:
Advanced: For users who need a broad range of advanced markup features and precise control over markups and measurements and their properties.
Construction: For construction professionals who work with large drawing sets and smart documents and need robust markup, editing, and collaboration tools.
Design Review: For users who need in interface tailored for design review and collaboration with customizable tool sets that contain essential features for drawing navigation, markup and measurement.
Office: For users who review and proofread documents and need the most frequently used markup and editing tools with a simplified interface.
Oil & Gas: For users working with piping & instrumental designs (P&IDs) and process flow diagrams (PFDs) who need specialized tool sets geared toward those tasks.
Punch: For users completing a punch process.
Simple: For users who need to maximize screen space for viewing PDFs but also want to access the Command bar and document tabs for quick navigation between files.
Tablet: For tablet PC user, this Profile reorients the interface vertically and exposes only key markup and editing tools to maximize screen space while panning, zooming, writing and drawing with a tablet PC stylus.
Takeoff: For estimators and specifiers who need to view plans and specs, conduct quantity takeoffs or add markups to their PDF files.
Click the arrow to the right of the Profiles button from
You can customize the Revu interface and save your configuration as a Profile. There is no limit to the number of custom Profiles you can create.
To create a custom Profile:
Go to View > Profiles
You can make changes to any local Profile in Revu, including the preloaded Profiles.
To save changes to a Profile:
There are several community-sourced Profiles available for download from http://www.bluebeam.com/us/support/extensions-profiles.asp. Download and install the one called "Multiple Monitor" by following the installation instructions found at the top of the page.
Once you have installed the Multiple Monitor Profile:
Moving tabs: You can move any of the tabs around by simply dragging and dropping to where you want them.
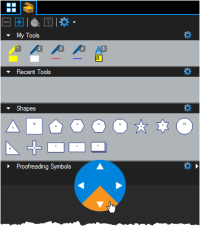
You can also use the position wheel that appears when you drag a tab away from its current place to split panels horizontally or vertically. Just select one of the directions on the wheel to split the panel and move the tab accordingly.
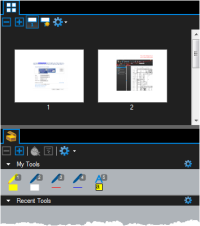
In the example below, dragging the Tool Chest tab and selecting the down arrow on the position wheel splits the panel horizontally and automatically moves it below the Thumbnails tab.
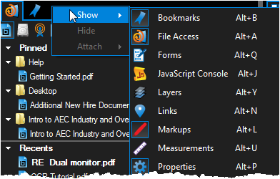
Showing and hiding tabs: To hide a tab, just right-click it and select Hide. To show a hidden tab, right-click an empty space next to a currently displayed tab and go to Show, then select the tab you want to show.
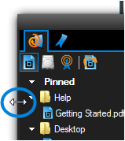
Resizing windows: To resize a window, simply place your cursor over one of the edges of the interface to reveal a double arrow. Once it appears, click and drag to stretch or shrink the window.
Splitting the main workspace: With the tabs moved to another monitor, the main workspace is now quite large. You might want to take advantage of this by splitting the main workspace so that you can view more than one PDF at a time. To do so, just click the desired split screen option from the Navigation bar (if it's hidden, use the keyboard shortcut F4 to show it).