Batch Slip sheet
Batch Slip Sheet lets you quickly insert new page revisions or replace existing pages across multiple documents. This feature helps you keep large sets of drawings or documents up-to-date with less work.
The batch version of Slip Sheet is discussed here. There is also a single-PDF version for replacing pages and a single-PDF version for inserting pages available.
PDFs don't need to be open in Revu when you run the process. If a document is open in Revu, any changes resulting from the process are made to the document, but the document won't be saved or checked in (if relevant); you must save and check in the document manually. If a document isn't open in Revu, and it isn't checked out/locked by another user, Revu applies and saves the document changes automatically (without opening the document).
In most cases, the Revu auto-matching function successfully matches current sheets with their revisions, but if a consistent naming convention is in place and the auto-matching function doesn't deliver satisfactory results, you can add your own syntax to the matching algorithm. If that doesn't work or isn't an option, manual correlation is always available. See Auto-Matching for examples of auto-matching in the batch features.
- Go to Batch >
 Slip Sheet.
- To add PDFs to the Current Pages and Revised Pages lists, select the appropriate option from the Add dropdown menu:
- Add Files: Select this option to navigate to the desired files on either a local or network drive. This option is the default when you select Add .
- Add Open Files: Select this option to add all PDFs currently open in Revu.
- Add Folder: Select this option to add all PDFs in a selected folder, but none of the PDFs in any of its subfolders.
- Add Folder (include subfolders): Select this option to add all PDFs in a selected folder and all PDFs in any of its subfolders.
- Select the method by which these documents should be matched from the Match Pages By dropdown menu:
- File Name, Page Index: Automatically matches documents by file name, then by page index.
- Page Label: Automatically matches documents using predefined page labels.
Page Region: Uses the text found within user-defined regions of the first PDF listed in Current Pages to automatically match documents. To define the page region, follow these steps:
- Select Select to replace the dialog with a crosshair cursor.
Drag to define a region within the PDF.
The data in this region should be located in the same place on each PDF. After you define the region, the AutoMark dialog appears.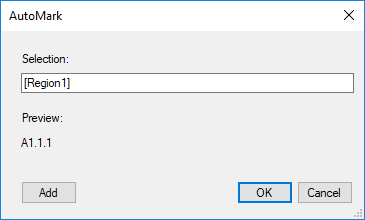
- To add another region:
- Select Add to replace the dialog with a crosshair cursor.
- Drag to define another region, which is added to the Selection field in the AutoMark dialog.
You may add as many regions as you need. Review the sample page label displayed under Preview. If desired, select the Selection field to add text before, after, or between [Regions]. - After you define all regions, select OK to close the AutoMark dialog and return to the previous dialog.AutoMark is most suitable for documents that are vector-based, are the same size and have the same registration. AutoMark might not work as expected if the pages are different sizes, if some of the pages are not searchable, or if the scans are not properly registered.
Manual Correlation: Skips the auto-matching process. Select this option to match documents manually on the next screen.
Pages must be matched to be included in the next part of the process. If one of the auto-matching options is selected and matches can't be found for one or more pages, they won't be included. This note doesn't apply to Manual Correlation, which carries all pages forward.
-
For each of the Match Pages By options except Manual Correlation, you can define an advanced filter for more control over the auto-matching process. To do so, select Advanced and enter the desired Match Filter. See Advanced Match Options for more information.
- To save this batch for future use, select Save Batch. Files are saved in a BCX format and can be opened later by Batch Compare, Batch Overlay and Batch Slip Sheet.
- Select Match.
- Pages that have been automatically matched are shown on the Matched Pages tab, arranged in matched pairs: pages in the same row are considered "paired" and will be compared.
- To move a page to a different row (and pair it with a different page), drag it to the desired position.
- To remove a page from either list, select it and click Remove.
- Pages that were not automatically matched are shown on the Unmatched Pages tab. These pages can be manually matched by selecting an appropriate page from either column and clicking Match. The matched pages are moved to the Matched Pages tab.
- Select the desired slip sheeting method from the dropdown under Options:
- Insert Revised Pages before Current Pages: Inserts the new pages in front of the corresponding current page.
- Replace Current Pages with Revised Pages: Replaces the current pages with the corresponding new pages.
- Select the desired slip sheeting options, as available:
- Copy Markups from Current Pages to Revised Pages: Select this option to copy the current page's markups over to the new revision.
- Unflatten Markups prior to Copy: Unflattens any flattened markups on the current pages before performing the copy.
- Flatten Markups after Copy: Flattens markups on the new pages after performing the copy.
- Stamp Current Pages 'Superseded' (appears only when Insert Revised Pages before Current Pages is selected as the Slip Sheet option in the previous step): Select this option to automatically stamp the current pages as having been superseded.
- Copy Markups from Current Pages to Revised Pages: Select this option to copy the current page's markups over to the new revision.
- Select OK. If there were any unmatched pages in any of the revised drawings left on the previous screen, the Batch: Slip Sheet - Unmatched Pages dialog appears. If there were no unmatched drawings, the Batch: Slip Sheet - Summary dialog appears; skip to the next step.
- On the Batch: Slip Sheet - Unmatched Pages dialog you have the option to extract new drawings discovered during the Batch Slip Sheet process. If you prefer to not extract any of these drawings, select Skip and proceed to the next step. Otherwise:
- Select the pages you want to extract from the Unmatched Pages list.
- Select any of the available options, as desired:
- Extract Pages as Separate Files: Select to create a one-page PDF for each page extracted from the current PDF.
- Use Page Label to Name Files: Select to use the page label in the name of the individual PDFs. This option should not be used if the page labels contain any characters that Windows considers invalid for use in file names, including \ / : * ? " < > |
- Overwrite Existing Files: Overwrites any existing files of the same name in the save location.
- Use Page Label to Name Files: Select to use the page label in the name of the individual PDFs.
- Open Files After Extraction: Select to open the newly created PDFs in the current session of Revu as separate document tabs.
- Update hyperlinks with relative paths: Select to automatically update hyperlinks contained in extracted pages with relative paths. Otherwise, full paths are used. See Defining an Action: Relative and Full Paths for more information regarding relative and full paths.
- Extract Pages as Separate Files: Select to create a one-page PDF for each page extracted from the current PDF.
- Select Extract Pages.
- Select the folder into which you want to save the extracted files and click Select Folder.
- On the Batch: Slip Sheet - Unmatched Pages dialog you have the option to extract new drawings discovered during the Batch Slip Sheet process. If you prefer to not extract any of these drawings, select Skip and proceed to the next step. Otherwise:
- Review the Summary information, which includes which pages were slip sheeted with which pages.
- To generate a report of the Summary information, follow these steps:
- Select Create detailed report.
- Choose PDF or CSV under Format.
- To change the folder in which the report will be saved, select the
 button to the right of Output Folder and select the desired folder.
 - Enter a name for the report in the File name field.
- To overwrite an existing file with the same name in the selected folder, select Overwrite Existing File.
- To open the file once it's been created, select Open File After Creation.
Select Settings to set additional reporting options. The options available vary depending on what kind of report is being generated:
PDF
- Create Hyperlinks: When enabled, the report includes hyperlinks to the current, revised, and unmatched pages, and to the marked up PDF that highlights the differences between them.
- Stamp Date and Stamp Time: When enabled, adds that information to the footer of the report.
- Page Size and Orientation: Sets the page size and orientation of the report.
CSV
- Create Hyperlinks: When enabled, the report includes hyperlinks to the current, revised, and unmatched pages.
- Include Column Headers: When enabled, the file includes automatically generated column headers in the comparison report.
- Select OK.
PDFs don't need to be open in Revu when you run the process. If a document is open in Revu, any changes resulting from the process are made to the document, but the document won't be saved or checked in (if relevant); you must save and check in the document manually. If a document isn't open in Revu, and it isn't checked out/locked by another user, Revu applies and saves the document changes automatically (without opening the document).
In most cases, the Revu auto-matching function successfully matches current sheets with their revisions, but if a consistent naming convention is in place and the auto-matching function doesn't deliver satisfactory results, you can add your own syntax to the matching algorithm. If that doesn't work or isn't an option, manual correlation is always available. See Auto-Matching for examples of auto-matching in the batch features.
- Go to Batch >
 Slip Sheet.
- To add PDFs to the Current Pages and Revised Pages lists, select the appropriate option from the Add dropdown menu:
- Add Files: Select this option to navigate to the desired files on either a local or network drive. This option is the default when you select Add .
- Add Open Files: Select this option to add all PDFs currently open in Revu.
- Add Folder: Select this option to add all PDFs in a selected folder, but none of the PDFs in any of its subfolders.
- Add Folder (include subfolders): Select this option to add all PDFs in a selected folder and all PDFs in any of its subfolders.
- Select the method by which these documents should be matched from the Match Pages By dropdown menu:
- File Name, Page Index: Automatically matches documents by file name, then by page index.
- Page Label: Automatically matches documents using predefined page labels.
Page Region: Uses the text found within user-defined regions of the first PDF listed in Current Pages to automatically match documents. To define the page region, follow these steps:
- Select Select to replace the dialog with a crosshair cursor.
Drag to define a region within the PDF.
The data in this region should be located in the same place on each PDF. After you define the region, the AutoMark dialog appears.- To add another region:
- Select Add to replace the dialog with a crosshair cursor.
- Drag to define another region, which is added to the Selection field in the AutoMark dialog.
You may add as many regions as you need. Review the sample page label displayed under Preview. If desired, select the Selection field to add text before, after, or between [Regions]. - After you define all regions, select OK to close the AutoMark dialog and return to the previous dialog.AutoMark is most suitable for documents that are vector-based, are the same size and have the same registration. AutoMark might not work as expected if the pages are different sizes, if some of the pages are not searchable, or if the scans are not properly registered.
Manual Correlation: Skips the auto-matching process. Select this option to match documents manually on the next screen.
Pages must be matched to be included in the next part of the process. If one of the auto-matching options is selected and matches can't be found for one or more pages, they won't be included. This note doesn't apply to Manual Correlation, which carries all pages forward.
-
For each of the Match Pages By options except Manual Correlation, you can define an advanced filter for more control over the auto-matching process. To do so, select Advanced and enter the desired Match Filter. See Advanced Match Options for more information.
- To save this batch for future use, select Save Batch. Files are saved in a BCX format and can be opened later by Batch Compare, Batch Overlay and Batch Slip Sheet.
- Select Match.
- Pages that have been automatically matched are shown on the Matched Pages tab, arranged in matched pairs: pages in the same row are considered "paired" and will be compared.
- To move a page to a different row (and pair it with a different page), drag and drop it to the desired position.
- To remove a page from either list, select it and click Remove.
- Pages that were not automatically matched are shown on the Unmatched Pages tab. These pages can be manually matched by selecting an appropriate page from either column and clicking Match. The matched pages are moved to the Matched Pages tab.
- Select the desired slip sheeting method from the dropdown under Options:
- Insert Revised Pages before Current Pages: Inserts the new pages in front of the corresponding current page.
- Replace Current Pages with Revised Pages: Replaces the current pages with the corresponding new pages.
- Select the desired slip sheeting options, as available:
- Copy Markups from Current Pages to Revised Pages: Select this option to copy the current page's markups over to the new revision.
- Unflatten Markups prior to Copy: Unflattens any flattened markups on the current pages before performing the copy.
- Flatten Markups after Copy: Flattens markups on the new pages after performing the copy.
- Stamp Current Pages 'Superseded' (appears only when Insert Revised Pages before Current Pages is selected as the Slip Sheet option in the previous step): Select this option to automatically stamp the current pages as having been superseded.
- Copy Markups from Current Pages to Revised Pages: Select this option to copy the current page's markups over to the new revision.
- Select OK. If there were any unmatched pages in any of the revised drawings left on the previous screen, the Batch: Slip Sheet - Unmatched Pages dialog appears. If there were no unmatched drawings, the Batch: Slip Sheet - Summary dialog appears; skip to the next step.
- On the Batch: Slip Sheet - Unmatched Pages dialog you have the option to extract new drawings discovered during the Batch Slip Sheet process. If you prefer to not extract any of these drawings, select Skip and proceed to the next step. Otherwise:
- Select the pages you want to extract from the Unmatched Pages list.
- Select any of the available options, as desired:
- Extract Pages as Separate Files: Select to create a one-page PDF for each page extracted from the current PDF.
- Use Page Label to Name Files: Select to use the page label in the name of the individual PDFs. This option should not be used if the page labels contain any characters that Windows considers invalid for use in file names, including \ / : * ? " < > |
- Overwrite Existing Files: Overwrites any existing files of the same name in the save location.
- Use Page Label to Name Files: Select to use the page label in the name of the individual PDFs.
- Open Files After Extraction: Select to open the newly created PDFs in the current session of Revu as separate document tabs.
- Update hyperlinks with relative paths: Select to automatically update hyperlinks contained in extracted pages with relative paths. Otherwise, full paths are used. See Defining an Action: Relative and Full Paths for more information regarding relative and full paths.
- Extract Pages as Separate Files: Select to create a one-page PDF for each page extracted from the current PDF.
- Select Extract Pages.
- Select the folder into which you want to save the extracted files and click Select Folder.
- On the Batch: Slip Sheet - Unmatched Pages dialog you have the option to extract new drawings discovered during the Batch Slip Sheet process. If you prefer to not extract any of these drawings, select Skip and proceed to the next step. Otherwise:
- Review the Summary information, which includes which pages were slip sheeted with which pages.
- To generate a report of the Summary information, follow these steps:
- Select Create detailed report.
- Choose PDF or CSV under Format.
- To change the folder in which the report will be saved, select the button to the right of Output Folder and select the desired folder.
- Enter a name for the report in the File name field.
- To overwrite an existing file with the same name in the selected folder, select Overwrite Existing File.
- To open the file once it's been created, select Open File After Creation.
Select Settings to set additional reporting options. The options available vary depending on what kind of report is being generated:
PDF
- Create Hyperlinks: When enabled, the report includes hyperlinks to the current, revised, and unmatched pages, and to the marked up PDF that highlights the differences between them.
- Stamp Date and Stamp Time: When enabled, adds that information to the footer of the report.
- Page Size and Orientation: Sets the page size and orientation of the report.
CSV
- Create Hyperlinks: When enabled, the report includes hyperlinks to the current, revised, and unmatched pages.
- Include Column Headers: When enabled, the file includes automatically generated column headers in the comparison report.
- Select OK.
Advanced Match Options lets you define a custom Match Filter that is used to precisely match pages during the auto-match process.
Wildcard Syntax:
* Represents zero or more characters that are not a number # Represents a series of characters that form a number ; Separator for specifying multiple filters ? Represents a series of alphabetic letters \ Escape character to treat above characters as literal All other characters are literal.
An assumed * wildcard always precedes the string. For instance, A#;C# is implied as *A#;*C#.Spaces count as literal characters. Don’t put a space after a semicolon, or the filter will include it.