
This article applies to:
- Revu 20
- Revu 2019
Jump to other versions:
Backing up your Revu settings
Backing up your Revu settings creates a .zip file that you can revert to in case you experience computer issues, or if you need to migrate to a new computer. Even if you’re not immediately moving to a new computer, it’s a good idea to keep a backup file in a location other than your local hard drive, so it can be restored in the event of a hard drive failure.
To back up your settings with Revu:
- Open Revu
 .
. - Go to Revu > Preferences (Ctrl+K).
- From the sidebar select Admin, then click Options at the top.
- Click Backup.
- When prompted, save your .zip file to a secure location.
Your back up Revu .zip file has been saved. Repeat this process as necessary, such as when you make significant changes to your setting.
Manually backing up your settings
You can also back up the entire folder manually, or add the folder to your backup routine. It’s located in:
C:\Users\<UserName>\AppData\Roaming\Bluebeam Software\Revu
Once you’re inside the Revu folder, you’ll see a sub-folder labeled 20 or 19 (named after the installed version).
Resetting your Revu settings
The reset settings option in Revu resets your settings to their original configurations. Before proceeding, it’s recommended to back up your settings in case this reset doesn’t produced the desired result.
To reset your settings:
- Open Revu .
- Go to Revu > Preferences (Ctrl+K).
- From the sidebar select Admin, then click Options at the top.
- Click Reset, then click OK.
Revu will now close and re-launch on its own.
Your Revu settings have been reset to their original configurations.
Restoring your Revu settings
Restoring your settings lets you return your Revu configuration settings to a previous state by uploading a backup file.
To restore your settings:
- Open Revu .
- Go to Revu > Preferences (Ctrl+K).
- From the sidebar select Admin, then click Options at the top.
- Click Restore, then click OK.
- Locate your Revu settings backup file and click Open.
Revu will now close and re-launch on its own.
Your Revu settings have been restored.
Backing up advanced Revu settings
You can also back up other Revu settings, such as the Bluebeam Printer, plugin options, and email templates. If you have not changed the following settings, backing them up is not necessary.
Custom page sizes for the Bluebeam Printer and plugins
To back up custom page settings:
- Open the Bluebeam Administrator
 . In Windows, press the Windows key and enter Bluebeam Administrator 20.
 - Click the Net Config tab.
- Double-click the path next to Printer Driver.
- Copy the file prtPages.xml to the same location as the rest of your backup.
Custom Page setups for the plugins
To back up custom page setups:
- Open the Bluebeam Administrator . In Windows, press the Windows key and enter Bluebeam Administrator 20.
- Click the Net Config tab.
- Double-click the path next to Global Page Setup.
- Copy the files *.plugin.xml to the same location as the rest of your backup.
Email templates
To back up your email templates:
- Open the Bluebeam Administrator . In Windows, press the Windows key and enter Bluebeam Administrator 20.
- Click the Net Config tab.
- Double-click the path next to E-mail Templates.
- Copy all the files in the folder to the same location as the rest of your backup.
Other versions of this article
Revu 2018 and older
Backing Up and Restoring Revu Settings, Tool Sets, Profiles & Templates
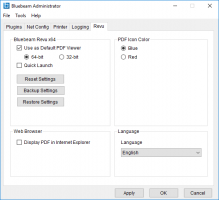
The Bluebeam Administrator includes a quick way to back up all Revu configuration settings at once. This includes Profiles, tool sets, and hatch and line patterns, which are all put into a single Zip file that can be stored on your network or backup drive. You can also back up individual Profiles and tools sets within Revu, but the Administrator lets you back them up all at once.
To back up the settings using the Bluebeam Administrator:
- Make sure Revu is currently closed.
-
Go to Start > All Programs > Bluebeam Software > Bluebeam Administrator.
In Windows 10 and 8.1, click or press Start
 and type Bluebeam Administrator.
-Or-
Go to Help > Administrator in Revu.
If running Revu in a side-by-side installation, always open the most current version of the Bluebeam Administrator. - Click the Revu tab.
- Click Backup Settings, and choose a location to save the resulting Zip (.zip) file in.
- Click Save.
Manually Backing Up Your Settings
You can also back up the entire folder manually or add the folder to your backup routine. It’s located in
C:\Users\<UserName>\AppData\Roaming\Bluebeam Software\Revu.
Once you’re inside the Revu folder, you’ll see a sub-folder named after the current version of Revu that’s installed on your machine. For example, version 10 users will see a folder called 10, and Revu 2017 users will see one called 17.
This folder also contains at least one database of the Recents list and the Pinned files that appears on the File Access tab. In Revu 12.5 and above there are three files that are used for this purpose, called RdbFileAccesses.dat, RdbPinnedFiles.dat, and RdbRecentFiles.dat. In Revu 12.1 and below, you’ll find a single file called Recents.db.
Resetting Your Settings
Before proceeding with these instructions, make sure to back up your settings following the instructions above. This is a precaution in case resetting your settings does not produce your desired result.
- Make sure Revu is currently closed.
-
Open the Bluebeam Administrator:
For side-by-side installations: Make sure you select the latest version of the Bluebeam Administrator.- If Revu is currently open:
Go to the Menu Bar and click Revu > Administrator
 , and then close the Revu application.
The Bluebeam Administrator is a separate application and should still be open at this point.
– Or-
- If Revu is not open:
In Windows 10 and 8.1, click Start, type Bluebeam Administrator 2018, and then press Enter.
Windows 7 users should go to Start > All Programs > Bluebeam Software > Bluebeam Administrator.
- If Revu is currently open:
- Click the Revu tab.
- Click Reset Settings.
- Select Yes to reset your settings.
Restoring Your Settings from a Backup
- Make sure Revu is currently closed.
-
Go to Start > All Programs > Bluebeam Software > Bluebeam Administrator.
In Windows 10 and 8.1, click or press Start
and type Bluebeam Administrator.-Or-
Go to Help > Administrator in Revu.
- Click the Revu tab.
- Click Restore Settings, and then locate and select the Zip (.zip) file of the backup.
- Click Open
- Close the Bluebeam Administrator by clicking Apply and OK.
Advanced Settings
You only need to complete these steps if you’ve configured these options in Revu or the plugins.
Custom Page Sizes for the Bluebeam Printer and plugins
- Open the Bluebeam Administrator.
- Click the Net Config tab.
- Double-click on the path next to Printer Driver.
- Copy the file prtPages.xml to the same location as the rest of your backup.
Custom Page Setups for the plugins
- Open the Bluebeam Administrator.
- Click the Net Config tab.
- Double-click on the path next to Global Page Setup.
- Copy the files *.plugin.xml to the same location as the rest of your backup.
E-mail Templates
- Open the Bluebeam Administrator.
- Click the Net Config tab.
- Double-click on the path next to E-mail Templates.
- Copy all the files in the folder to the same location as the rest of your backup.
Exporting and Importing a Digital ID
Digital IDs cannot be backed up in the same way as tool sets, profiles, and other Revu settings. However, some Digital IDs can be exported as .pfx files, then imported to a new computer. Please note that this is a manual process.
To get started, identify the type of Digital ID that you have from the list below:
- Personal Information Exchange (*.pfx) file.
- Windows Certificate Store ID
- Third Party Certificate Authority (CA)
If you have a .pfx certificate file, then you can export that file by saving it locally on your machine. If you have a Windows Certification Store ID, it may be exported from the Certificate Export Wizard. For any third party CA certificates, please contact the CA for their preferred method of transfer and import.
Exporting a .pfx File
- Find the location of the certificate file on your PC.
- Copy the file and save it to the other machine.
Importing a .pfx File
- Locate the certificate .pfx file on your machine.
- Open the file. This will produce the Windows Certificate Import Wizard.
- Under store location, select Local Machine and click Next.
- Specify the file name in the correct field. Click Next.
- If applicable, enter the Password and select the import options. Click Next.
- Specify additional settings (if applicable) and click Finish. Your certificate is now imported.
An Important Suggestion
How-To
Revu 20
Revu 2019
Revu 2018
Revu 2017 & Below
Preferences