Certify a document
Documents can be certified, usually by the person who created it or by the first signer, as being authentic. Additionally, certifying a document prevents signers from making changes to its page content, though the certifier has the option to allow other limited changes to the document, including the addition of markups, the completion of form fields, or the application of digital signatures. As such, documents should be certified only when they're complete, including after all digital signature fields have been added.
Certified documents can't be combined with other documents. Combine documents before certifying, or use Sets to view separate signed PDFs as a single collection. Certified documents can be added to a PDF package.
Certified documents can't have pages inserted into them, nor can pages be extracted from certified, multi-page documents.
Certified documents are automatically locked for editing, and their security status can't be changed unless the certification is cleared. Operations that would change the document—adding or deleting pages, flattening markups, running OCR, or adding new form fields—aren't permitted or available for these documents.
There are two ways to certify a PDF, depending on whether or not you are also a signer on the document.
Certified documents will show a certification statement on the document's Properties panel that can be reviewed at any time. Additionally, when opening a certified document a dialog will appear prompting the reader to open the Properties panel in order to review the certification statement.
Using this process, you can certify the document and sign it at the same time.
-
Select the desired signature field. The Sign dialog appears.

- Choose a Digital ID.
- For PKCS #12 IDs, enter the Password and select Log in.
Windows Certificate Store IDs do not require a separate password as they are protected by the user's Windows login.
-
Select Document Certification and choose one of the Permitted changes after certifying options:
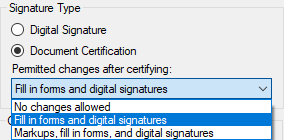
- No changes allowed: No changes are permitted and no other signatures can be added.
- Fill in forms and digital signatures: Form fields can be completed and signatures added, but no other changes are permitted.
- Markups, fill in forms, and digital signatures: Markups can be added, form fields can be completed and signatures added, but no other changes are permitted.
- Complete any of the desired Options fields.
- Select an Appearance for your signature.
- Select OK. A Save As dialog appears. Signed documents must be saved at the time of signature.
- Enter a file name and select the location for the signed file, and select Save to save the signed PDF.
The person who certifies a document doesn't necessarily need to be one of the signers. Remember, a PDF can't be certified after it's been signed by any party, so if the document is to be certified, do so before sending it out for signatures.
To certify a document without signing it, follow these steps:
-
Go to Tools > Signatures >
 Certify Document. The Sign dialog opens.
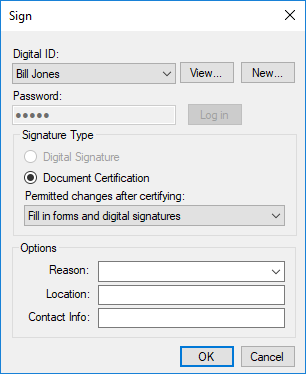
- Choose a Digital ID.
- For PKCS #12 IDs, enter the Password and select Log in.
Windows Certificate Store IDs do not require a separate password as they are protected by the user's Windows login.
-
Select Document Certification and choose one of the Permitted changes after certifying options:
- No changes allowed: No changes are permitted, including the application of digital signatures. Select this option only if the document does not need to be signed.
- Fill in forms and digital signatures: Form fields can be completed and signatures added, but no other changes are permitted.
- Markups, fill in forms, and digital signatures: Markups can be added, form fields can be completed and signatures added, but no other changes are permitted.
- Complete any of the desired Options fields.
- Select OK.
A document certification can only be cleared by the person who certified it. If this person was also the first signer, that signature is cleared at the same time. Any other signatures placed on the document automatically have their validation status revoked.
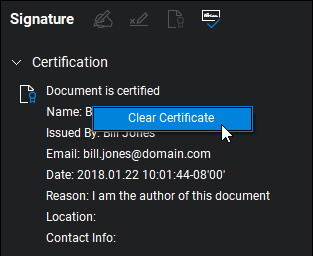
To clear a certificate, follow these steps:
- Go to Window > Panels >
 Signatures or press ALT+4.
 -
Right-click the certification notice and select Clear Certificate.