Manage self-signed digital IDs
Before you can digitally sign or certify a document, you need a digital ID in Revu. If you don't have one already installed on your computer, you can purchase one from a trusted Certificate Authority (consult the documentation that accompanies it to install the digital ID; Revu will automatically detect digital IDs installed in eTokens, USB dongles, or in your Windows Certificate Store) or you can create one in Revu (also known as "self-signed"). You will only need to do this once.
This topic discusses the creation and management of self-signed digital IDs. If you purchase a digital ID from a third-party Certificate Authority, you shouldn't need to create a digital ID in Revu. If you're uncertain whether you should use a self-signed digital ID or a digital ID purchased from a third-party Certificate Authority, the Digital Signatures Tutorial discusses the merits of both options.
If you already have a PKCS #12 self-signed digital ID on your computer and wish to use it in Revu as well, you can import it instead of creating another one.
After creating your self-signed digital ID, you must export your public certificate so you can send it to recipients of your signed and/or certified documents.
In addition to creating a self-signed digital ID, this topic answers questions like how to change the password for digital IDs or how to delete them. For information about controlling the appearance of the signature on documents, see Customizing the Appearance of a Digital Signature.
Generally speaking, self-signed digital IDs are sufficient for personal use and small-to-medium businesses, though it is recommended that you limit their use to parties that are already known to each other and have established a measure of mutual trust. When using a self-signed digital ID, you are essentially vouching for yourself.
Before others can recognize your self-signed digital ID, you must export your public certificate and send it to them, at which point they must install it. If somebody has sent you a public certificate and you wish add them to your Trusted Identities Store, you must import their public certificate.
To create a new, self-signed digital ID, follow these steps:
-
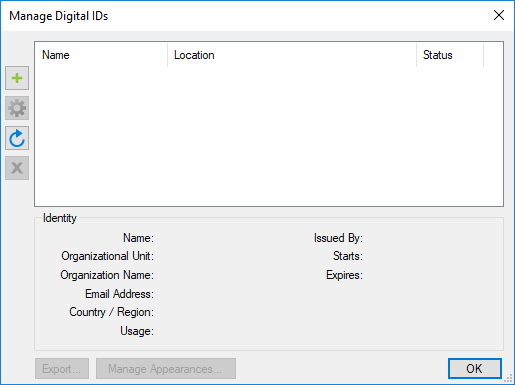
Go to Tools > Signatures > Digital IDs. The Manage Digital IDs dialog appears.
-
Select
 Add Digital ID. The New Digital ID dialog appears.
- Select one of the available Create Digital ID options:
- Create Digital ID file: Creates a digital ID in the PKCS #12 format. It is protected by a separate password that is defined at the time of creation.
- Create Digital ID in Windows Certificate Store: Creates a digital ID in the Windows Certificate Store. It is protected by the user's Windows login.
Since it relies on a user's Windows login credentials, Windows Certificate Store is not recommended for environments with shared login credentials. Additionally, the Windows Certificate Store is Windows-only while PKCS #12 is compatible with both Windows and Mac OS. - Enter the Identity information, as desired. Name and E-mail Address are required fields.
-
If Create Digital ID file was selected, enter and confirm a Password under PKCS #12 Options. This password will be used to confirm the user as the signer of a document, so use a sufficiently secure password.
Keep your password in a secure place. By design, passwords for these types of digital IDs cannot be retrieved or reset if lost. In the event that you lose your password, you will need to create a new digital ID. - Select OK.
The new digital ID now appears in the Manage Digital IDs dialog box. See Customizing the Appearance of a Digital Signature for more information about controlling the appearance of the signature on documents.
You can change the password for a self-signed, PKCS #12 digital ID file from the Manage Digital IDs dialog box. Because digital IDs stored in the Windows Certificate Store are linked to your Windows login credentials, their passwords change when those credentials change. They cannot be changed in Revu.
To change the password for a self-signed digital ID, follow these steps:
- Go to Tools > Signatures > Digital IDs. The Manage Digital IDs dialog appears.
-
Right-click the desired PKCS #12 digital ID and select Change Password.

-
In the Change Password dialog, enter the requested information.

-
Select OK.
Changing the password of a digital ID automatically logs you in with that ID. If that is not desired, right-click the ID and select Logout to log out of the ID.
Self-signed digital IDs created in Revu can be deleted from within Revu.
To delete a self-signed digital ID, follow these steps:
- Go to Tools > Signatures > Digital IDs. The Manage Digital IDs dialog appears.
- Select the digital ID you want to delete.
Check the Identity details to confirm that it is the desired digital ID.
- Select the
 Delete Digital ID button. Digital IDs in the Windows Certificate Store that were not created in Revu cannot be deleted from within Revu and the Delete Digital ID button will not be available for them. These digital IDs should be deleted from the Windows Certificate Store.
 - If the digital ID being deleted is a PKCS #12 digital ID file, you will be prompted for its password. Enter the password and click OK to complete the deletion.
- If you've lost the password, you can delete the digital ID file manually. Navigate to its location as shown in the Location column of the dialog box (if the path is too long to view completely, hover the mouse cursor over it to show the full location) in Windows Explorer and delete it from that folder. Afterward, return to Revu and repeat this procedure to remove it from Revu.