Use the Snapshot Tool to create custom markups
This article applies to:
- Revu 21
- Revu 20
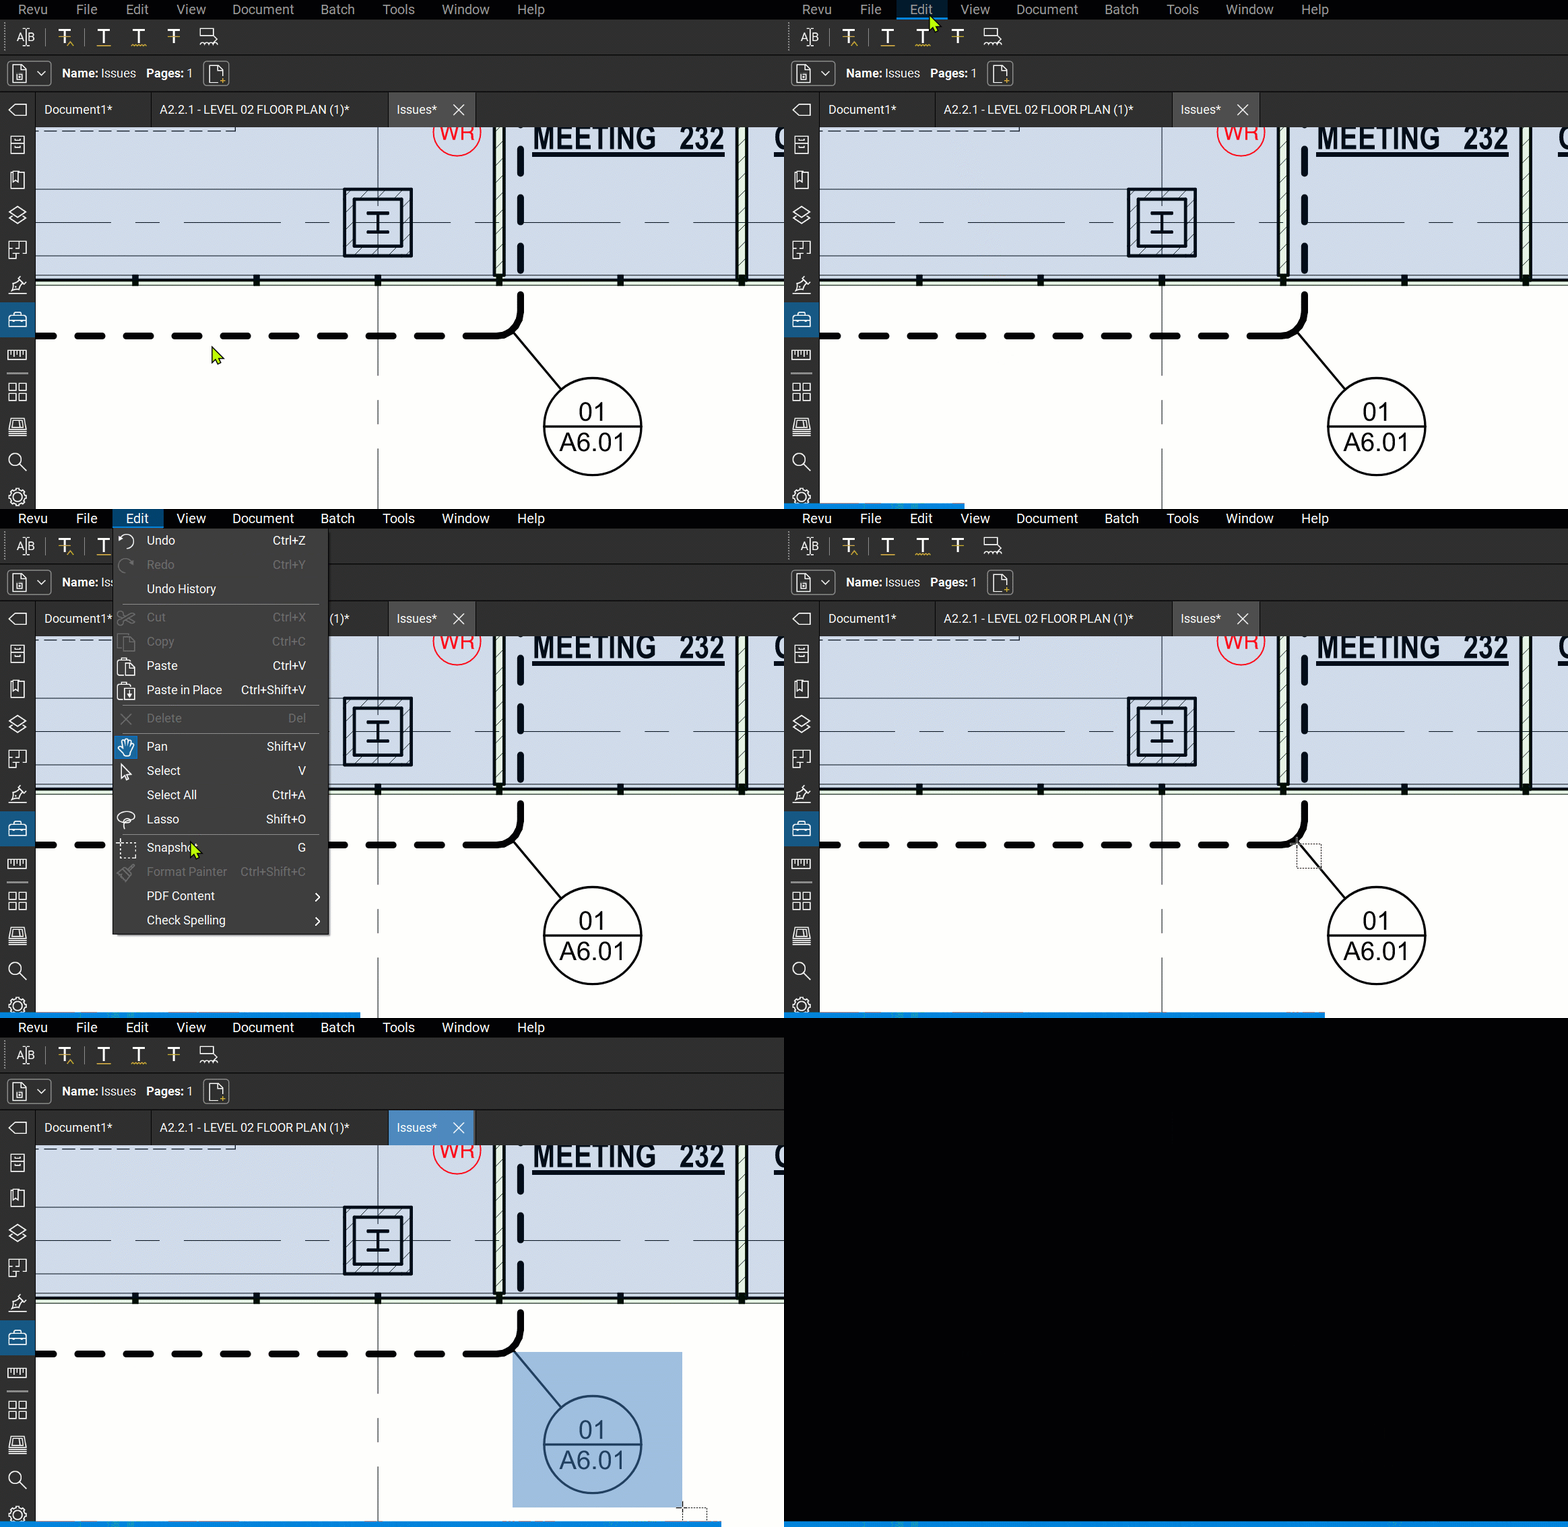
The Snapshot tool allows you to copy text, raster, or vector data from your PDF to the clipboard. Pasting the snapshot onto a PDF in Revu creates a new, vectorized image, allowing you to adjust properties like size and color. If you would like to save the snapshot as a markup, you can also add it to the Tool Chest for later use.
Taking a snapshot
- Go to Edit >
Snapshot (G).
If you do not want to include markups in your snapshot, go to Edit > PDF Content > Snapshot Content (shift-G) to take a snapshot of only the PDF content. - Set and drag the cursor to form a rectangle around the desired area. Additionally, you can set points to define a polygonal shape around the area. The selected area flashes blue when a snapshot has been taken.
 When you're in Snapshot mode, set-and-drag the cursor to form a rectangle around the desired area.
 - Press ESC to exit Snapshot mode.
- Paste the snapshot to desired area by going to Edit > Paste (Ctrl + V).
- Adjust the position or orientation of the snapshot as needed.
Formatting and saving your snapshot to the Tool Chest
- To adjust the colors of your snapshot, right-click the snapshot and select Change Colors.
Adjusting the color of a snapshot works much like adjusting the colors of a PDF. See Color Processing to learn more.
- After adjusting the properties of your snapshot, save it to the Tool Chest by right-clicking the snapshot and selecting Add to Tool Chest > (desired tool set).
 Customize and save your snapshot to the tool chest.
You can now use your snapshot as a markup for your documents whenever you need it.
How-To
Revu 21
Revu 20
Markup
The snapshot tool allows you to copy text, raster, or vector data from your PDF to the clipboard. Pasting the snapshot onto a PDF (within Revu) creates a new vectorized image, allowing you to adjust properties such as size and color. If you would like to keep the snapshot for use as a markup, you can also add it to the Tool Chest for later use.