When you start a Studio Session you will configure the Session permissions and will be given the opportunity to add documents and invite users as well. Permissions can be changed, documents can be added, and users can be invited after the Session has been created as well.
You will need a validated Studio account to create a Studio Session. If you have not established one yet, do that first.
- From the Studio tab, go to
 Start >
  New Session. The Start Studio Session dialog box appears.
If you have not already created an account, the Create Studio Account dialog box appears instead. Create a Studio Account before proceeding.
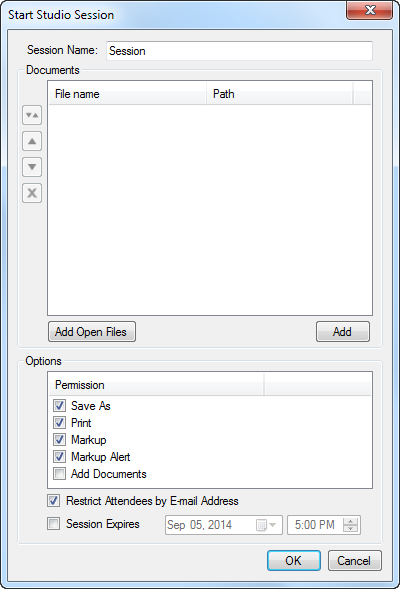
- Enter a name for this Session in the Session Name field. The name does not have to be unique.
-
Click Add to select PDFs to include in the Session, or click Add Open Files to add the files that are currently open in Revu. Files can be added later, as well.
Note: Adding a PDF with a Legend to a Session will cause the Legend to appear as a Snapshot for as long as it is in the Session. Once the PDF is taken out of the Session, however, the Legend will resume normal functionality and will automatically update to represent changes made to the PDF while it was in the Session.
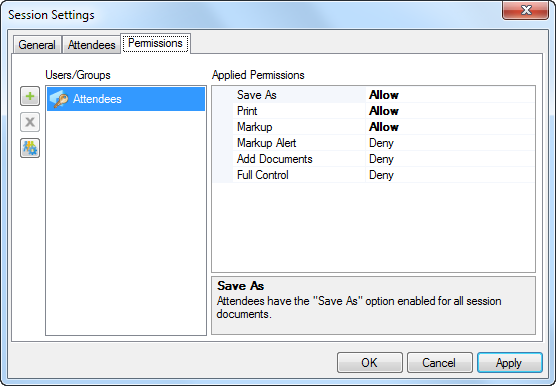
- Select the desired options from the Permission list. These will apply universal permissions to all Attendees. Check Save, Print, Markup, Markup Alert, or Add Documents to allow Attendees those permissions by default or uncheck them to remove those permissions from Attendees by default.
- Universal permissions are automatically applied to all attendees who are not subject to individual or group permissions, which can be set up after the Session has been created.
- Universal permissions are automatically applied to all attendees who are not subject to individual or group permissions, which can be set up after the Session has been created.
- To restrict access to the Session by email address, select Restrict Attendees
- To set an expiration date for the Session, select Session Expires and enter the desired expiration date and time. Expiration dates must be in the future; Revu will not allow a back-dated expiration date.
-
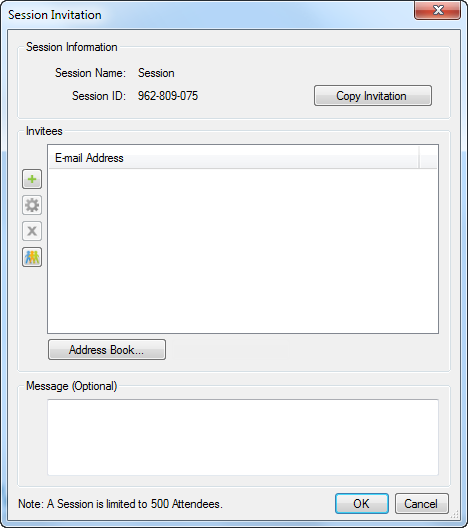
Click OK to save the settings and upload the files. The Session Invitation dialog box appears.
Inviting somebody to a Session automatically adds them as an Allowed Attendee in the Session Settings
- The
-
To add invitees from the address book of your default email program, click Address Book.
Note: The email program must be MAPI compliant for Revu to access its address book. The address books from web-based email like Gmail, Hotmail or Yahoo cannot be accessed.
- To add invitees

- To add all the members of an existing Group, click
 . When the Select Groups dialog box appears, select the desired Group and click OK.
 - To change the email address of an invitee, select the entry and click

- To remove an invitee, select the entry and click

- Enter a Message to add to the invitations, if desired.
- Click OK. Email invitations will be sent to all the invitees from the Studio server.