Advanced Preferences
The Advanced Preferences contain settings for the rendering of documents in Revu, as well as JavaScript and PDF/A settings. Select Advanced from the Preferences dialog box to view or modify these preferences.
To open the Preferences dialog box, go to Revu > ![]() Preferences.
Preferences.
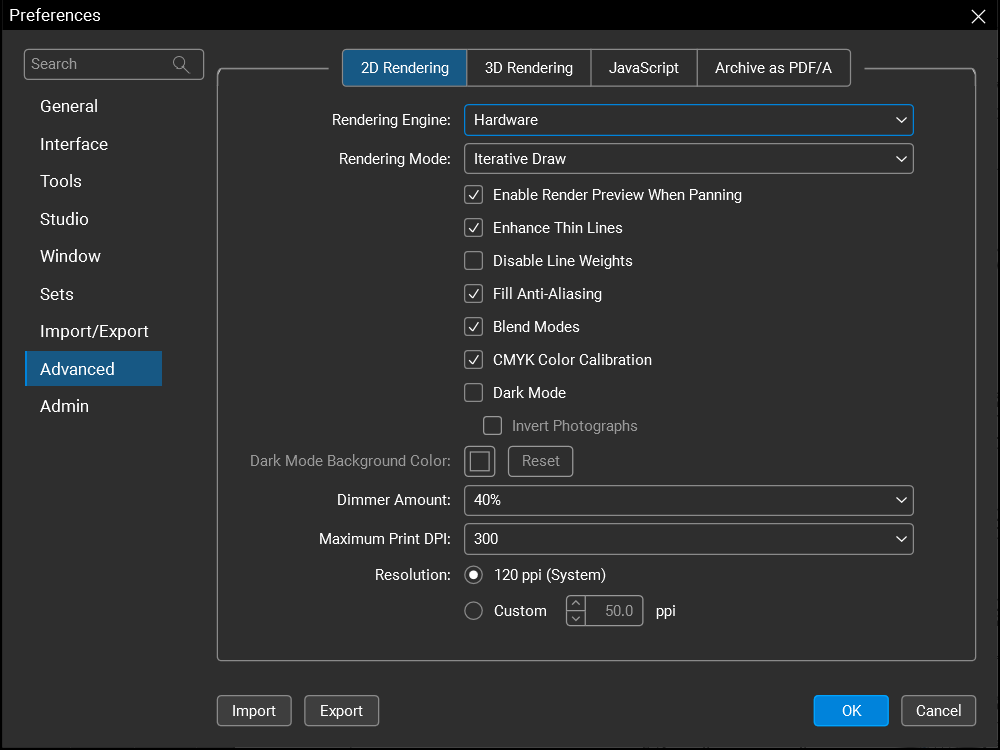
Rendering Engine: Determines which rendering engine is used on 2D drawings. The choices include a hardware option or one of two software options. If one rendering engine is not working to an acceptable level, switching to another might resolve the issue.
Rendering Mode: Determines how Revu will handle updating the main workspace, for example during panning and zooming operations. The options are:
-
Wait for Completion: Avoids updating the screen until the document is ready to be drawn in full detail.
-
Iterative Draw: Updates the document at increasing resolutions until it is drawn in full detail.
Enable Render Preview When Panning: When enabled, a lower resolution version of the current document is shown during panning and zooming operations. Once the operation is complete, the image will adjust to full resolution according to the selection made in Rendering Mode. This can be especially useful when panning around drawings while zoomed in.
Enhance Thin Lines: When enabled, Revu enhances the resolution of certain vector elements. If vectors appear too thick, disable this option.
Disable Line Weights: When disabled, Revu uses the line weights defined in the PDF when showing documents in the workspace. When enabled, a method will be used to determine an optimal line thickness based on the screen resolution and zoom factor of the workspace.
Fill Anti-Aliasing: When enabled, Revu attempts to automatically fill in the appearance of thin lines and certain fill-in patterns. This is particularly useful if thin lines are disappearing when zoomed out on a drawing.
Blend Modes: When enabled, shows blend modes or transparencies in the main workspace, allowing for a true representation of line merged or blended PDFs. Performance may be slower with this option enabled, however.
CMYK Color Calibration: When enabled, Revu attempts to show CMYK colors in a uniform manner. If colors are not shown as expected, disable this option.
Dimmer Amount: Sets the intensity of the underlying image when the Dimmer is enabled. Setting this value to a lower number makes annotations stand out more prominently.
Maximum Print DPI: Sets the printing resolution in dots per inch. 300 dpi is recommended for faster printing.
Resolution: Determines the screen resolution in dots per inch. Use this setting to match the rendering DPI to your monitor's resolution.

Rendering Engine: Sets the rendering engine as either DirectX (Software), DirectX (Hardware), or Disabled. Choosing (Hardware) will utilize the workstation's graphics processor (GPU) to aid in rendering. To disable 3D content rendering, causing it to not be shown by default, select Disable.
Enable Double-Sided Rendering: Renders both the front and back of a 3D surface. Enable this setting if 3D surfaces are appearing and disappearing as the model is rotated.
Enable Backside Lighting: Computes lighting on both front and back sides of faces. This can be helpful on models that are not closed or have incorrectly oriented faces.
Autohide selection occlusions: When enabled, Revu automatically hides parts of a 3D model that would obscure the user's view of a selected part.
Fit part on selection: When enabled, selecting a part of a 3D model on the 3D Model Tree that is not currently visible in the workspace causes Revu to automatically adjust the view to be on that part.
Show 3D Hover Bar:Controls whether or not to show the floating toolbar over the 3D model view in the PDF. If disabled, the functionality is still available in the 3D Model Tree tab.
Show 3D Orientation Axis: Shows the X-Y-Z axis as three colored lines in the lower left corner of the 3D view.
Show 3D Rotation Center: Shows a crosshair at the center point when rotating the 3D view.
Default Modal Navigation: Sets the default mouse interaction.
Markup Indicator Size: Sets the size of the blue markup indicators that show where markups have been added to a 3D view.
Animation Frame Rate: Sets the number of frames per second Revu will attempt to render. The higher the number, the more taxing the 3D viewing process will be on the workstation. If a high-end graphics processor is present in the workstation, this value can be set to Unlimited.
View Transitions: Enables a smooth camera move from one predefined view to the next. Set the time value to control the length of time it takes to move from one predefined view to the next. The default setting 0.7 seconds. To make the transition go slower, increase this time value.
Rotate - Revolution Time: When in Rotate Animation mode, this value sets the time is takes in seconds to complete one complete rotation of the model. The default setting is 10 seconds.
-
To make the rotation go slower, increase this number.
-
To make the rotation go faster, decrease this number.
-
To make the rotation continuously play, select Loop.
-
By default the rotation moves counterclockwise. To rotate clockwise, select Reverse.
Cycle Views - Delay time: When in Cycle Views Animation mode, this value sets the time the view will display on the screen before transitioning to the next view. The default setting is 2 seconds.
-
To make the delay longer, increase this value.
-
To continuously repeat the sequencing through the views, select Loop.
-
To reverse the order of the view sequencing, select Reverse.

Enable JavaScript: When enabled, JavaScript is enabled for all PDFs opened in Revu and most JavaScripts will be allowed to run. Some JavaScript functionality is normally repressed for security reasons, even when JavaScript is enabled. To allow these to run on trusted PDFs, see Trust Certified Documents below.
If JavaScript is disabled and a PDF containing JavaScript is opened, the user is prompted to enable JavaScript before viewing the PDF.
This option is enabled by default.
Trust Certified Documents: When enabled, Revu allows PDFs that it recognizes as "trusted" (either because they have been specifically designated at such or because they are in a "trusted" folder) to execute JavaScript functionality that is normally disallowed for security reasons, including having the ability to read local files and access the Internet.
If JavaScript is not enabled for Revu, no JavaScript functionality is allowed, even for documents in the Trust Certified Documents list. Enable JavaScript must be selected for this feature to work.
- Select Add > File.
- Navigate to and select the desired PDF, and select Open. The file is added to the Trust Certified Documents list.
This action causes Revu to automatically trust PDFs found in the designated folder, including PDFs placed there after the folder has been added to the Trust Certified Documents list. Additionally, PDFs that were in the folder and were thus "trusted" at one point will no longer be trusted if they are removed from the folder.
- Select Add > Folder.
- Navigate to and select the desired folder, and select Select Folder. The folder is added to the Trust Certified Documents list.
- Select the desired file or folder.
- Click Delete.
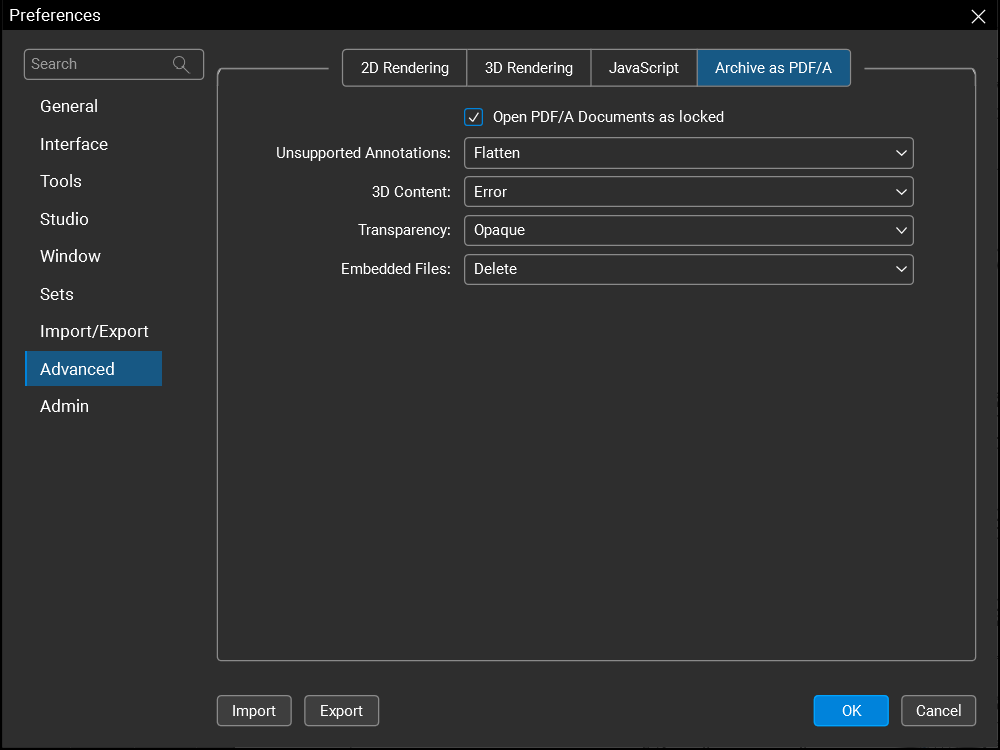
Open PDF/A documents as locked: When enabled, PDF/A files are opened as locked for editing. This prevents the file from being changed and voiding the PDF/A compliance. Locked PDF/A files can be unlocked so it can be edited.
Unsupported Annotations: Determines how Revu should handle unsupported markups upon PDF/A creation. The options are:
-
Flatten: Moves the annotation into the content of the PDF, if possible.
-
Delete: Removes the annotation from the PDF.
-
Error: Generates an error in the report, but the annotation will not be changed.
3D Content: Determines how Revu should handle 3D content, which PDF/A does not support, at the time of PDF/A creation. The options are:
-
Delete: Removes the 3D content from the PDF.
-
Error: Generates an error in the report, but the 3D content will not be changed.
Transparency: Determines how Revu should handle transparency, which PDF/A does not support, at the time of PDF/A creation. The options are:
-
Opaque: Drops the transparency and makes the object opaque or solid.
-
Error: Generates an error in the report, but the annotation will not be changed.
Embedded Files: Determines how Revu should handle attached files, which are not supported by PDF/A, upon PDF/A creation. The options are:
-
Delete: Removes the embedded file from the PDF.
-
Error: Generates an error in the report, but the file will not be removed.