Studio Project Tabs
Studio Projects open in their own document tabs in the main workspace beside any PDFs and WebTabs that are also open and it is there that you interact with Project files. You can have more than one Project open at a time, if needed. If you are the Host of the Project, tools for managing the Project will also be found on this tab.
This page discusses Project tabs. For the other Studio interactions, see The Studio Panel and The Studio Panel in a Session.
When you select  Projects on the Studio Panel, your Studio Projects are shown in two lists: Joined, which shows Projects that you have previously joined, and Not Joined, which shows Projects to which you have been invited but not yet joined.
To open a Project that you have previously joined, select it from the Joined list. Doing so will open the Project tab in the main workspace. Using Studio Project tabs is discussed below.
If the Project you want is in your Not Joined list, you need to join it before you can open it. To do so, select the associated Join link; you will automatically join the Project and the Project tab will open in the main workspace where you will be able to access its documents. See Using a Studio Project Tab below for more information. In the future, you will find the Project in your Joined list and you can reopen it from there. See Joining a Studio Project for more information about joining Projects.
It can be helpful to filter large Projects lists to find the one needed. Select  Filter on the Studio panel toolbar and select a filtering method.
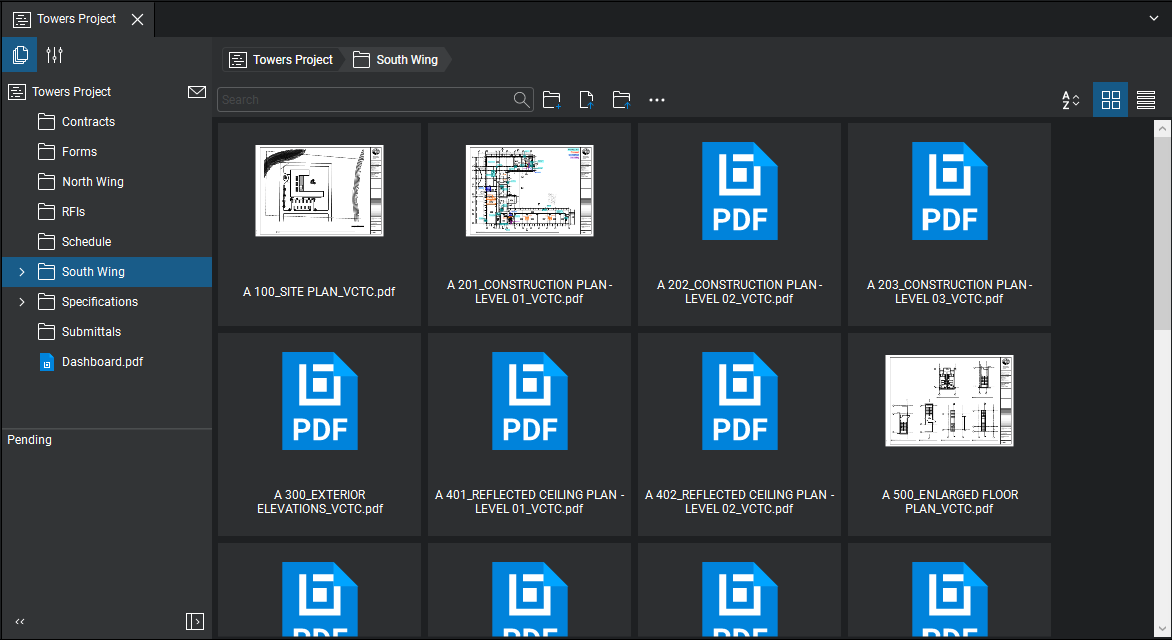
When viewing a Studio Project tab, there are multiple ways to navigate to Project files, including a folder tree on the left of the tab and either a thumbnail or list view on the right, depending on which is currently selected. A useful feature of the thumbnail view is that PDFs that have been cached to your local device will show a preview of the document, while uncached PDFs will show a generic PDF icon, making it easy to see which PDFs are ready to be viewed offline. You can cache additional files by opening them while online. For more information about working with the files in a Project, see Working with Files in a Studio Project.
Files and folders in Projects are tagged with a variety of badges depending on their current status. See Status Icons for Studio Files for more information about them.
If Open Project documents in Split-View is enabled in Studio Preferences, PDFs opened from the Project tab will automatically open in a vertical split view, allowing users to view PDFs and Projects side by side.
The following tools are available in a Project tab when viewing Documents:
-
 Project Settings: Select to access the Project settings available to you. All attendees can manage their Notification and Shared Link statuses. See Manage Studio Notifications and Managing Shared Project Files. Project Hosts have additional settings they can manage. See Defining Access and Permissions in Studio Projects for more information.
 -
 Invite: Select to open the Project Invitation dialog box to invite new users to the Project.
 - Add: Select to show a menu of upload options for the Project. Only users with permissions to upload files will have anything in this menu. Upload options include:
- New Folder: Creates a new folder in the root directory of the Project or as a subfolder of the selected folder (depending on what you right-clicked). Once selected, the New Folder dialog appears. Enter a name for the folder and select OK to create it.
- Upload Files: Uploads individually selected files to the root directory of the Project or to the selected folder (depending on what you right-clicked). Once selected, the Upload Files dialog appears. Select Add and select to upload either Files (by navigating to the desired files), Open Files (which automatically adds all PDFs currently open) or Open Set (which automatically opens the Set currently open).
- Upload Folder: Uploads the contents of a folder to the root directory of the Project or to the selected folder (depending on what you right-clicked). Once selected, the Select a folder to upload dialog appears. Navigate to and select the desired folder and select Select Folder.
This option recreates the selected folder in the Project and uploads the contents into that folder automatically.
- Actions: Shows a list of commands available to the selected Project file or folder. This list varies according to what is selected and is usually similar to the command list found in the right-click menu.
- Search bar: Use to search Project files.
-
 Sort: Determines the sorting method and order of Project files. An arrow appears beside the current sorting method, with the direction of the arrow indicating whether the sort is ascending or descending.
 -
 Thumbnails View: Shows Project files as thumbnails.
 -
 List View: Shows Project files in a list. The columns shown while in List View are configurable. Right-click any column header and select the desired columns: checked columns are shown, unchecked columns are hidden. Changes persist across all Projects.
 -
 Sync: Appears when the mouse is moved over a Project file or folder. Click to tag files or folders to be included in future synchronizations. See Synchronizing Project Files for more information.
Several Project-specific commands are available by right-clicking a Project in the Projects list.
- Open Project: Opens the Project in a new tab.
- Copy Project ID: Copies the Project ID to the clipboard.
- Manage Notifications: Opens a new WebTab to the Studio Enterprise portal in Revu.See How to Manage Studio Notifications for more information.
- Remove From List: Removes the Project from your Projects list. Does not delete the Project or affect the Projects list of other attendees.
- Delete (Project Owner only): Deletes the Project and its associated files from the Studio server. See Deleting a Project for more information.