Introduction
Thank you for your interest in leveraging Bluebeam support for single sign-on (SSO) to enhance security, improve the user experience, and reduce support costs. The step-by-step instructions in this document will help to ensure successful configuration of SSO leveraging the Microsoft OpenID Connect Protocol (OIDC) when using Microsoft Entra ID (formerly Azure Active Directory [AD]).
Configuring SSO requires that your organization has at least 100 seats on either a Basics, Core, or Complete Bluebeam Plan and that end users are using versions under Core Support (see Supported versions and support tiers).
If you have any questions regarding these instructions, contact us.
Overview
This guide covers how to set up your SSO configuration and the information that needs to be sent to/from Bluebeam and your organization’s Entra ID.
Important considerations before you begin:
- You’ll need the Active Directory Global Administrator to grant permissions for the application.
- Pay close attention to avoid any inconsistencies between the email of a user in your Entra ID and the email used in an existing Bluebeam ID (BBID), which can be caused by things like name changes or adjustments to account information. As part of the onboarding process for Bluebeam single sign-on (SSO), we will send you a CSV file that lists your organization’s users who currently exist in our system, including those who may be active Bluebeam Studio users. For SSO, Bluebeam matches according to email address, which must match the legacy BBID contained in the files we send.
Please let us know if you need assistance in matching any user email addresses. We can double-check the admin’s name/email with the Account Manager or consult the licensing system.
Prepare for setup
First, contact Technical Support to let us know you’ll be configuring SSO. Once you’ve been added in our system, you’ll see a new option in accounts.bluebeam.com that will allow you to securely submit the necessary information.
Inputs for home system
Within Azure, you’ll need to set up redirect URIs for users in their respective regions. You can either:
- Set up one configuration that contains multiple regions.
- Set up different configurations for each region in which you have users.
Use the table below to determine the redirect URI to set up in your Entra ID:
| Region | Redirect URI |
|---|---|
| U.S. | https://signin.bluebeam.com/oauth2/v1/authorize/callback |
| U.K. | https://signin.bluebeamstudio.co.uk/oauth2/v1/authorize/callback |
| Germany | https://signin.bluebeamstudio.de/oauth2/v1/authorize/callback |
| Sweden | https://signin.bluebeamstudio.se/oauth2/v1/authorize/callback |
| Australia | https://signin.bluebeamstudio.com.au/oauth2/v1/authorize/callback |
Outputs to send to the Bluebeam system
You’ll need to share the redirects you set up with the Bluebeam SSO Engineering team by logging into your Bluebeam Accounts Page and using our secure form to provide the following information:
- Client Secret Value.
- Application Client ID.
- OpenID Connect (OIDC) metadata file.
- Domains list (Bluebeam needs a list of all domains managed in your Entra ID.).
Configure your Entra ID
To set up Entra ID for OpenID Connect (OIDC):
- Go to The Microsoft Azure Portal.
- Click Microsoft Entra ID.
- Click App registrations in the sidebar. Then click + New registration.
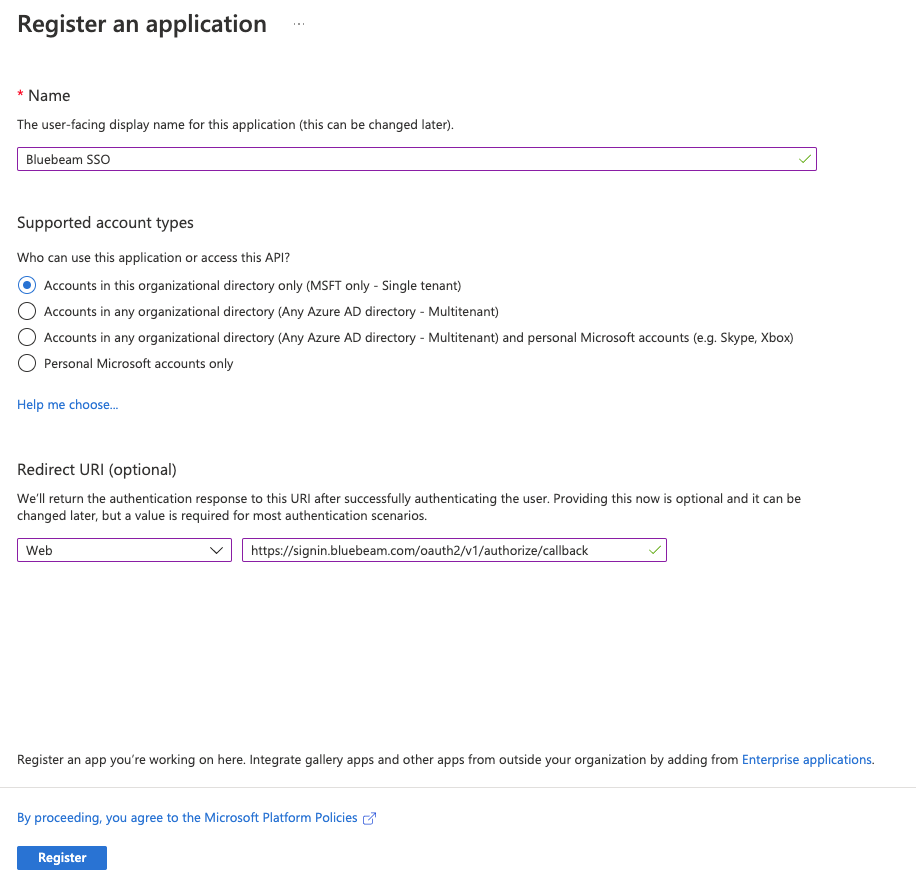
- Enter an application name (for example, Bluebeam SSO). Then:
- Under Redirect URI, select Web as the platform.
- Consult the chart above to find your Redirect URI and input the link.
- Click Register.
- Click Certificates & secrets in the sidebar. Then:
-
- Click + New client secret.
- Enter a Description.
- Set the expiration date.
The default expiration is six months. However, we suggest using the the maximum value of two years, if possible, based on your security needs.
- Click Add.
- Copy the Client Value into your notes.
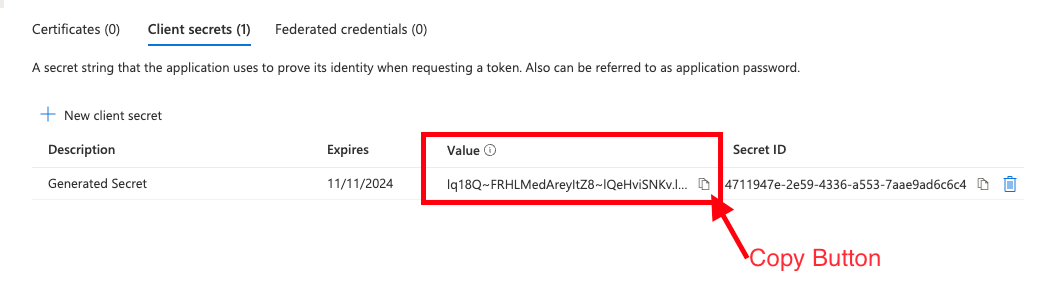 You will need the Client Value later. Open a text editing program, like Notepad or Word, to paste the Client Value you copied. You cannot retrieve this value later, so you should save and store it in a secure place.
-
- Click Overview in the sidebar, and:
- Under Essentials, copy the Application (client) ID into your notes.
- Click Endpoints.
- Copy and save the URL for OpenID Connect metadata document.
Format your OpenID Connect metadata document as:
https://login.microsoftonline.com/{tenant-id}/v2.0/.well-known/openid-configuration
- Click Token configuration in the sidebar. Then click + Add optional claim. Add the following claims to the ID token:
- Claim: family_name, Token type: ID
- Claim: given_name, Token type: ID
- Claim: preferred_username, Token type: ID
- Claim: email, Token type: ID
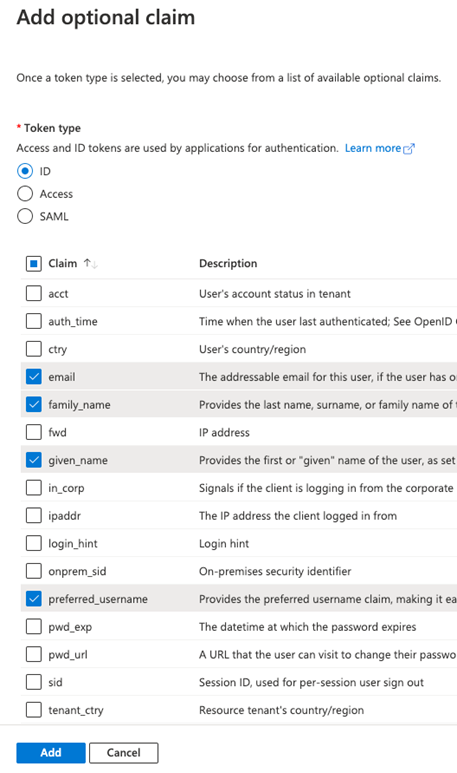 The token must have the preferred_username/email, first name, last name, username (i.e., email) Claims above for creating a user in the Bluebeam system. Please let us know if your system uses any other Claims.
 - Click API permissions in the sidebar, and click + Add a permission.
- Click Microsoft Graph at the top of the page. Then click Delegated Permissions.
You will need the Active Directory Global Administrator to grant these permissions for the application.
- Select checkboxes for the following OpenID permissions:
- openid
- profile
- Click Add Permissions.
- On the Configured permissions dialog, click Grant admin consent for <your organization>.
The image below illustrates the minimum required permissions to grant.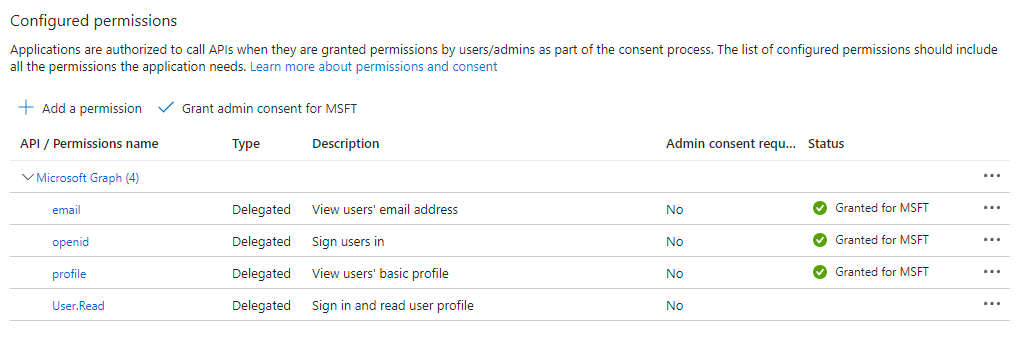
Restrict user access to SSO using “Users and groups”
Use the following procedure to either assign SSO access to all users in your Azure instance, or to assign SSO access to only a specified subset of users in your Azure instance.
- Go to https://portal.azure.com/.
- Select Microsoft Entra ID.
- Click Enterprise Applications in the sidebar.
- Select the Application you created (ex. Bluebeam SSO).
- Click Properties in the sidebar.
- If you want to allow SSO login for all users in your Active Directory, keep Assignment required? set to No.
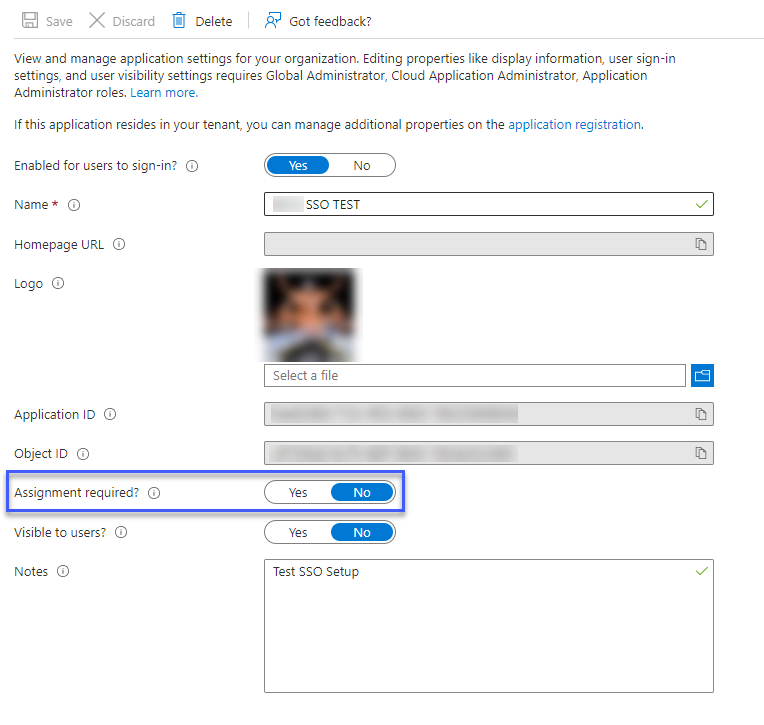
- If you want to restrict SSO login to specific users, toggle Assignment required? to Yes and:
- Use the Entra ID Users and Groups feature to assign SSO to those users.

- Notify the Bluebeam admin of this setting.
Bluebeam activates SSO across the entire domain. Not including a specific user from your AD will result in that user being restricted from logging in.
- Use the Entra ID Users and Groups feature to assign SSO to those users.
Submit information to Bluebeam
Once you’ve gathered all the information in the Outputs to send to Bluebeam’s systems section, you can submit them through our secure form. To submit:
-
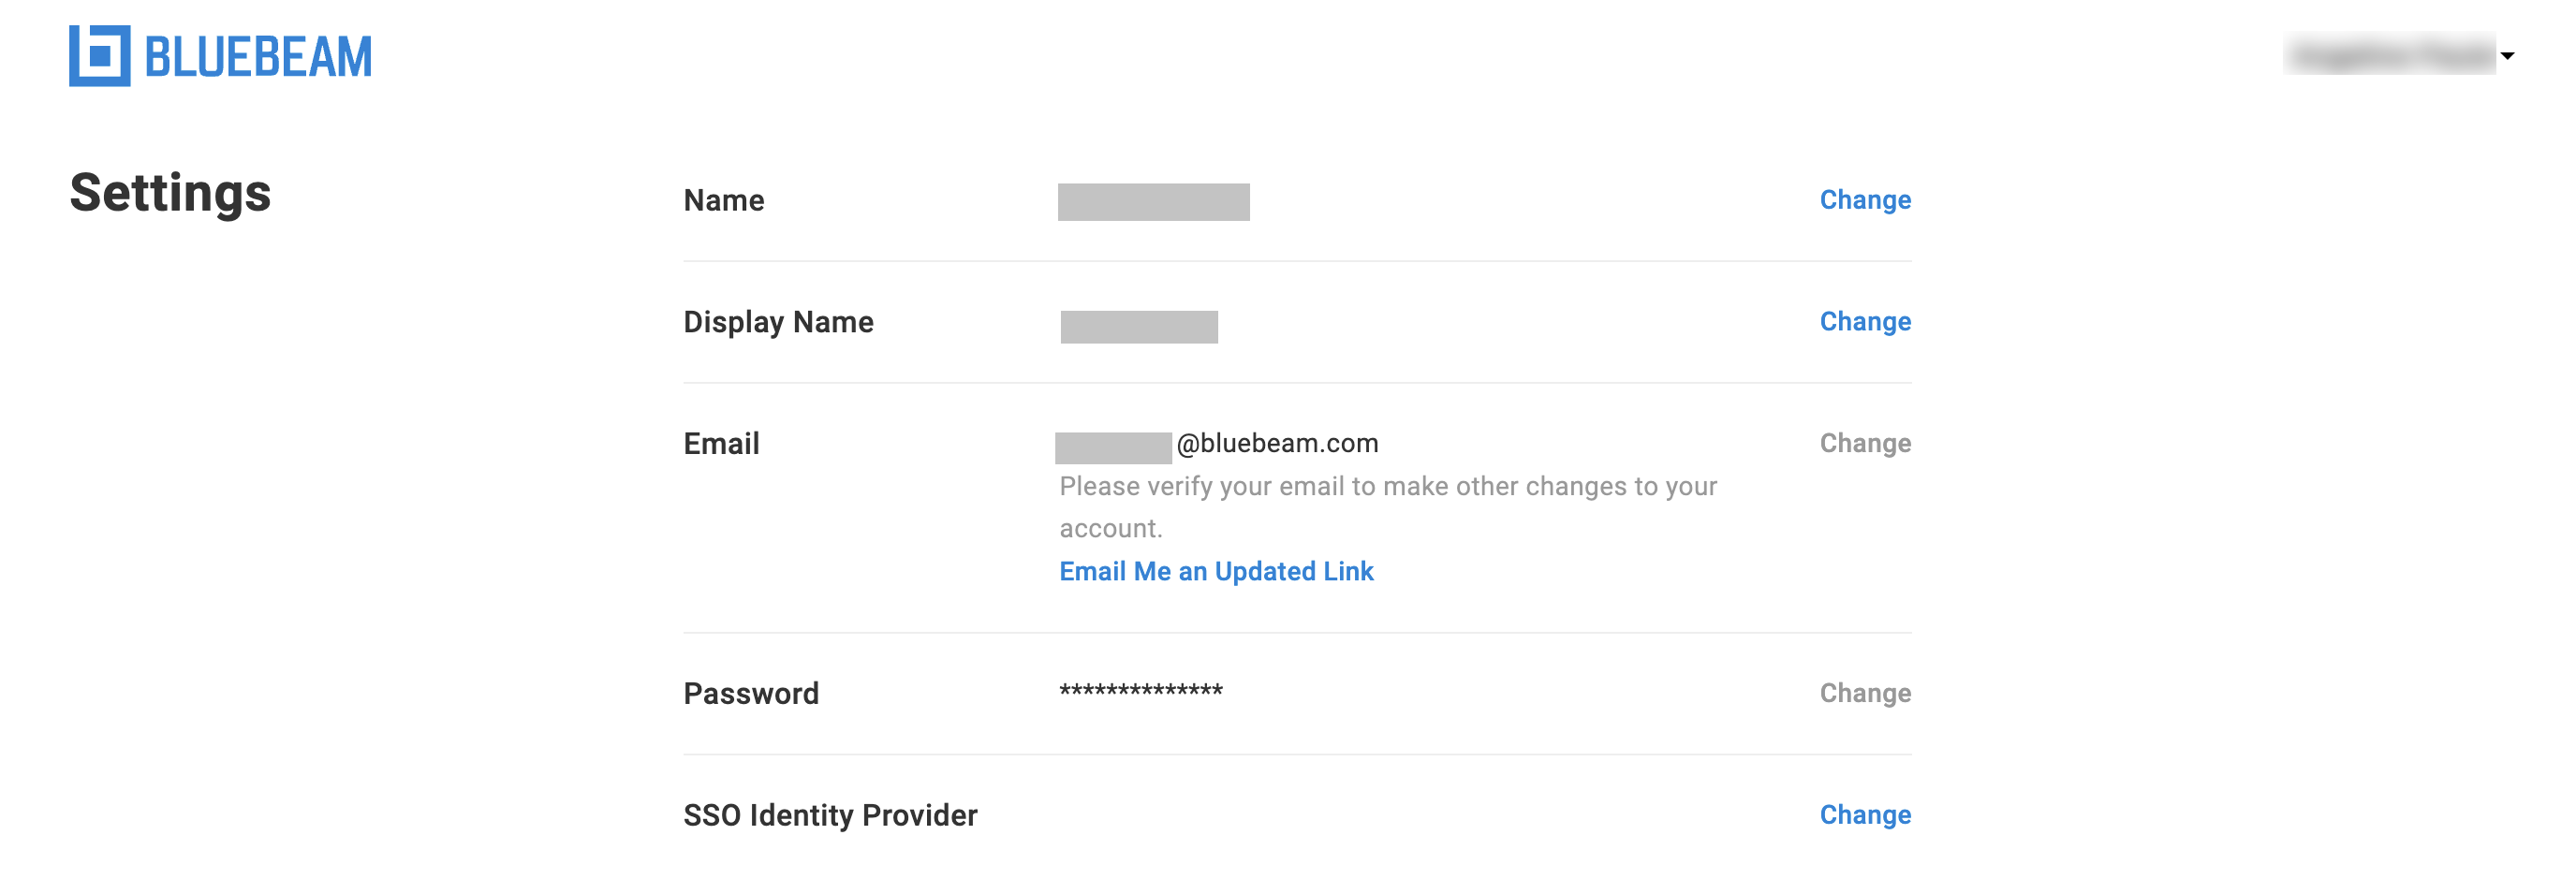
- Sign in to accounts.bluebeam.com with your BBID.
If you don’t see the SSO Identity Provider section, make sure you’re using the same BBID that you provided to Technical Support.
- Next to SSO Identity Provider, click Change.
- Select Azure as your Identity Provider. Then enter the following information for your organization:
- Company Name.
- Client Id (The Application (client) ID you copied when configuring your Entra ID).
- Client Secret (The Client Value you copied when configuring your Entra ID).
- Issuer (The Open ID metadata you copied when configuring your Entra ID).
- Domains list (separated by commas).
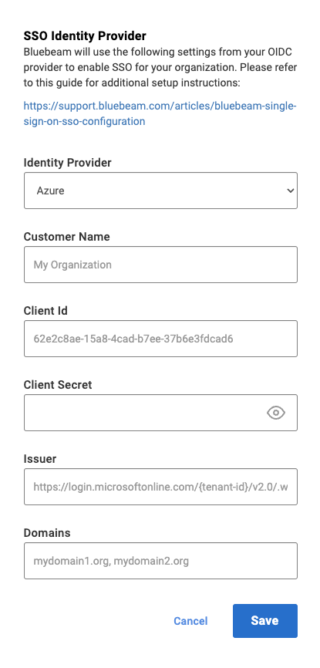
- When you’re ready to configure SSO, click Save.
Once submitted, this information will be reviewed by our internal teams, and Bluebeam Technical Support will reach out to coordinate an activation timeline.
How-To
SSO
Revu 21
Revu 20
Revu 2019
Revu 2018
Learn how to start configuring your Revu licenses for SSO with Microsoft Azure. - Sign in to accounts.bluebeam.com with your BBID.