Using an older version of Revu?
Applies to:
- Basics
- Core
- Complete
Add markups to the Tool Chest
The  Tool Chest stores custom markups so you can quickly add them to your PDFs without having to recreate them. The Tool Chest comes preloaded with several collections of markups called tool sets. You can create your own tool sets with individual or grouped markups and even share custom tool sets with other users.
To add a markup to the  Tool Chest:
- Open a PDF drawing in Revu.
- Click the Tool Chest (Alt+X).
- In the PDF, right-click the markup you want to save, click Add to Tool Chest, and then select the name of the tool set.
The following markups cannot be included in tool sets:
 Notes
Notes Hyperlinks
 File attachments
- Text editing tools (
 Review Text,
  Underline,
  Squiggly line,
  Strikeout, and
  Text Highlights)
  Symbols that already have a Sequence or Action defined.
Set custom markups as default
- Select a tool you would like to customize, such as the Text Box, Cloud, or Polyline tools.
- Right-click the markup, and select
 Properties (Alt+P).
 - Adjust the tool properties, such as the color, line size, or font-size, to your liking.
- Go to the bottom of the Properties Panel, and select Set as Default.
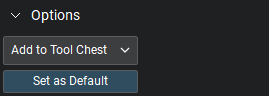
The customized markup tool appears with the default properties you set.
Group multiple markups and add them to the Tool Chest
Markup tools in Revu can be grouped together, allowing them to be moved, resized, copied, and added to the Tool Chest as an individual markup.
- Press and hold the Shift key to select multiple markups.
- Right-click one of the selected markups and click Group (Ctrl+G).
- Right-click the grouped markup, click Add to Tool Chest, and then select the desired tool set.
Create and import tool sets
You can create new tool sets to better organize the custom markups that you create. The new tool set will automatically display in the Tool Chest and will be available as an option when you click Add to Tool Chest.
Add a new tool set
- Click the Tool Chest dropdown at the top of the Tool Chest panel, then select Manage Tool Sets. The Manage Tool Sets dialog box appears.
- Click Add.
- Click New, enter a title, then click OK.
Add an existing tool set
You can also add a tool set that’s been imported or shared with you as an existing .btx file.
- Go to the
 Tool Chest panel and click the Tool Chest dropdown menu.
 - Select Manage Tool Sets, and the dialog box will appear.
- Click Add…
- Select Existing and enter the full/relative path to the .btx file, or click the Browse button to find the tool set on your computer.

Entering the full path will locate a .btx file on your local drive, while using a relative path will access a tool set according to its folder location. A relative path is helpful if you’re trying to add a tool set saved on a shared drive or in a DMS. - Under Options, ensure Display and Show In All Profiles are selected. Select Relative Path if you entered a relative path above.
- Click OK.
For more information about importing tool sets, visit How to share Tool Sets.
Properties mode vs. Drawing mode
Markups in the Tool Chest can function in two different modes. Drawing mode creates an exact copy of what you’ve added to the Tool Chest. Properties mode will create a new markup using the same visual properties of the original markup (i.e. color, shape, and size).
Double-click the icon in the Tool Chest to switch between modes. The icon will change to show the difference between the two modes.
Symbol view vs. Detail view
When you have several similar markups saved in your Tool Chest, it can be difficult to tell them apart when using the default  Symbol view.
 Detail view displays markups in a tool set alongside information like Subject, Comment, and Labels, making it easier to distinguish between them.
To change the display of a tool set:
- Click the
 Settings icon corresponding to your tool set(s).
 - Select either Symbol or Detail from the dropdown menu.
How-To
Revu 21
Markup