Creating and Editing the 3D Model Window
In Revu, 3D content always exists in a 3D Model Window. It is possible to resize and move that window with the 3D Editor.
- Go to Edit > PDF Content >
 Add & Edit 3D Content.
 - Click and drag a rectangle to define the area of the 3D model. The Open dialog box appears.
-
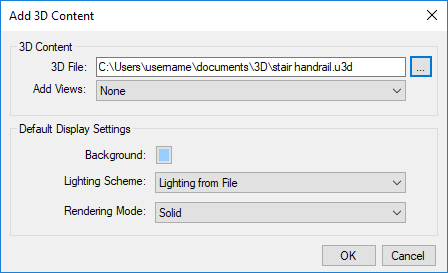
Navigate to and select the desired 3D content. Content should be in a Universal 3D (.u3d) or Industry Foundation Classes (.ifc) file. Click Open. The Add 3D Content dialog box appears.

- To add views to the 3D content, select the desired option from the Add Views dropdown list.
- Select the desired Default Display Settings. These settings can be manipulated later, if necessary.
- Click OK.
This procedure describes moving, resizing, and deleting 3D model windows. For other interactions, see Interacting with 3D PDFs.
- Go to Edit > PDF Content > Add & Edit 3D Content. The 3D Model Window will highlight in blue.
- To move a 3D Model Window, click and drag it to the desired location.
- To resize a 3D Model Window, click it, then click and drag any of the yellow control points.
- To delete a 3D Model Window, right-click it and select
 Delete.
 - When finished, press ESC or change to another tool.