Applies to:
- Revu 21
- Bluebeam Cloud
Using an older version of Revu? Please see the Bluebeam Gateway User Guide for managing Revu 20 & below licenses.
Overview
Welcome to the Bluebeam Subscription Management Portal, where account owners manage access for subscription-based Bluebeam solutions. The Subscription Management Portal allows the following permission levels:
- IT Admin: As an IT Admin, you can enable and manage SSO and SCIM for your organization. In addition, you can manage all users in the organization and domain names associated with it. This permission level allows you to allocate Bluebeam subscription seats, add or deactivate users, assign additional Org Admins and Limited Admins, and domain names.
The ability to configure SSO and SCIM is in an early access phase and only available if your organization qualifies. For more information, contact Support.
- Org Admin: As an Org Admin, you can manage all users in the organization and domain names associated with it. This permission level allows you to allocate Bluebeam subscription seats, add or deactivate users, assign additional Org Admins and Limited Admins, and domain names.
- Limited Admin: As a Limited Admin, you can manage only the new subscriptions you purchased for your account and can only create and manage users in that subscription. You can’t assign additional Org Admins, and you can’t manage domain names.
- End User: End users are users in your organization who use Bluebeam products and services. End users can’t use the features in the Subscription Management Portal. If you purchased seats to an existing subscription in the Webstore, you are automatically assigned End User permission levels.
After logging into the Bluebeam Subscription Management Portal, bookmark org-admin.bluebeam.com for future easy-access.
In this guide, we cover how to set up and manage your Bluebeam Plan account(s), so you and/or your team can access Revu 21, Bluebeam Cloud, and Studio with just a single BBID. No serial number or product key is necessary to get started.
Log into the Subscription Management Portal
To get started, log into the Subscription Management Portal:
- Type org-admin.bluebeam.com into your web browser.
- Select your server region.
- Enter your BBID and password.

Add a New Subscription User
To add individual new users to your account, select the account (or child account) then:
- From the left sidebar menu, select Users.
- From the top of the active window, select Users.
- Under Users and Current Plan, select Create New User to the right of User Overview.
- Select the Add New Subscription User tab, and provide the requested information on the form.
In addition to setting Permissions (IT Admin, Org Admin, Limited Admin, End User, as allowed by your permission level), you need to select the appropriate Server Region. By default, users are created in the server region where the account resides. However, if a user belonging to that account wants to use Revu in another server region (regardless of their actual location), you should create that user in the other server region. Doing so triggers an event to move that user’s entitlement to the other server region.
- After you finish entering the new user’s information, select Save.
- Select a plan for the new user.
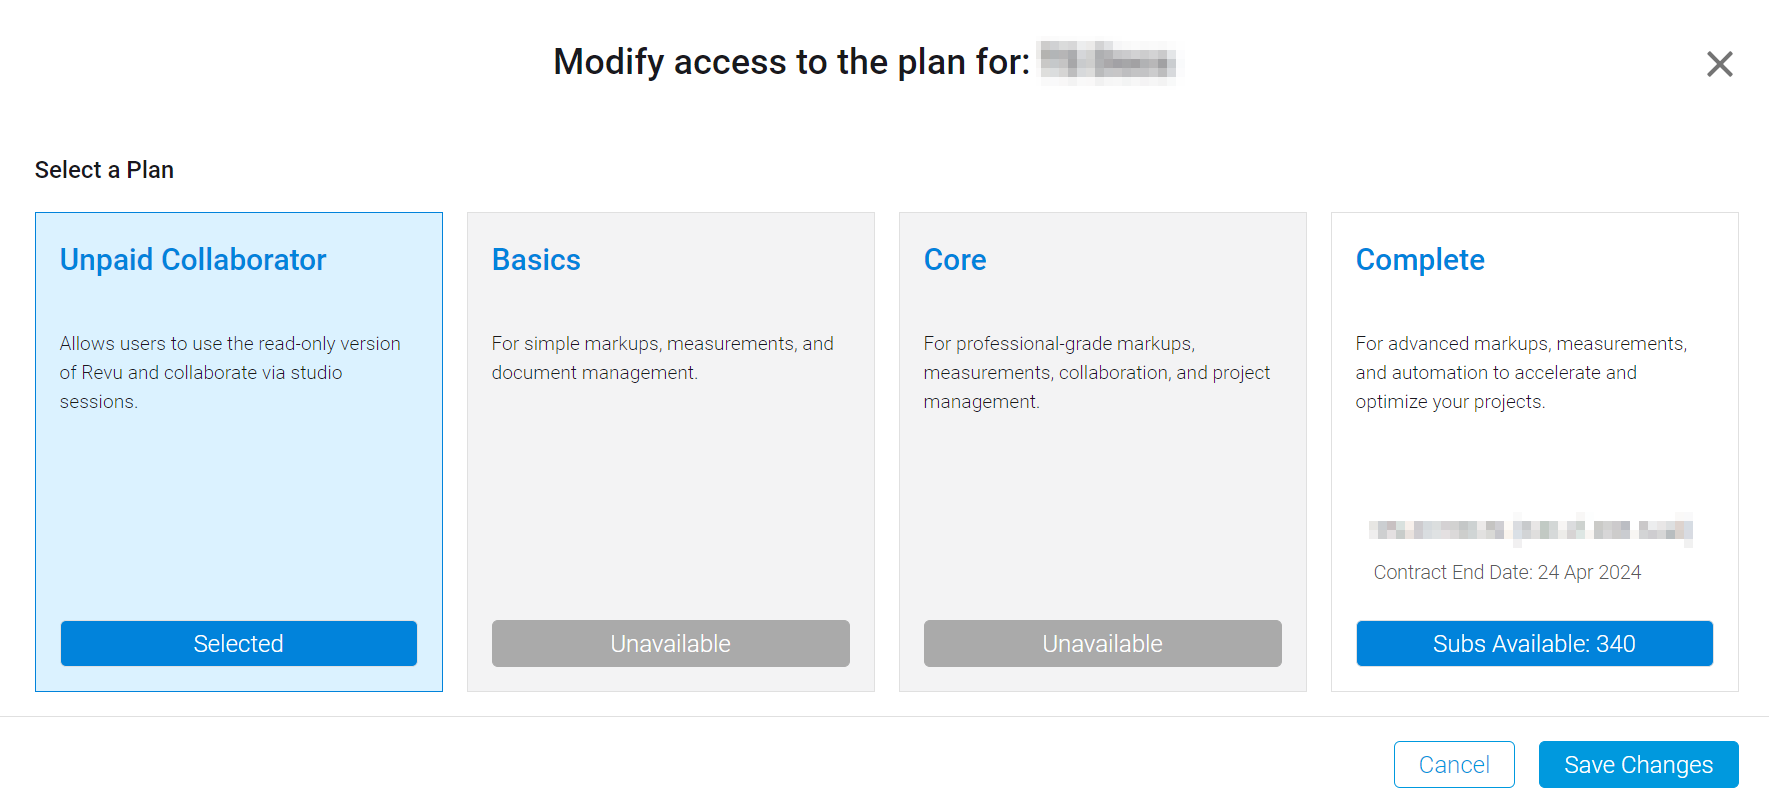
- Select Save Changes.
The new user will appear under User Overview with a Pending status until their account is activated via email invitation.
Bulk Add Users
Org Admins can also add multiple users to their account.
To do this:
- From the left sidebar menu, select Users.
- From the top of the active window, select Users.
- Under Users and Current Plan, select Create New User to the right of User Overview.
- At the top of the window, select the Bulk Add Users tab.
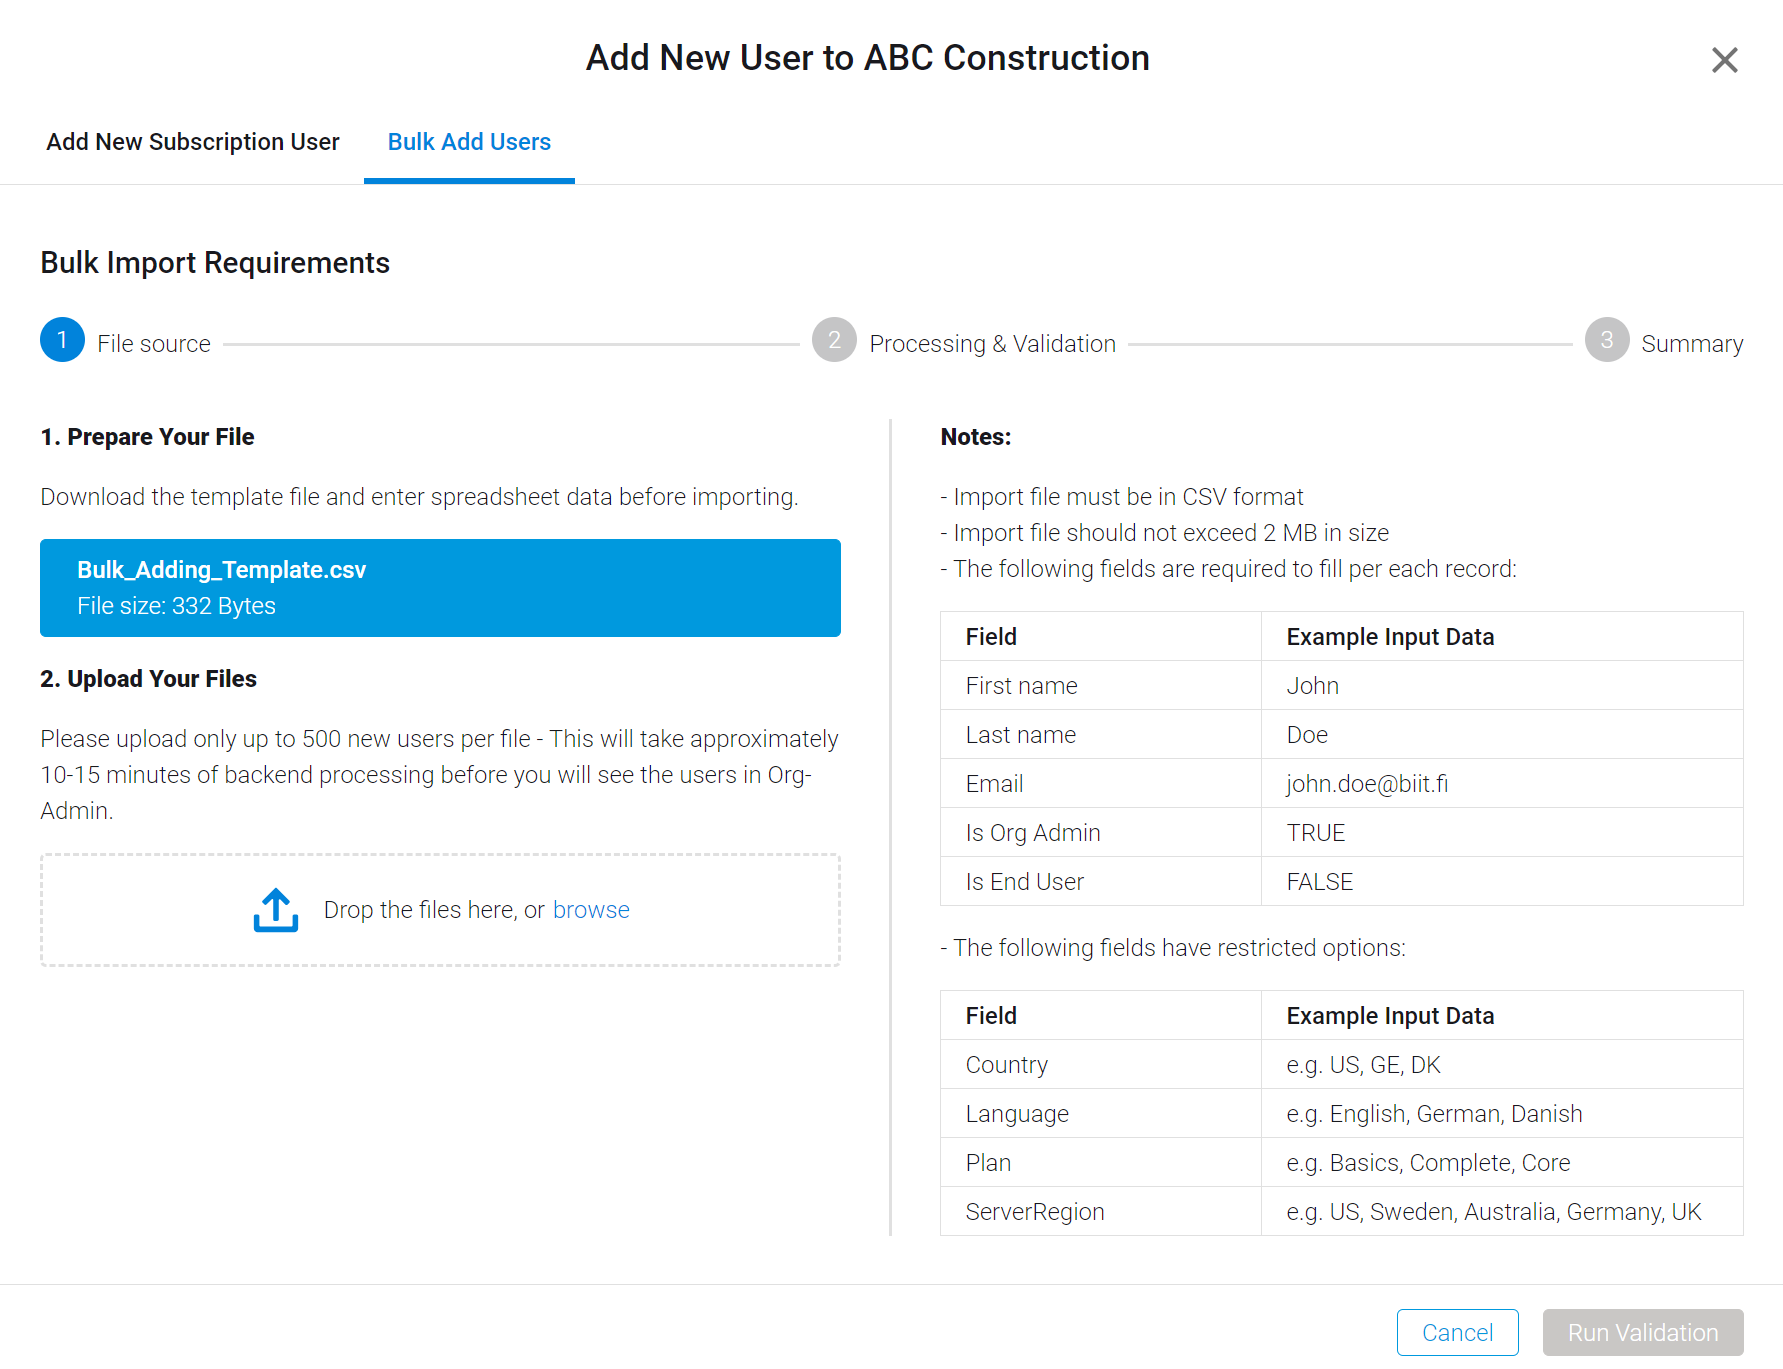
- To add multiple users, you’ll need to import a CSV file. Download the template provided and input all mandatory information in Excel. You may add up to 500 users at a time.
If you’ve added multiple users via the template previously, be sure to download and use the latest version of the template when attempting a subsequent bulk upload. Otherwise, it won’t process.
- Within the template, designate subscription access (i.e., Basics, Core, or Complete) for users in the Plan column.
If you want to add any users as unpaid collaborators, leave the Plan column blank for those users.
- You can also specify the server region for multiple users in the spreadsheet.
Don’t delete any columns from the CSV template (even for non-mandatory fields). Otherwise, your bulk upload will not process.
- After saving your version of the CSV, upload it under Bulk Add Users. To do this, drag and drop the file or Browse for it in the File Explorer.
- Select Run Validation.
- When the CSV file is processed, it will appear at the bottom of the window.
- Select Import All. Imports can take up to 10-15 minutes.
- After reviewing the Summary, select Close.
After bulk uploading users, you may import another CSV list if needed. The new users will appear under User Overview with a Pending status until their accounts have been activated via the email invitations they each receive.
Edit Permissions
If you need to edit permissions after adding a user, follow these steps:
-
- From the left sidebar menu, select Users.
- From the top of the active window, select Users.
- Under User Overview, locate the user account that needs updated permissions.
- Select the
 menu icon next to the account status.
 - Choose Edit user information.

- Under Permissions, select IT Admin, Org Admin, Limited Admin, and/or End User.
The ability to select and assign the IT Admin permission is available only to IT Admins performing this procedure.
- Select Save.
Edit Subscription Access for Multiple Users
If you need to assign or edit subscription access for multiple users at a time, follow these steps:
- From the left sidebar menu, select Account Settings.
- From the top of the active window, select Subscriptions.
- For a subscription plan with available seats, select the
 menu icon at the far right.
 - Select Assign Members to Plan.
- Select the box next to the users you want to add to your subscription.
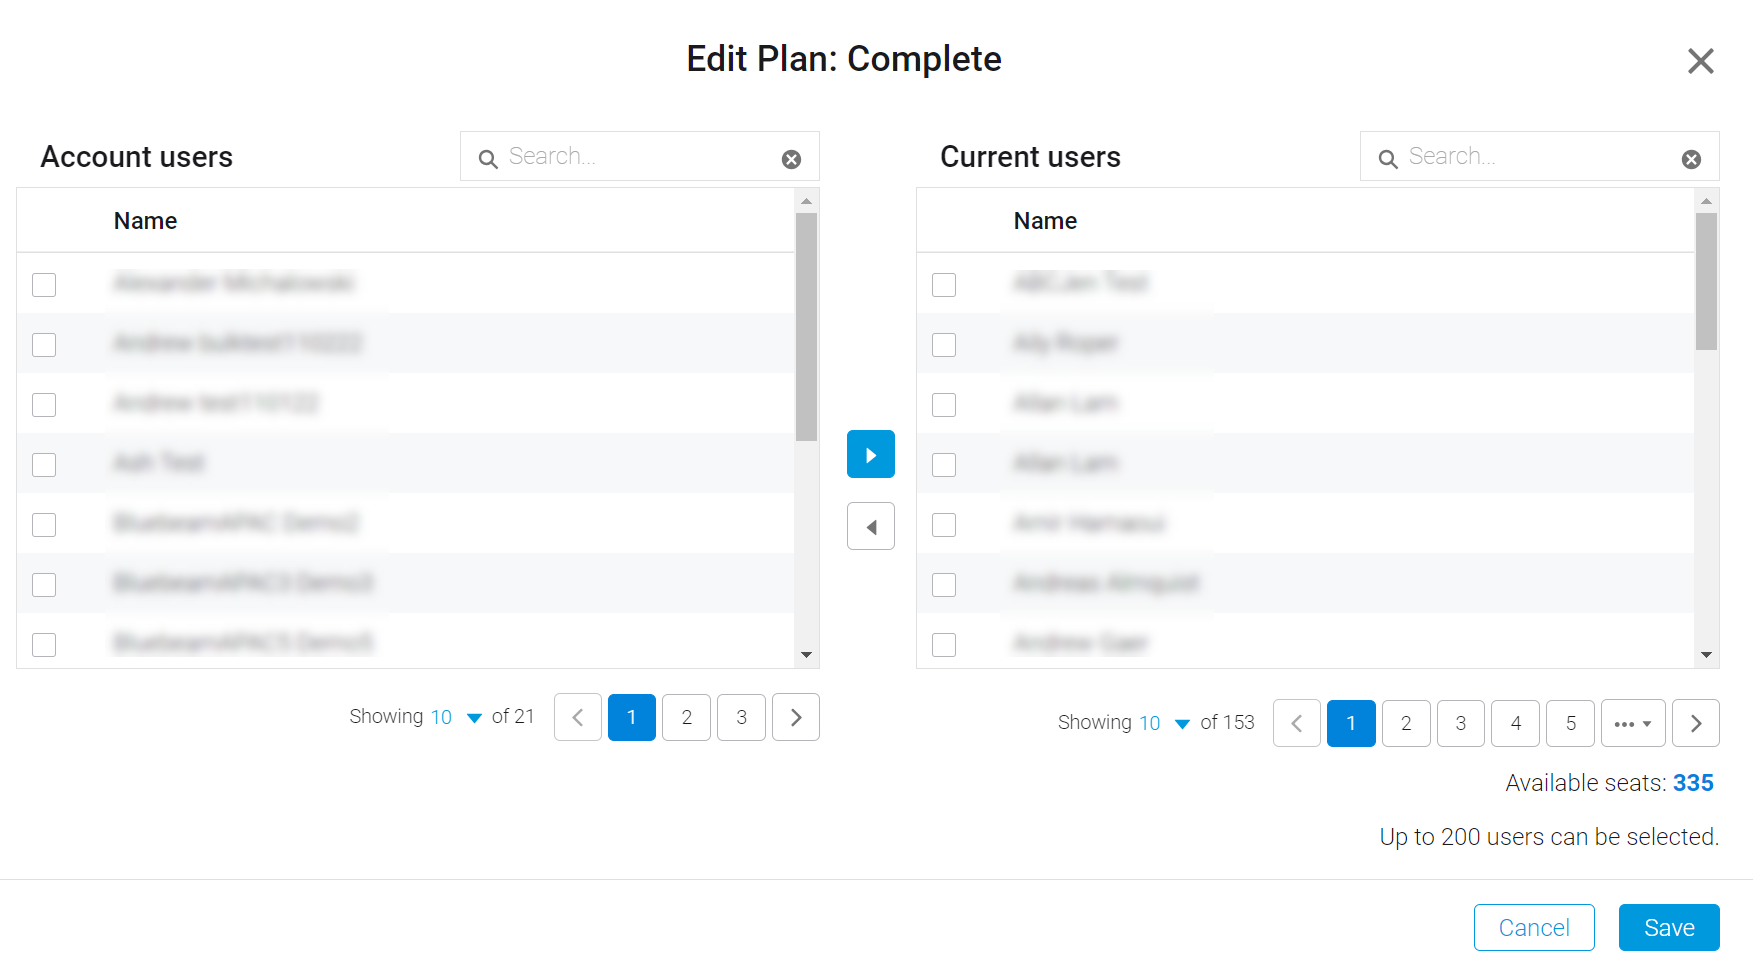
- After you select all applicable users, select the right arrow to move them to Current users.
- Select Save.
Search + Filter Subscription Users
On the Users page, within Users and Current Plan, you can also find particular account users and/or filter them by categories. To do this:
- From the left sidebar menu, select Users.
- From the top of the active window, select Users.
- Under User Overview, select the dropdown menu next to the funnel.

- From the list of search options, select the category in which you’d like to filter subscription users:
-
- First Name
- Last Name
- Email Address
- Server Region
- Plan
- User Type
- Status
-
You can also search by keyword if looking for a particular account user and/or email:
- Type your search term in the field next to the filter dropdown list.
- Select the magnifying glass or press Enter.
Your search results will display under User Overview.
You can also sort columns by values. To do this, select the arrow that appears when you hover your cursor over a column heading:

Export a User List
Under Users and Current Plan, you can use the Search + Filter feature to export a list of users to a Microsoft Excel file based on your search and filter criteria. This feature allows organizations with a large number of users to easily view and sort users by criteria like Status, Plan, User Type, or any other column in the list. To do this:
- From the left sidebar menu, select, Users.
- From the top of the active window, select Users.
- Filter your user list.
- Scroll to the bottom of the User Overview section.
- Select Export as Excel.
The Excel file will appear within a ZIP file in your Downloads folder.
Edit User Information
On the Users and Current Plan page, you can also edit information for existing account users. To do this:
- From the left sidebar menu, select Users.
- From the top of the active window, select Users
- Under User Overview, select the
 menu icon next to a user’s status for additional options.
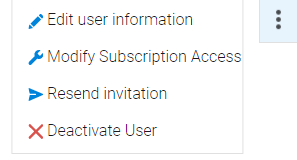
- Select Edit user information.
- In the Modify Subscription End User dialog, you can navigate to Modify Product Tiers, change Permissions, and/or update Contact Details.
- When finished editing user information, select Save.
If you’ve entered the incorrect email address for an invited user, you must deactivate their account and add a new subscription user with the correct email address.
Modify Subscription Access for a Single User
If needed, you can change subscription access for a specific account user from the Users and Current Plan page. To do so:
- From the left sidebar menu, select Users.
- From the top of the active window, select Users.
- Under User Overview section, select the menu icon next to their status and select either option:
- Edit user information > Modify Plans
- Modify Subscription Access
- Select a plan with available seats and select Save Changes.
Resend Invitation
When you add new subscription users, invitations are sent out via email for their accounts to be created and activated. If they don’t create and activate their accounts, and they no longer have access to their invitation email, you can either resend the invitation, or provide them with this link to have their invitation resent to them.
To resent an invitation to a user:
- From the left sidebar menu, select Users.
- From the top of the active window, select Users.
- Under User Overview, select the
 menu icon next to a user’s status and select either option:
- Edit user information > Resend Invitation
- Resend invitation
- Select Registration Invite Email.
- Select Resend.

Registration Invite Email
Select the Registration Invite Email option for users with an Expired status. This will allow them to activate their accounts and confirm/create their Bluebeam IDs (BBIDs) for logging into Revu 21, Studio, and Bluebeam Cloud.
Welcome Email
Select the Welcome Email option for users with an Accepted status who have activated their accounts and confirmed/created their BBIDs. This email will provide them a link to download Revu 21 and confirm the server region they should select when accessing Bluebeam solutions.
Bulk Resend Invitation
When you add new subscription users, invitations are sent out via email for their accounts to be created and activated. If a user doesn’t create and activate their account, and they no longer have access to their invitation email, you can resend the invitation. If multiple users in your organization have a status of Expired or Pending, you can resend an invitation to all those users with one action.
To bulk resend invitations:
- From the left sidebar menu, select Users.
- From the top of the active window, select Users.
- Filter your user list by Status.
- Select Pending and/or Expired as the search criteria.
- At the bottom of the list of results, select Bulk Resend Invitations.
- When prompted to confirm, select Yes.
Deactivate User
As a best practice, we recommend only deactivating users when they’re no longer employed at your company. To do this:
- From the left sidebar menu, select Users.
- From the top of the active window, select Users.
- Under User Overview, select the
 menu icon next to a user’s status.
 - Select Deactivate User.
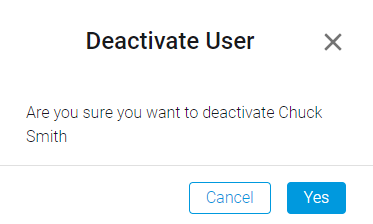
- To confirm, select Yes.
The Subscription Management Portal also allows you to deactivate multiple users with one action by using the search and filter feature to narrow the list of users to those you want to deactivate.
To bulk deactivate users:
- From the left sidebar menu, select Users.
- From the top of the active window, select Users.
- Filter your user list by specified category and keyword(s) to display only the users you want to deactivate.
- At the bottom of the list of results, select Bulk Deactivate Users.
- When prompted to confirm that you want to deactivate all listed users, select Yes.
Deactivated users will remain listed under User Overview. However, their status will change to Deactivated.
Reactivate User
If you need to reactivate an inactive user:
- Select the
 menu icon next to a deactivated user’s status.
 - Select Reactivate User.
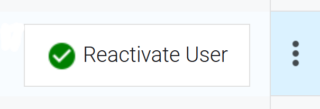
- Choose the permission level for the reactivated user, and select Save.
- Select a plan, and select Save Changes.
Remove User
Our suggested best practice is to deactivate users who are no longer employed by your company. If you no longer want to see deactivated users listed under User Overview on the Users and Current Plan page, you can remove them from the Subscription Management portal.
You should remove only former employees who you do not expect to return, and leave other deactivated users in the User Overview so they’ll be available for reactivation.
To remove deactivated users:
- Under User Overview, select the
 menu icon next to a deactivated user’s status.
 - Select Remove User.

- Select Save.
Reallocate Subscriptions
If your account includes child accounts, you can transfer available subscriptions to them from your main Bluebeam account.
To redistribute available subscriptions to an existing child account:
- Open the main, parent account with available subscriptions. From your account dashboard, you’ll see your child account(s), listed in the left sidebar.
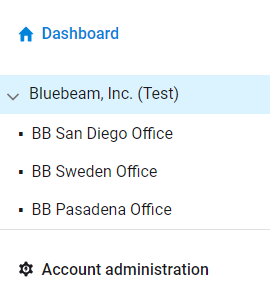
- Select Reallocate Subscriptions. You can also go to Account Settings and select the Subscriptions tab and then select Reallocate Subscriptions.
- Select the child account that will receive subscriptions.
- Select the order number.
- Under Product, choose the subscription plan (Basics, Core, or Complete) with available seats to transfer.
- Enter the number of subscriptions to reallocate. The number must be less than or equal to the number of remaining seats.

- Select Redistribute.
To view subscriptions distributed among your child account(s):
- Go to Account Settings > Subscriptions tab.
- Under Subscription Management, select the
 menu icon.
 - Select Show Split Sub Distributions.
To return subscriptions to a parent account:
- Select the child account from the Dashboard.
- Go to Account administration > Subscription Management.
- Select the
 menu icon next to Plan.
 - Select Return subscriptions.
- Enter the number of subscriptions you want to transfer back to the parent account.
- Select Return subscriptions.
Licensing & Registration
Revu 21
Licensing & Registration
Getting Started
Subscription Management

