This article applies to:
- Revu 21
- Revu 20
- Revu 2019
- Revu 2018
If your drawings accumulate a lot of markups and information from various stakeholders, then organizing your PDFs with layers will allow you to toggle among views based on information type, discipline, workflow, etc. In Revu, you can add markups placed on a drawing to a layer, but the most efficient way to organize your drawing markups is to add the standardized tool sets your team uses to their own layers. This way, you won’t need to set up unique layers for every sheet. In this article, we cover how to boost project efficiency by adding tools from the  Tool Chest to layers. For an overview of the
  Layers panel and how to create a new layer, visit this article.
Choose your standard tool sets
Before adding tools to PDF layers, first determine or create the tool sets that you or your team will use across various drawing sheets. In the  Tool Chest panel, there are preset tool sets you can immediately start using.
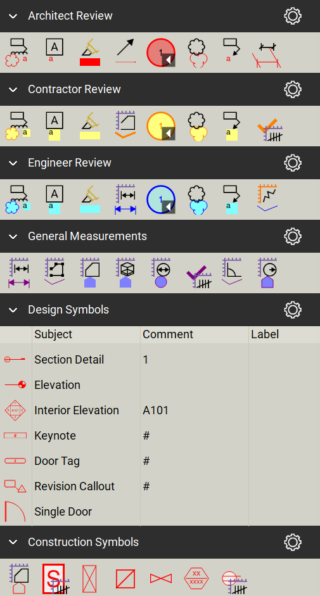
Additionally, you can create your own custom markups and add them to the  Tool Chest for future use. To learn more, click here.
Profiles and tool sets
In Revu, profiles also determine the preset tool sets available in the Tool Chest.
To switch from the default Revu profile to another profile:
- Select Revu >
 Profiles.
 - Choose a preset profile from the dropdown.
If you’d like to learn how to create a custom profile in Revu, check out this video. You can also find more downloadable industry standard tool sets available on our Revu Custom Libraries page.
Add tool sets to layers
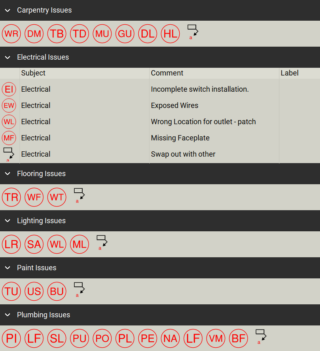
Once you pinpoint specific markup tools that are used across drawing sheets, you’re ready to assign them to their own layers. As an example, we’ll use the Field Issues profile and create layers for different types of issues commonly found during a punch walkthrough.
- In Revu, open the Tool Chest panel. For this example, we’ll start by adding the markup tools in the Plumbing Issues tool set to their own layer.
- Select the markup tool you’d like to add to a layer and right-click it.
- Select Layer.
- Enter a name for the layer. We recommend naming the layer after the tool set.
- Select OK.
To activate the layer in the Layers panel, place the markup from the Tool Chest on your drawing. Markups that were applied previously won’t be included in a new layer. You must replace them on the drawing if you want them included in the layer view.
- Repeat the steps above for the rest of the markup tools in the tool set. Be sure to enter the same tool set name when adding markups from the same tool set to a layer. This will group them together.
Repeat this process for the tool sets you’d like to see as PDF layers. This will allow you to toggle your view of markup tools according to discipline (plumbing issues, electrical issues, etc.) and even workflow (punch, quantity takeoffs, design review, etc.).
Toggle different layer views
To switch views among the layers you’ve created for your tool sets, follow the steps below.
- Open the Layers panel.
- Select the check box next to the layer name to toggle the view. When the check box displays an eye icon, the layer is visible.
Revu 21
Revu 20
Revu 2019
Revu 2018
How-To
Tips + Tricks