- Revu 2019
- Revu 2018
- Revu 2017 & Below
Before the official EOL date for Revu 2019 & below (June 28, 2023), you should back up your Studio Sessions and/or Projects to ensure you don’t lose any important project data.
Finish and back up your Studio Sessions
Before downloading your Session files, you must first finish the Session. Only Hosts and users with Full Control permissions can finish a Session. To do this:
- Join the
 Session and ensure that no one else is currently active.
 -
From the <Session Name & ID menu>, select
 Finish Session. The Finish Session dialog box appears.
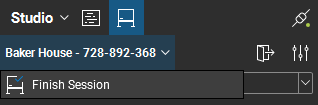
- To include markups made by specific attendees, select their names in the Include Markups list.
 Any markups included on a Session PDF can’t be altered once reuploaded to a new Session.
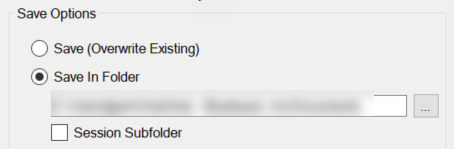
 - Select Save In Folder. This option saves the Session documents in a specified folder, ensuring the original files aren’t overwritten. To change the default folder location, select the browse icon and navigate to a new save location. You can also select Session Subfolder to create a subfolder with the Session name in the specified location.
- Select Close files after finishing to automatically close any Session files that are currently open in Revu.
- If you’d like to generate a report for the Session, select Generate Report. To learn more about Session Report types and settings, see Creating a Session Report.
- Select OK to finish the Session.
The Session and its files are removed from the Studio server when the Session is finished.
Back up your Studio Projects
To back up your Studio Project files, you can download them to a local or network drive.
- In
 Studio, open the
  Project.
 - Right-click the root Project folder, a subfolder within the Project, or an individual file and select Download Copy. When downloading the root Project folder or a subfolder, the Please select a download folder dialog box appears. If you’re downloading a single file, the Save As dialog box appears.
- Navigate to the desired save location and choose Select Folder (when downloading a folder) or Save (when downloading a single file).
When downloading a Project folder, all of its contents (including subfolders) and structure are downloaded. When downloading the root Project folder, this means all Project folders and documents are downloaded.If any folder permissions are set to Hidden, the folder(s) won’t download even if they are contained within the folder or Project you are downloading. For more information, visit this article.
If you have any additional questions about the discontinuation of Revu 2019 & below, please see our EOL FAQ.
How-To
Revu 2017 & Below
Revu 2018
Revu 2019
EOL
Legacy
Studio