Customizing Markups
Many aspects of a markup can be modified in Revu by manipulating its properties, which are shown in a variety of places, including various toolbars and the Properties panel.
There are two types of toolbars to consider when it comes to customizing markups: the Properties Toolbar and the other, customizable toolbars. Both of these options can give you easy access to tools that change the markup's fill, font and font style, alignment, line style and width. Not all toolbars are shown by default in every Profile. To show a hidden toolbar, go to Tools > Toolbars and select it.
The toolbars most commonly used to customize markups are:
Properties Toolbar: This toolbar is dynamic in nature; it shows the most commonly used properties for a selected markup.

Appearance: Changes the appearance of selected markups.

Font: Changes the appearance of text within a selected markup.

Line Style Changes the line attributes of selected markups.

Alignment: Controls the alignment of markups in the file relative to other selected markups.

Order: Arranges the relative position of overlapping markups. These tools can be used on one or more markups.

After changing the properties of a markup, you can save it to your Tool Chest by right-clicking it, going to Add to Tool Chest and choosing a tool chest to save it in. You can also set it as the default for the markup type by right-clicking and selecting Set as Default.

The Properties panel offers multiple customization options based on the selected markup. If the Properties panel is hidden, do one of the following:
- Go to Tools > Toolbars > Properties.
- Right-click on a markup, then click Properties.
- Use the keyboard shortcut ALT+P.
There are four sections in the Properties panel:
Lists the markup author name, subject (markup type), date and time the markup was added or modified, comments and the number of replies other reviewers have made to the comments.
Controls the overall look of the markup including color, line width and style, opacity and font. Each markup type has different options for configuring its appearance.
Shows the markup’s X and Y coordinates, width, height and rotation. Users can adjust the markup location and size to the ten-thousandth decimal point and rotate the markup up to 360 degrees.
Presents two options for saving the selected properties of the markup for future use. Click Add to Tool Chest and select a tool set. Set as Default saves the Appearance settings and uses them when you create another markup of this type.
Revu provides a couple ways to create curved lines.
Drawing a Curved Polyline
The Arc tool works great when you need to draw a single curved line, but if you need to draw a more complex, curved shape, try using the Polyline tool instead. Go to Tools > Markup > Polyline and, while drawing your shape, hold down the CTRL button on the keyboard to create nearly any curved shape.
Curving a corner
If you have a shape with an angled corner that you would like to change to a curve, you can convert it fairly easily:
-
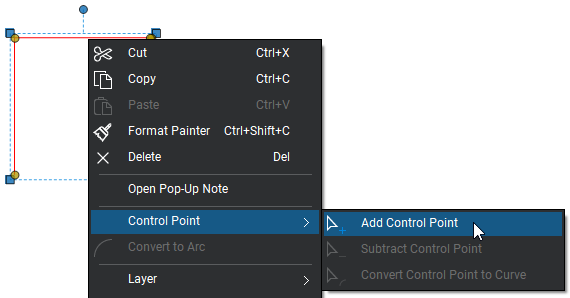
Right-click on one of the lines that form the corner you want to convert to a curve and go to Control Point > Add Control Point.
-
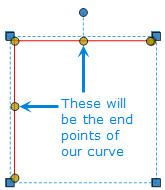
Add a second control point on the other line.
-
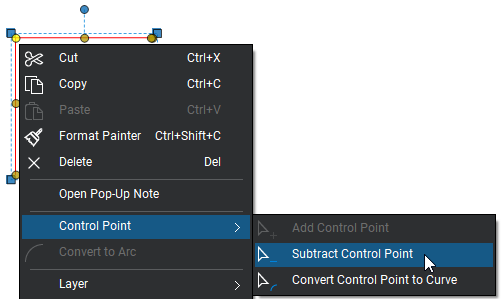
Right-click on the corner's control point and go to Control Point > Subtract Control Point.
-
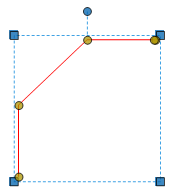
Right-click the new line formed between the two control points and select Convert to Arc.
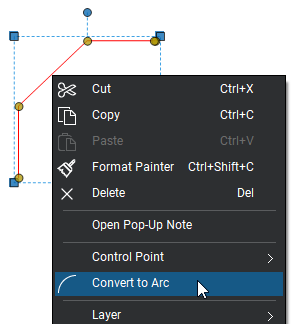
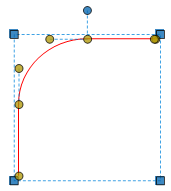
The line is converted to an arc. At this point, you can manipulate the arc with the new control points and bend it into the exact shape you want.
If you would like to create a markup using an image from a PDF, you can do it with the Snapshot tool.
-
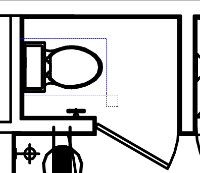
Go to Edit > Snapshot and drag a box around the shape you want to use as a markup.
-
Right-click anywhere on your PDF and select Paste. A new copy of the selected shape appears.

-
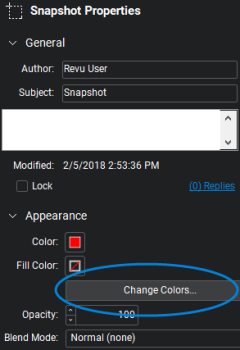
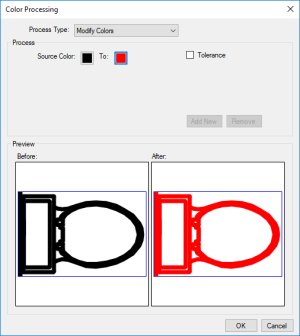
Right-click the new shape, select Properties and make any desired changes to the markup's properties. The example below shows how the markup can change from black to red using the Color Processing dialog box that opens when the Change Colors button is clicked.
-
Now you can place the new markup anywhere you need on the PDF.
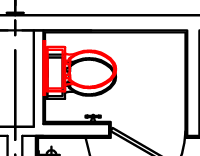
If you'd like to save the new markup for later use right-click it, go to Add to Tool Chest and then choose a tool chest to save it in.
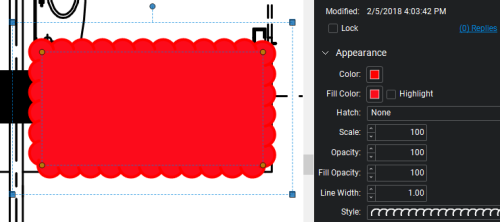
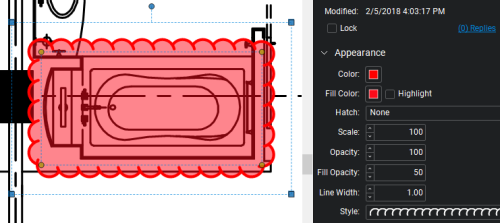
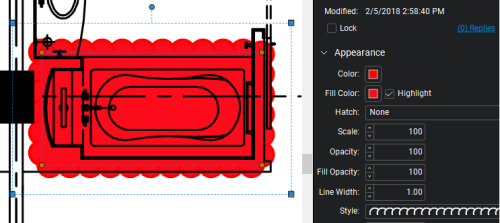
When you place a cloud or other shape markup on a document that has a fill color, it can obscure whatever is behind it. You can always alter the Fill Opacity of the shape, but unless you lower it quite a bit, it can still obscure details. Another option is to use the Highlight property. See the examples below for a quick comparison.
|
Fill Opacity = 100% Highlight unchecked |
|
|
Fill Opacity = 50% Highlight unchecked |
|
|
Fill Opacity = 100% Highlight checked |
|